Categories
- Design Tips (1)
- Design Tutorials (1)
- Uncategorized (349)
Whenever we take on a new built-in project we take the time to study the process. Always dialing in our approach, and as a result, the final product. No build is the same as the next; from design to size and functionality to finish we step it up a notch each and every time. And by no way are we the “experts”. In all honesty we are amateurs in comparison to some of our peers who do this as their bread and butter. But, we do create some incredible builds that transform our client’s homes. So, we thought it would be great to write about how to prep and spray built-ins. So when you decide to build something custom or are looking to update an existing build you’re armed with the right stuff!
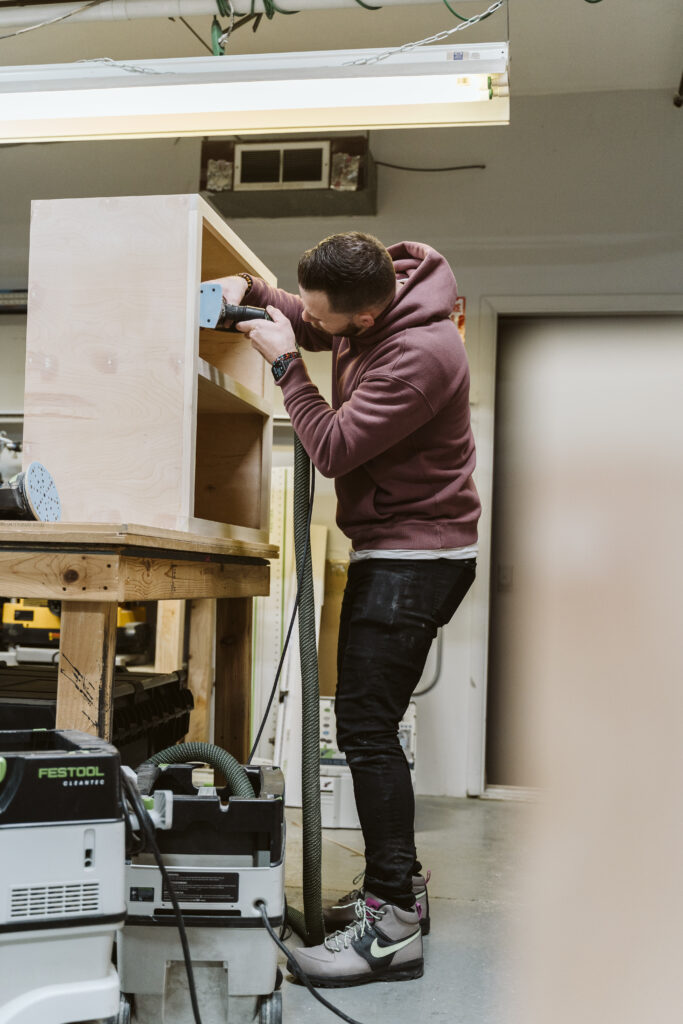
Like with most things in life the most important part of the process is the preparation. You want to make sure that your surface is completely smooth and free from any screw or nail holes. To ensure we have the proper surface to spray we start with a solid pass with a palm sander equipped with 150 Grit sandpaper, and a final pass with a 220 grit sandpaper. You want to make sure to move the sander lightly and evenly to avoid any ripples or indentation.
This is the most essential step in the process. You can have the smoothest, most perfect surface but without the right primer and paint your time and effort will be a waste. We’ve tried it all and have found out the hard way what really works the best. When it comes to primer we now use Advanced Primer from Benjamin Moore exclusively for all of our built-in cabinets, doors and fronts. It lays down beautifully, often in a single coat, and provides the absolute best surface for paint. When we prime our doors and drawer fronts we typically do 2 coats of primer as those components will see the most use and contact with hands that carry natural oils.
For paint we’ve found another product from Benjamin Moore – Advanced Paint. When spraying a satin finish it lays down like glass – super bright and reflective, giving us a clear indication of any irregularities with the surface (which is rare). It dries quickly but we recommend 24 hours between coats to ensure it is dry to touch and able to be moved from a drying rack to the paint booth. We also use Benjamin Moore Advanced paint for all of our moldings which pairs perfectly with Sherwin Williams Emerald. See, even competitors can play nice in the sandbox…like I said, we’ve found out the hard way (otherwise known as trial and error).
Since we touched on the best paint we have to talk about the best sprayer. We have a variety of sprayers for any project including 3 Graco Handheld Airless Sprayers, a Graco 390 PC Airless Sprayer and a Graco Finish Pro HLVP Sprayer. Now, most every professional painter will recommend an HVLP setup but we’ve had a hard time getting ours dialed in. Perhaps it’s due to lack of time allowance required to really get to know the sprayer, but when we’ve used it the result is terrible. Our team is proficient and comfortable with the 390 PC for all of our built-ins, while we always have the Graco Handheld with us to do all the finish details on a job such as last minute filler pieces, or air vent covers to match the build.
Even more important than the sprayer itself is the gun and the tip. For the 390 PC we have a Contractor Professional gun and almost always use a detail tip. We prefer the Graco 310 tip, which has a fine finish low pressure allowing us to hit all the crevices without heavy areas.
Whenever you paint you want to move from side to side and always pull the trigger quickly in the air and fan onto the surface. We like to start inside any cubbies from corner to corner then fill in the sides, top and bottom. Our next pass will be on the outer sides, top and bottom (if needed) and finally the face frame. Once dry you want to lightly grace the surface with the palm of your hand to get a feel for the surface. This is when we typically do a light pass on rough areas with the palm sander fixed with 220 grit sand paper. Again, light smooth passes.
Repeat to finish with a solid 2 – 3 coats of paint and it is a wrap! Note that it takes approximately 28 days for paint to fully cure, so be sure to install with caution outside of that 28 day window. We do it all the time so don’t worry…it works.
I hope this helps provide some insight into how we prepare and paint built-ins. We have alot more content coming your way on the subject.
Be Safe. Be Well.
-Michael
Feel free to contact us For home design inquiries
Clark + Aldine is fully licensed and insured.
© 2024 Clark + Aldine | Interior Design Websites by Formcode | Site Map · Privacy Policy · Terms and Conditions