Categories
- Design Tips (1)
- Design Tutorials (1)
- Uncategorized (349)
We made it!!! Week 8 of the One Room Challenge and our final reveal of our basement remodel! This space has been in my dreams since the day we moved into our house. With this project now under our belt we have officially touched every single space in our home since we bought it in 2015. I am thrilled to be bringing with you all on this journey from our first renovation, our master bedroom, to our kitchen and now let’s get into the NEWEST, our basement. It’s one thing to design and build a functional purposeful space for clients but to do it in our own home is something so special. We have jam packed this space with all the functional and purposeful design we could think of!
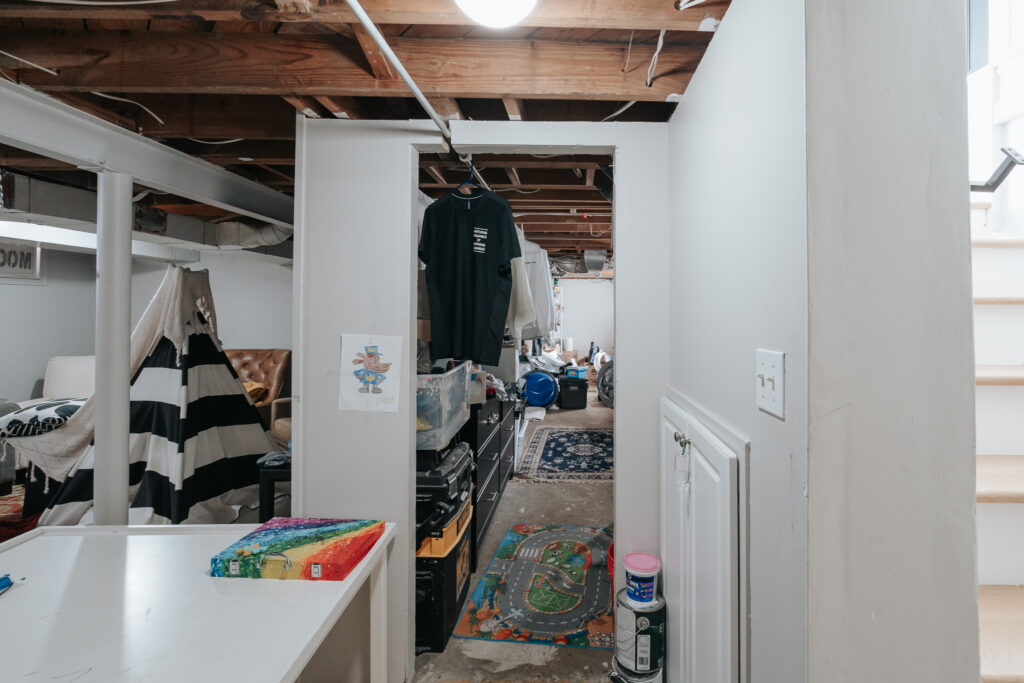
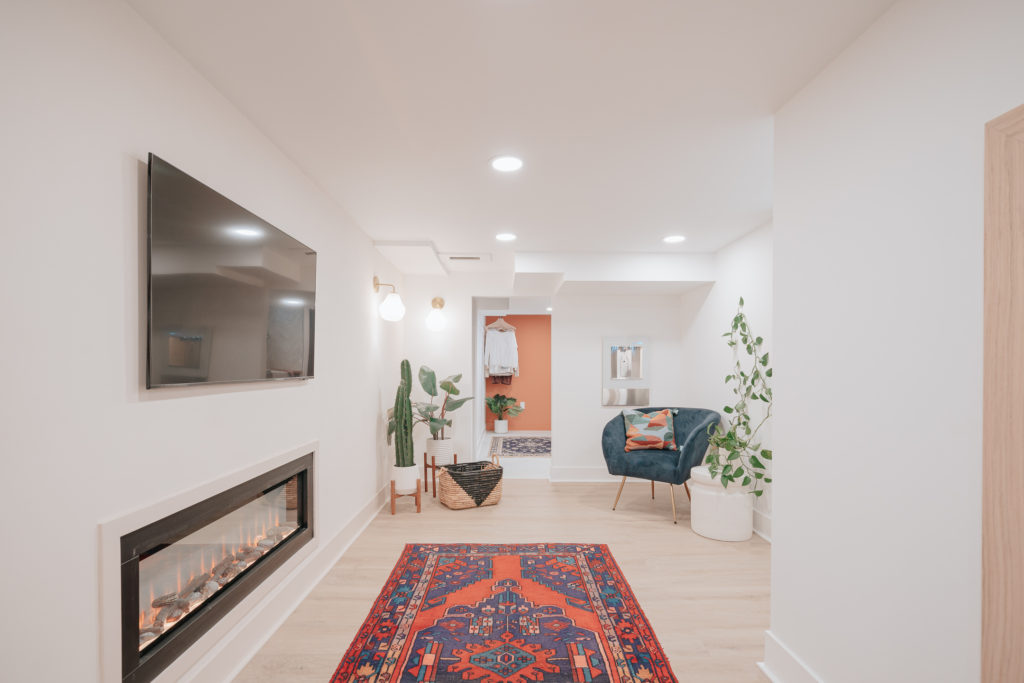
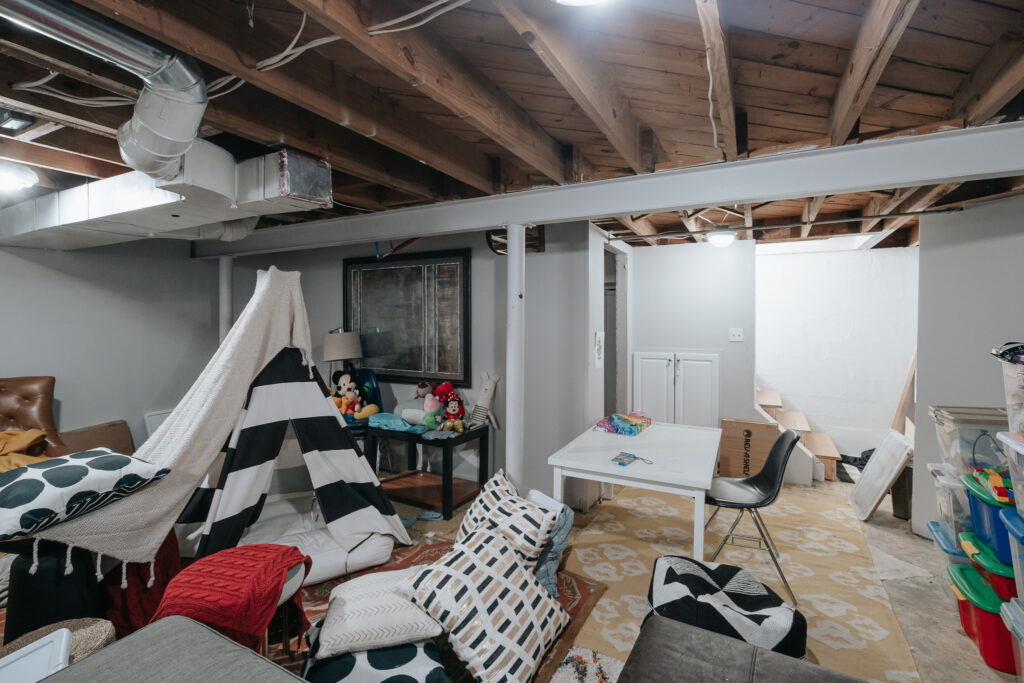
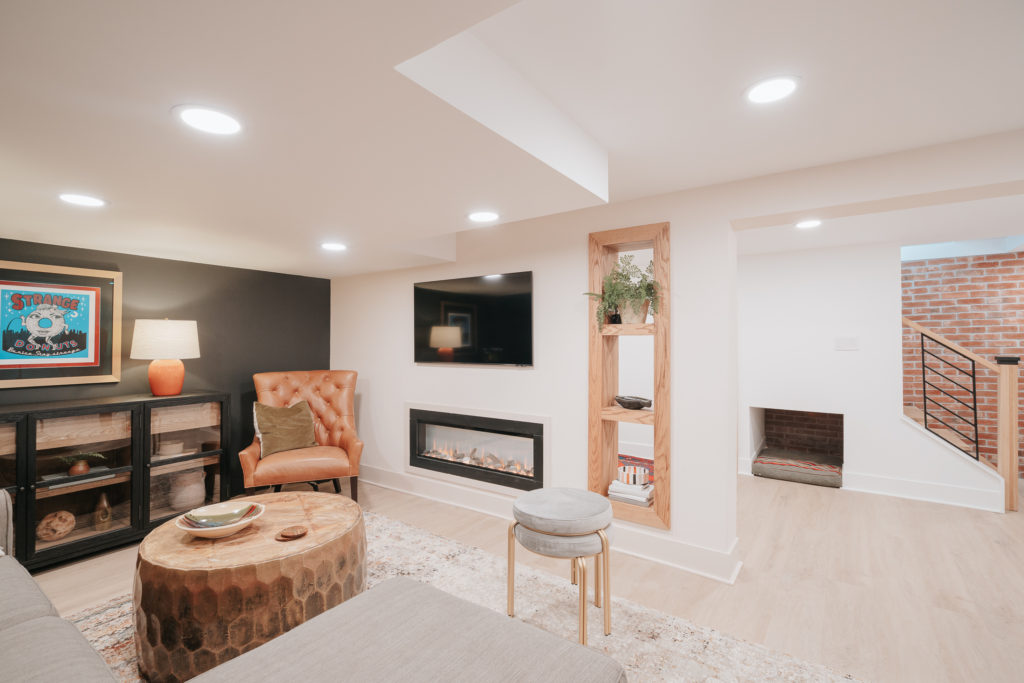
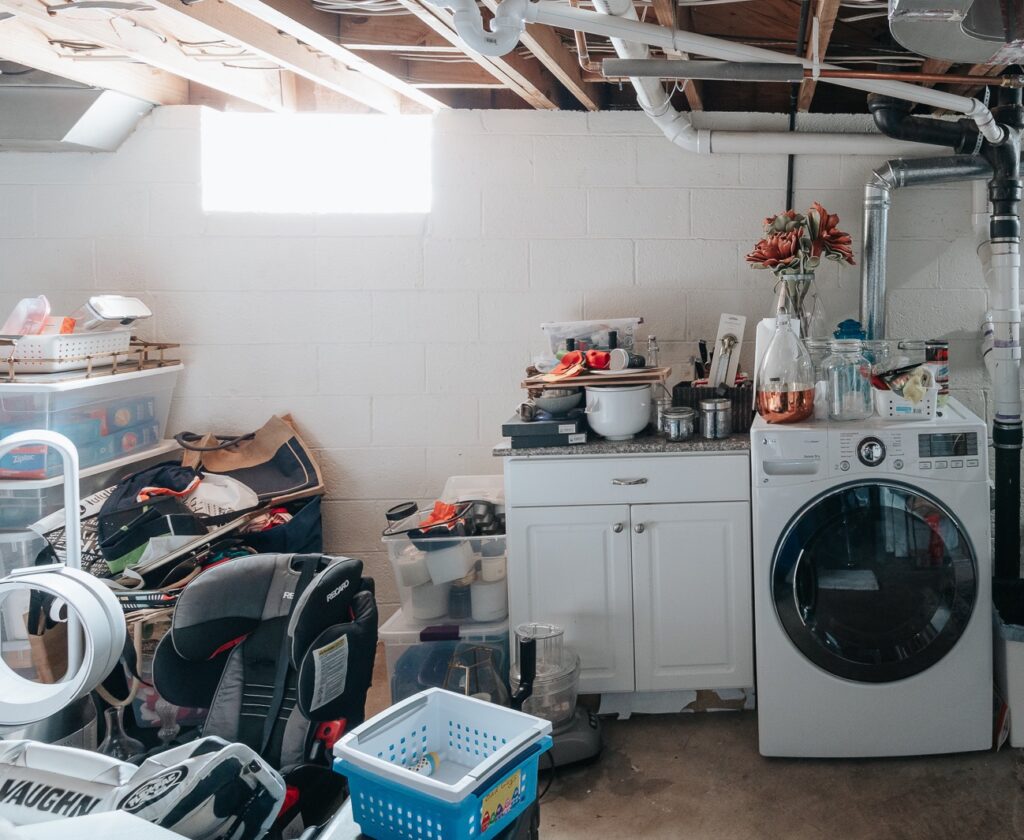
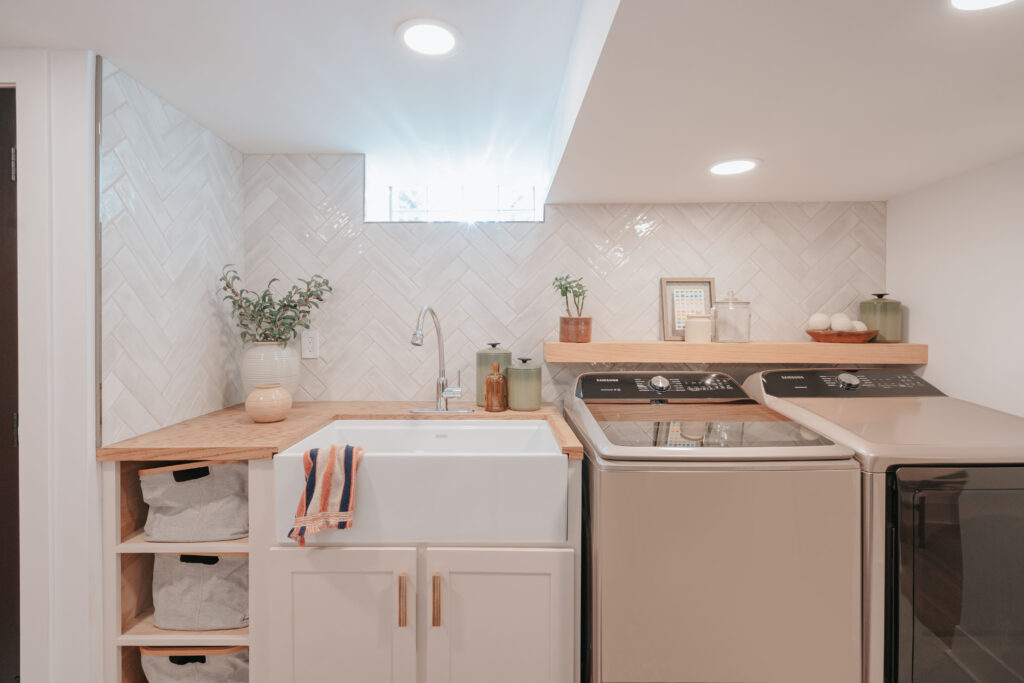
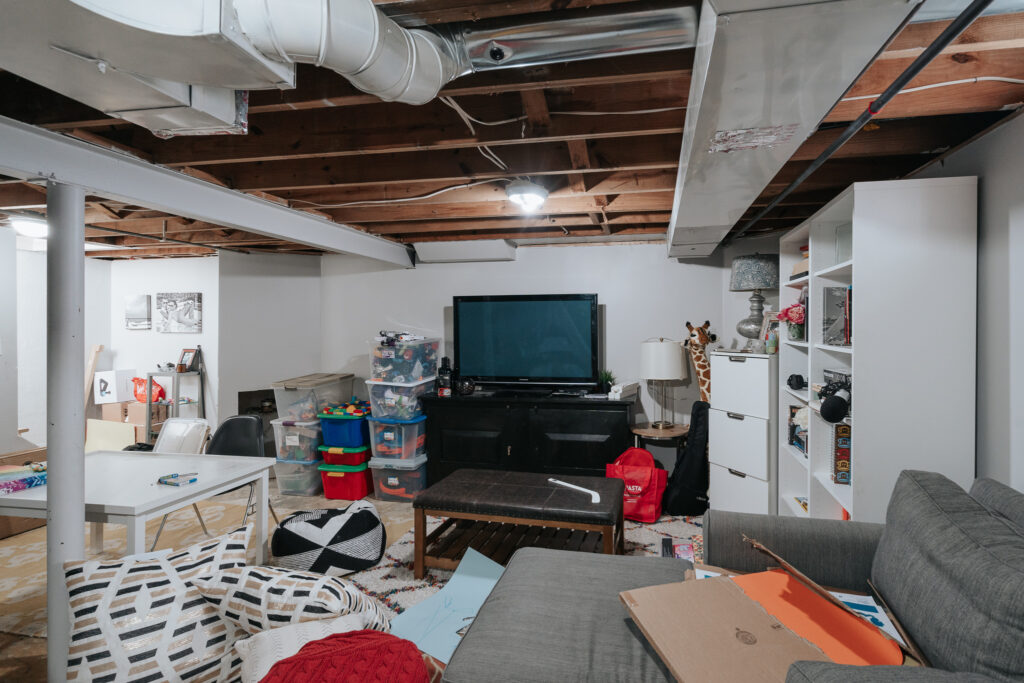
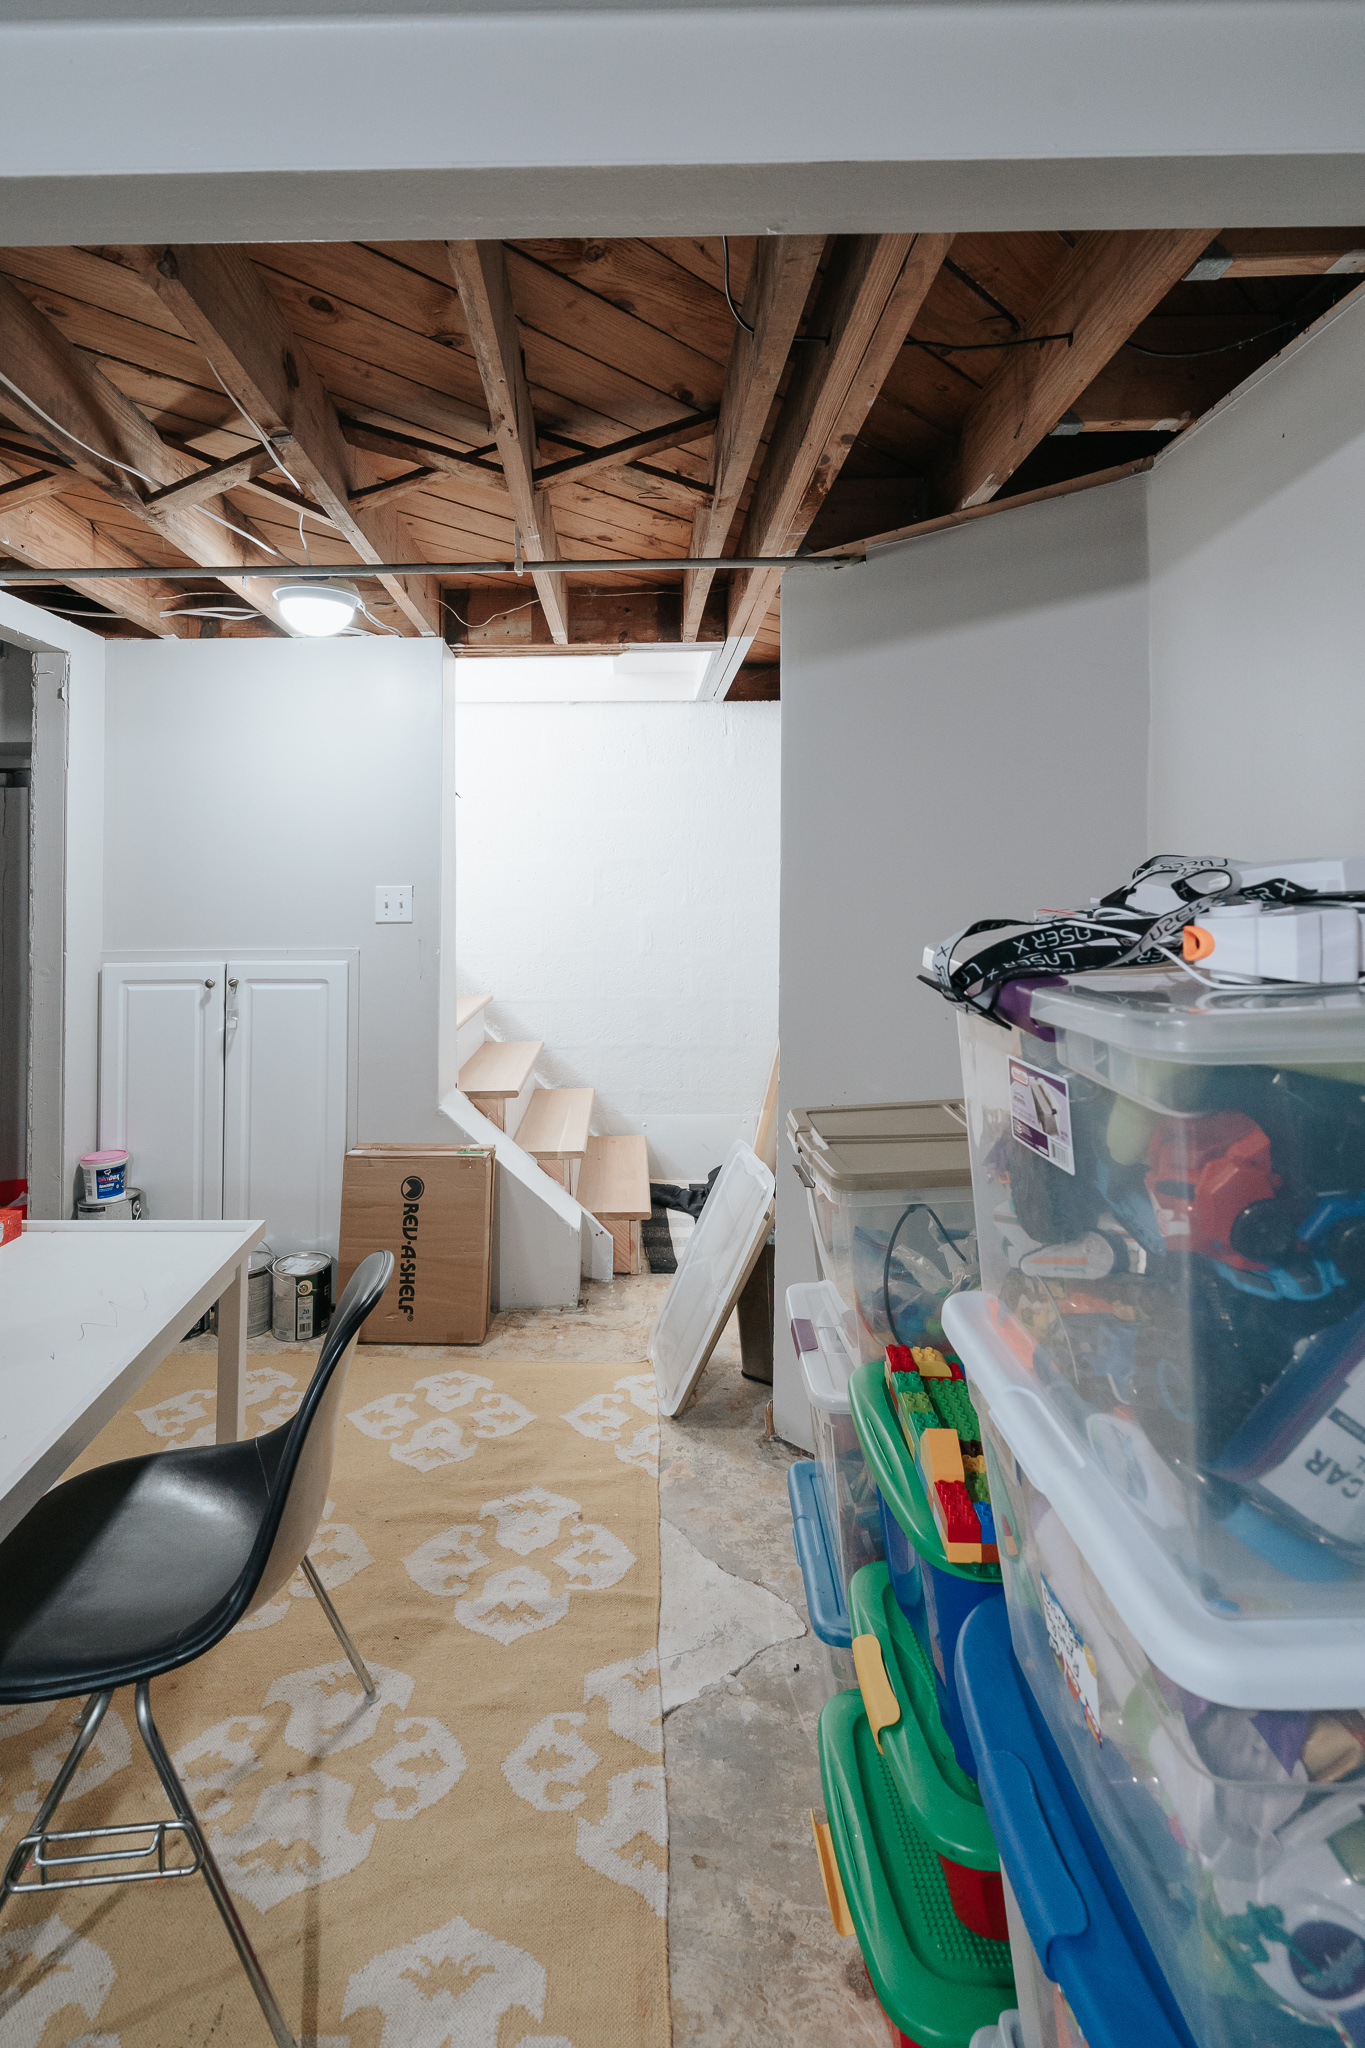
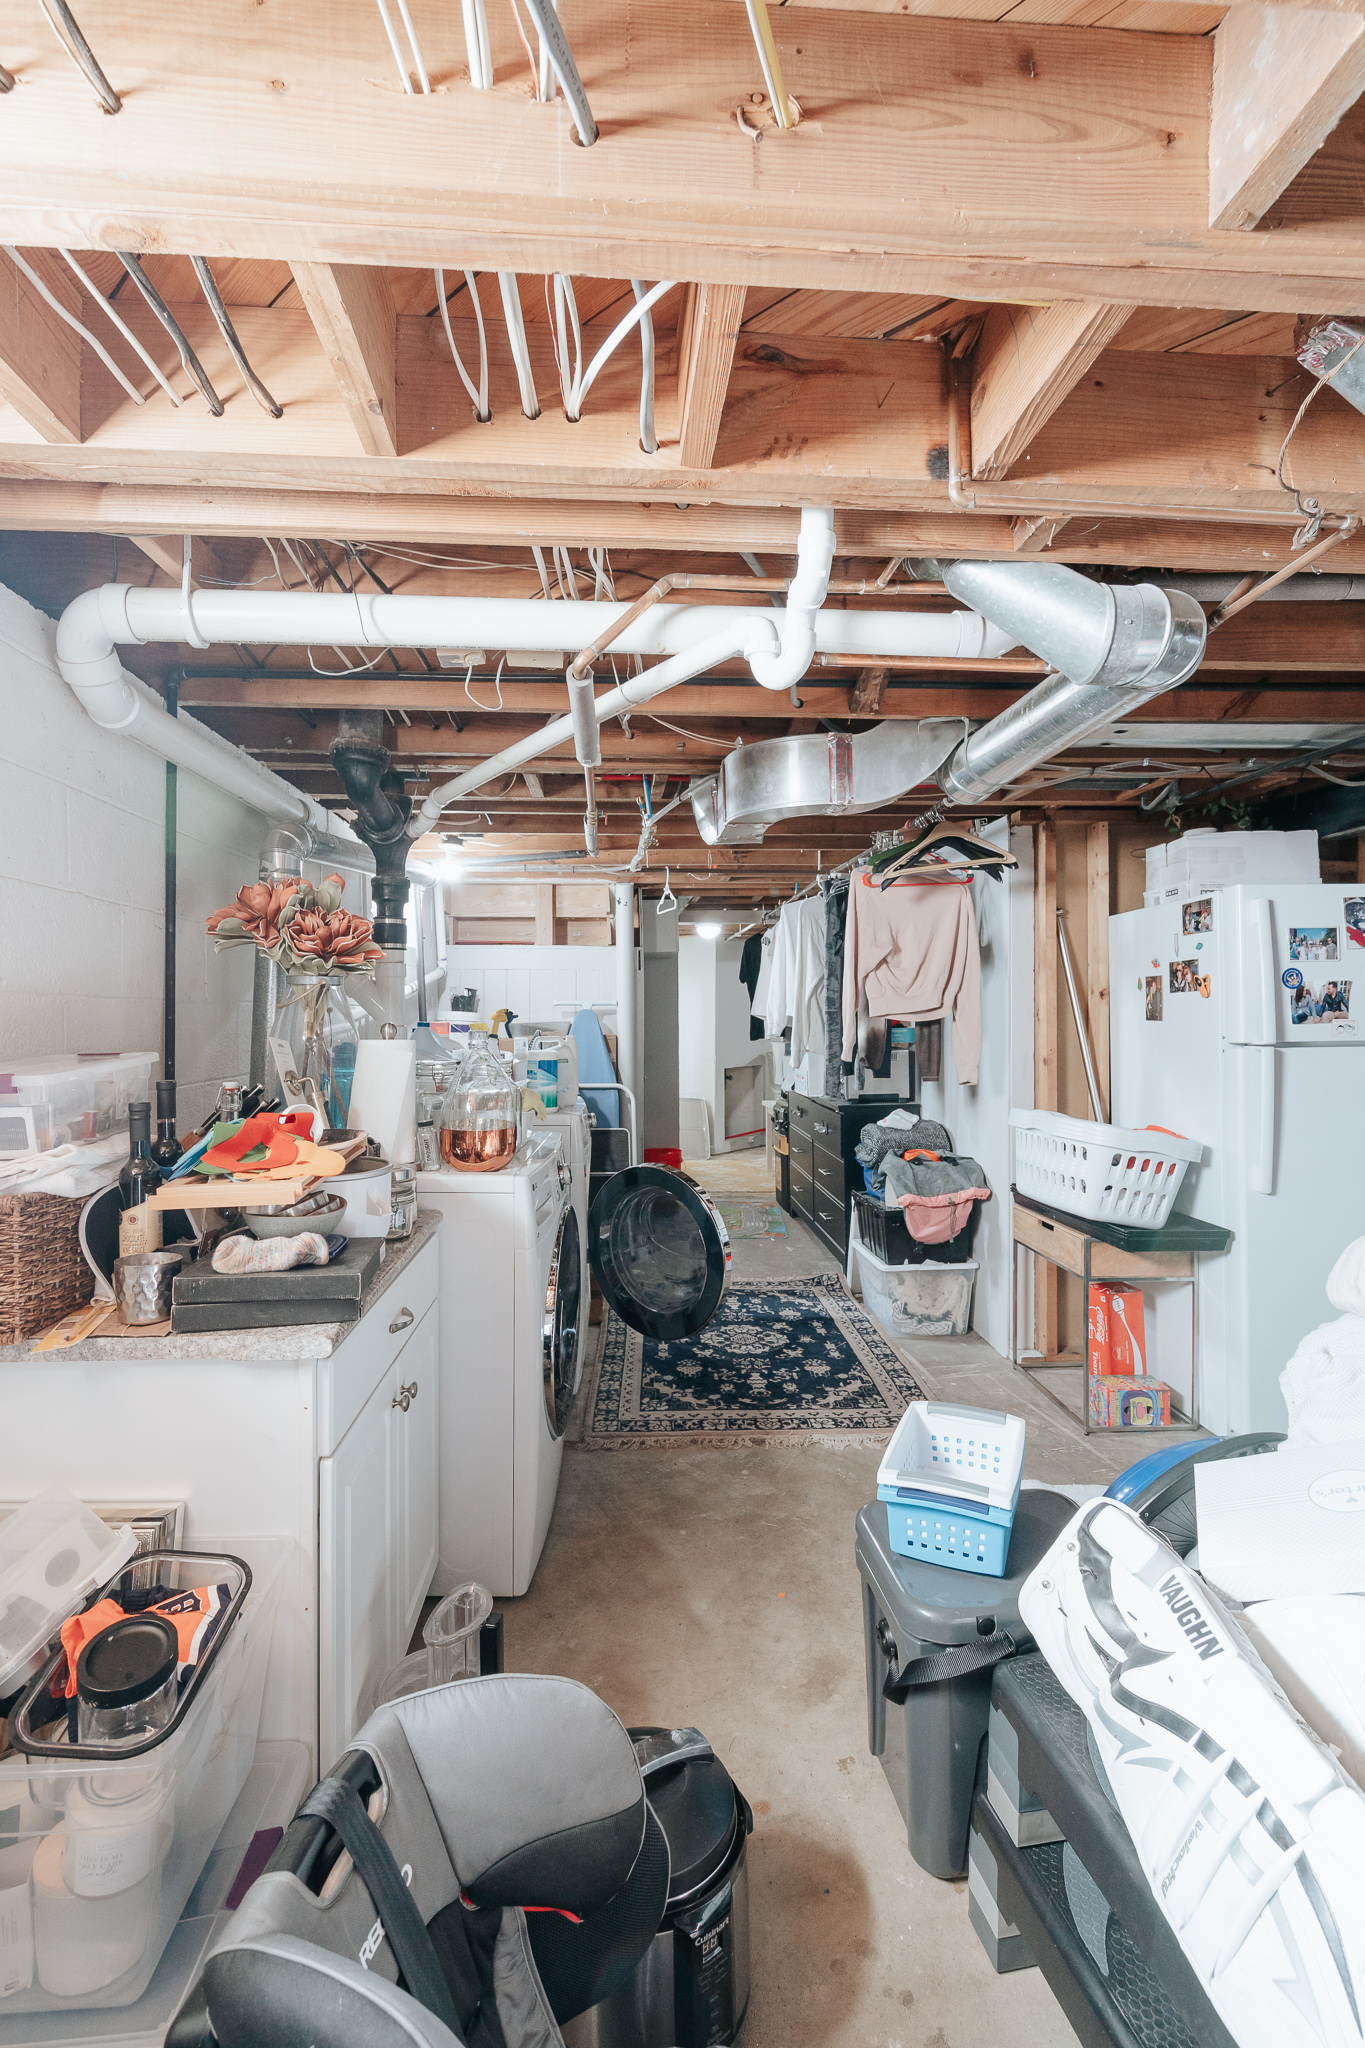
So without further ado let’s get into it! Here are some unbelievable before and after images.
Now let’s get into all the details…there’s a lot. We really wanted to create a space that served our family in the best way possible. And hopefully I don’t leave any of the details out.
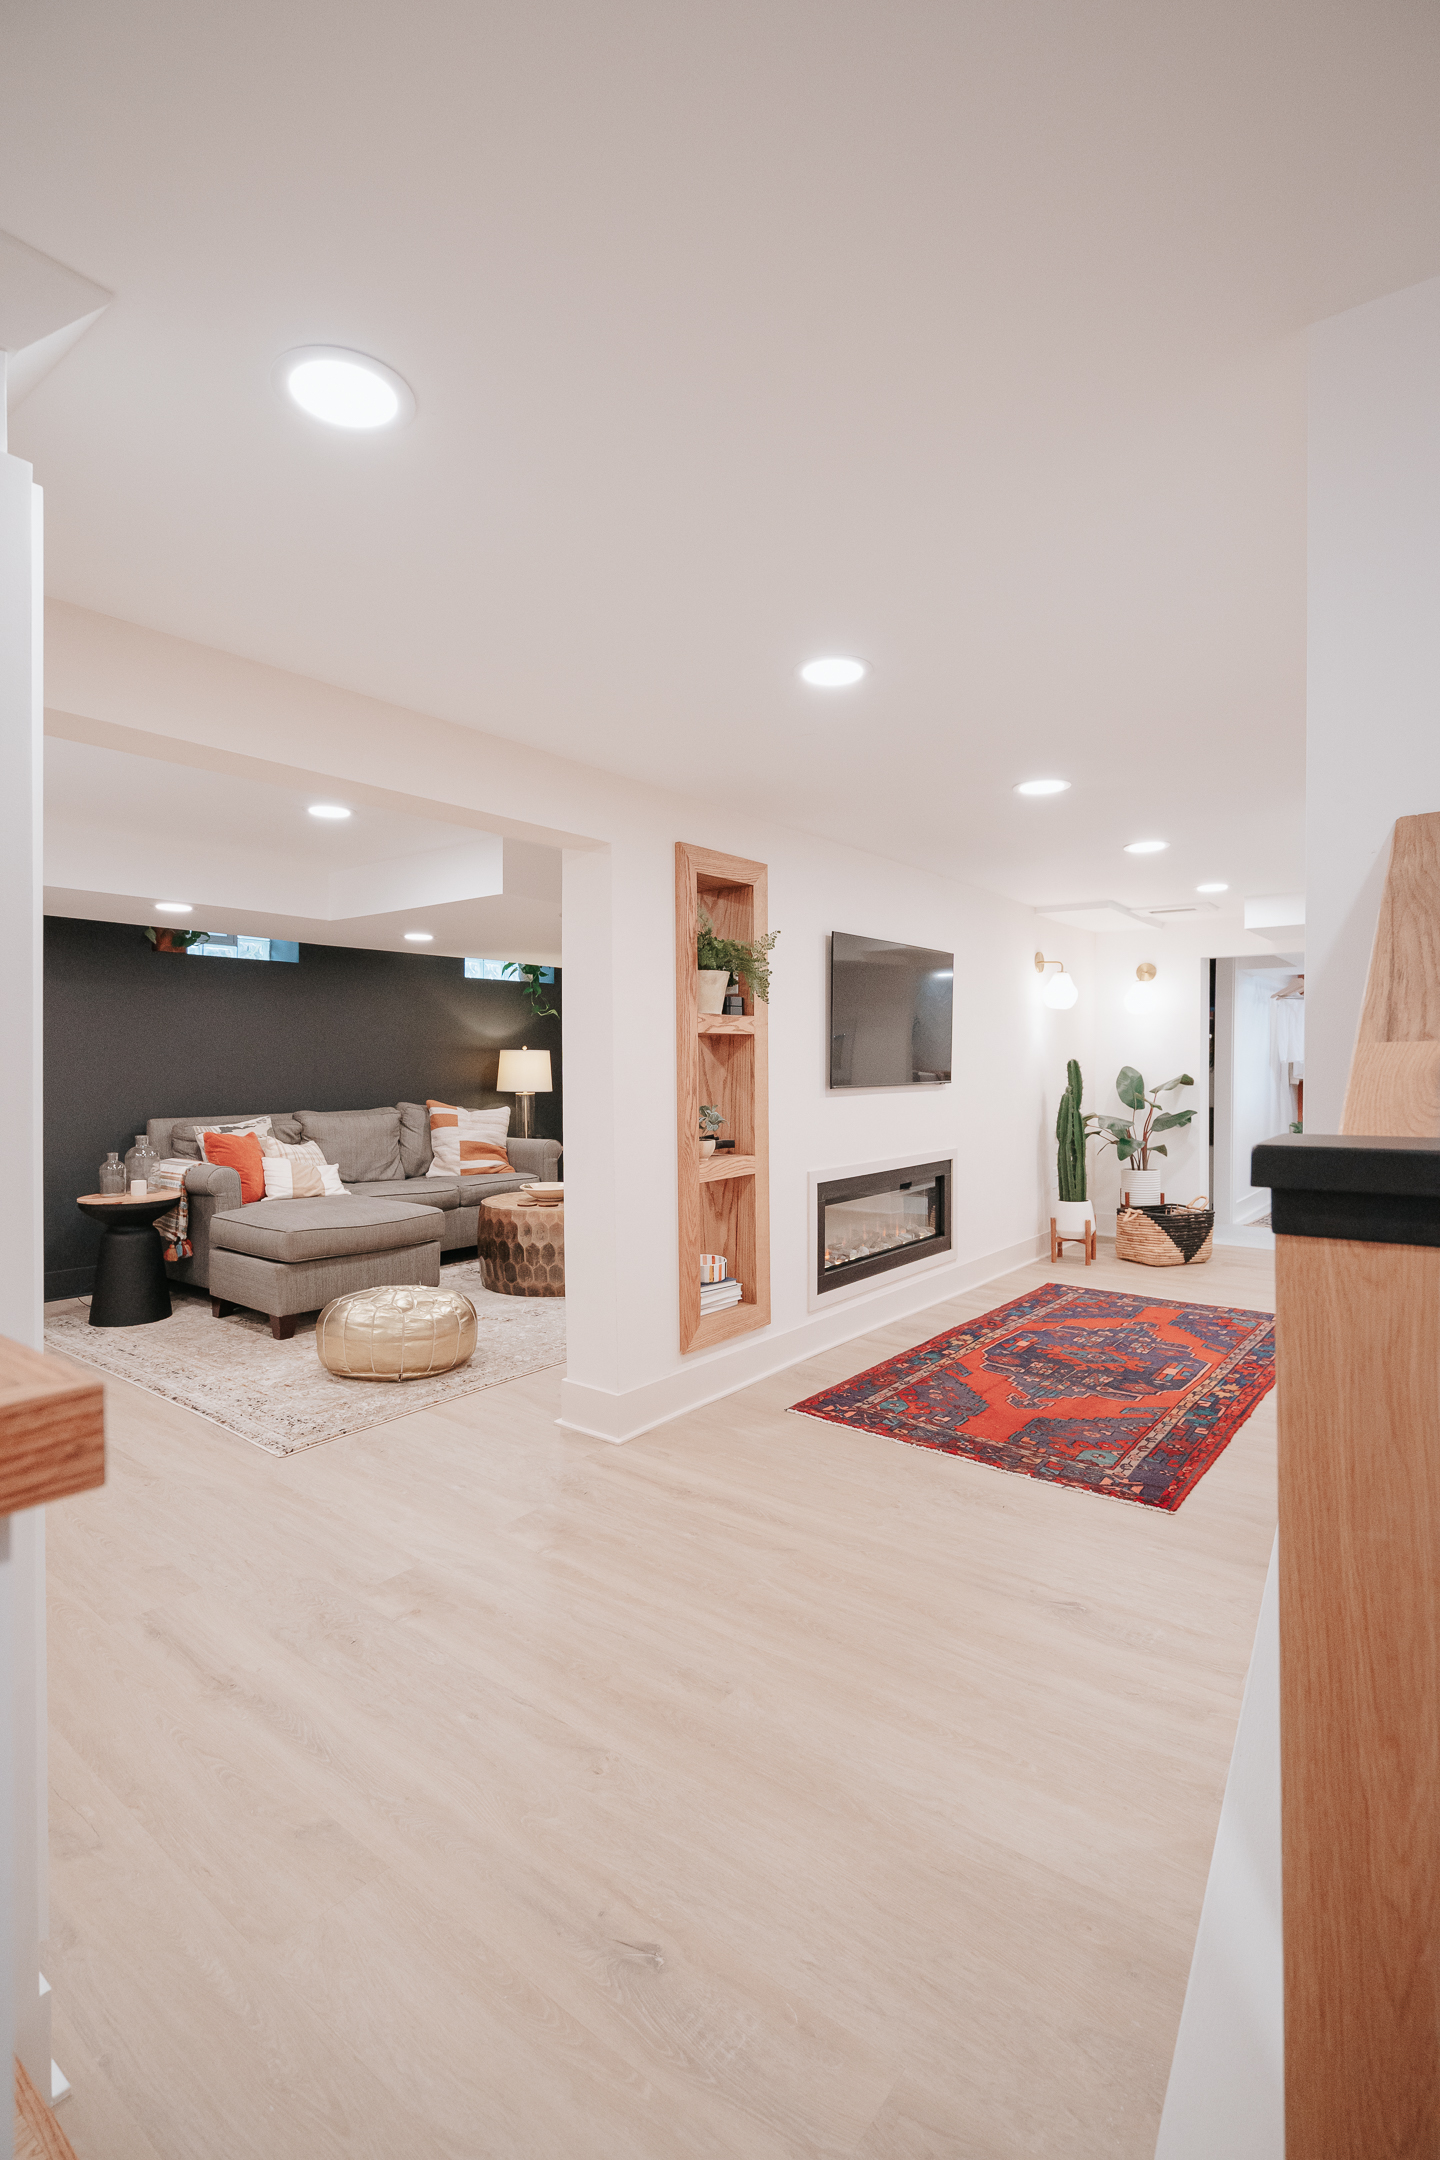
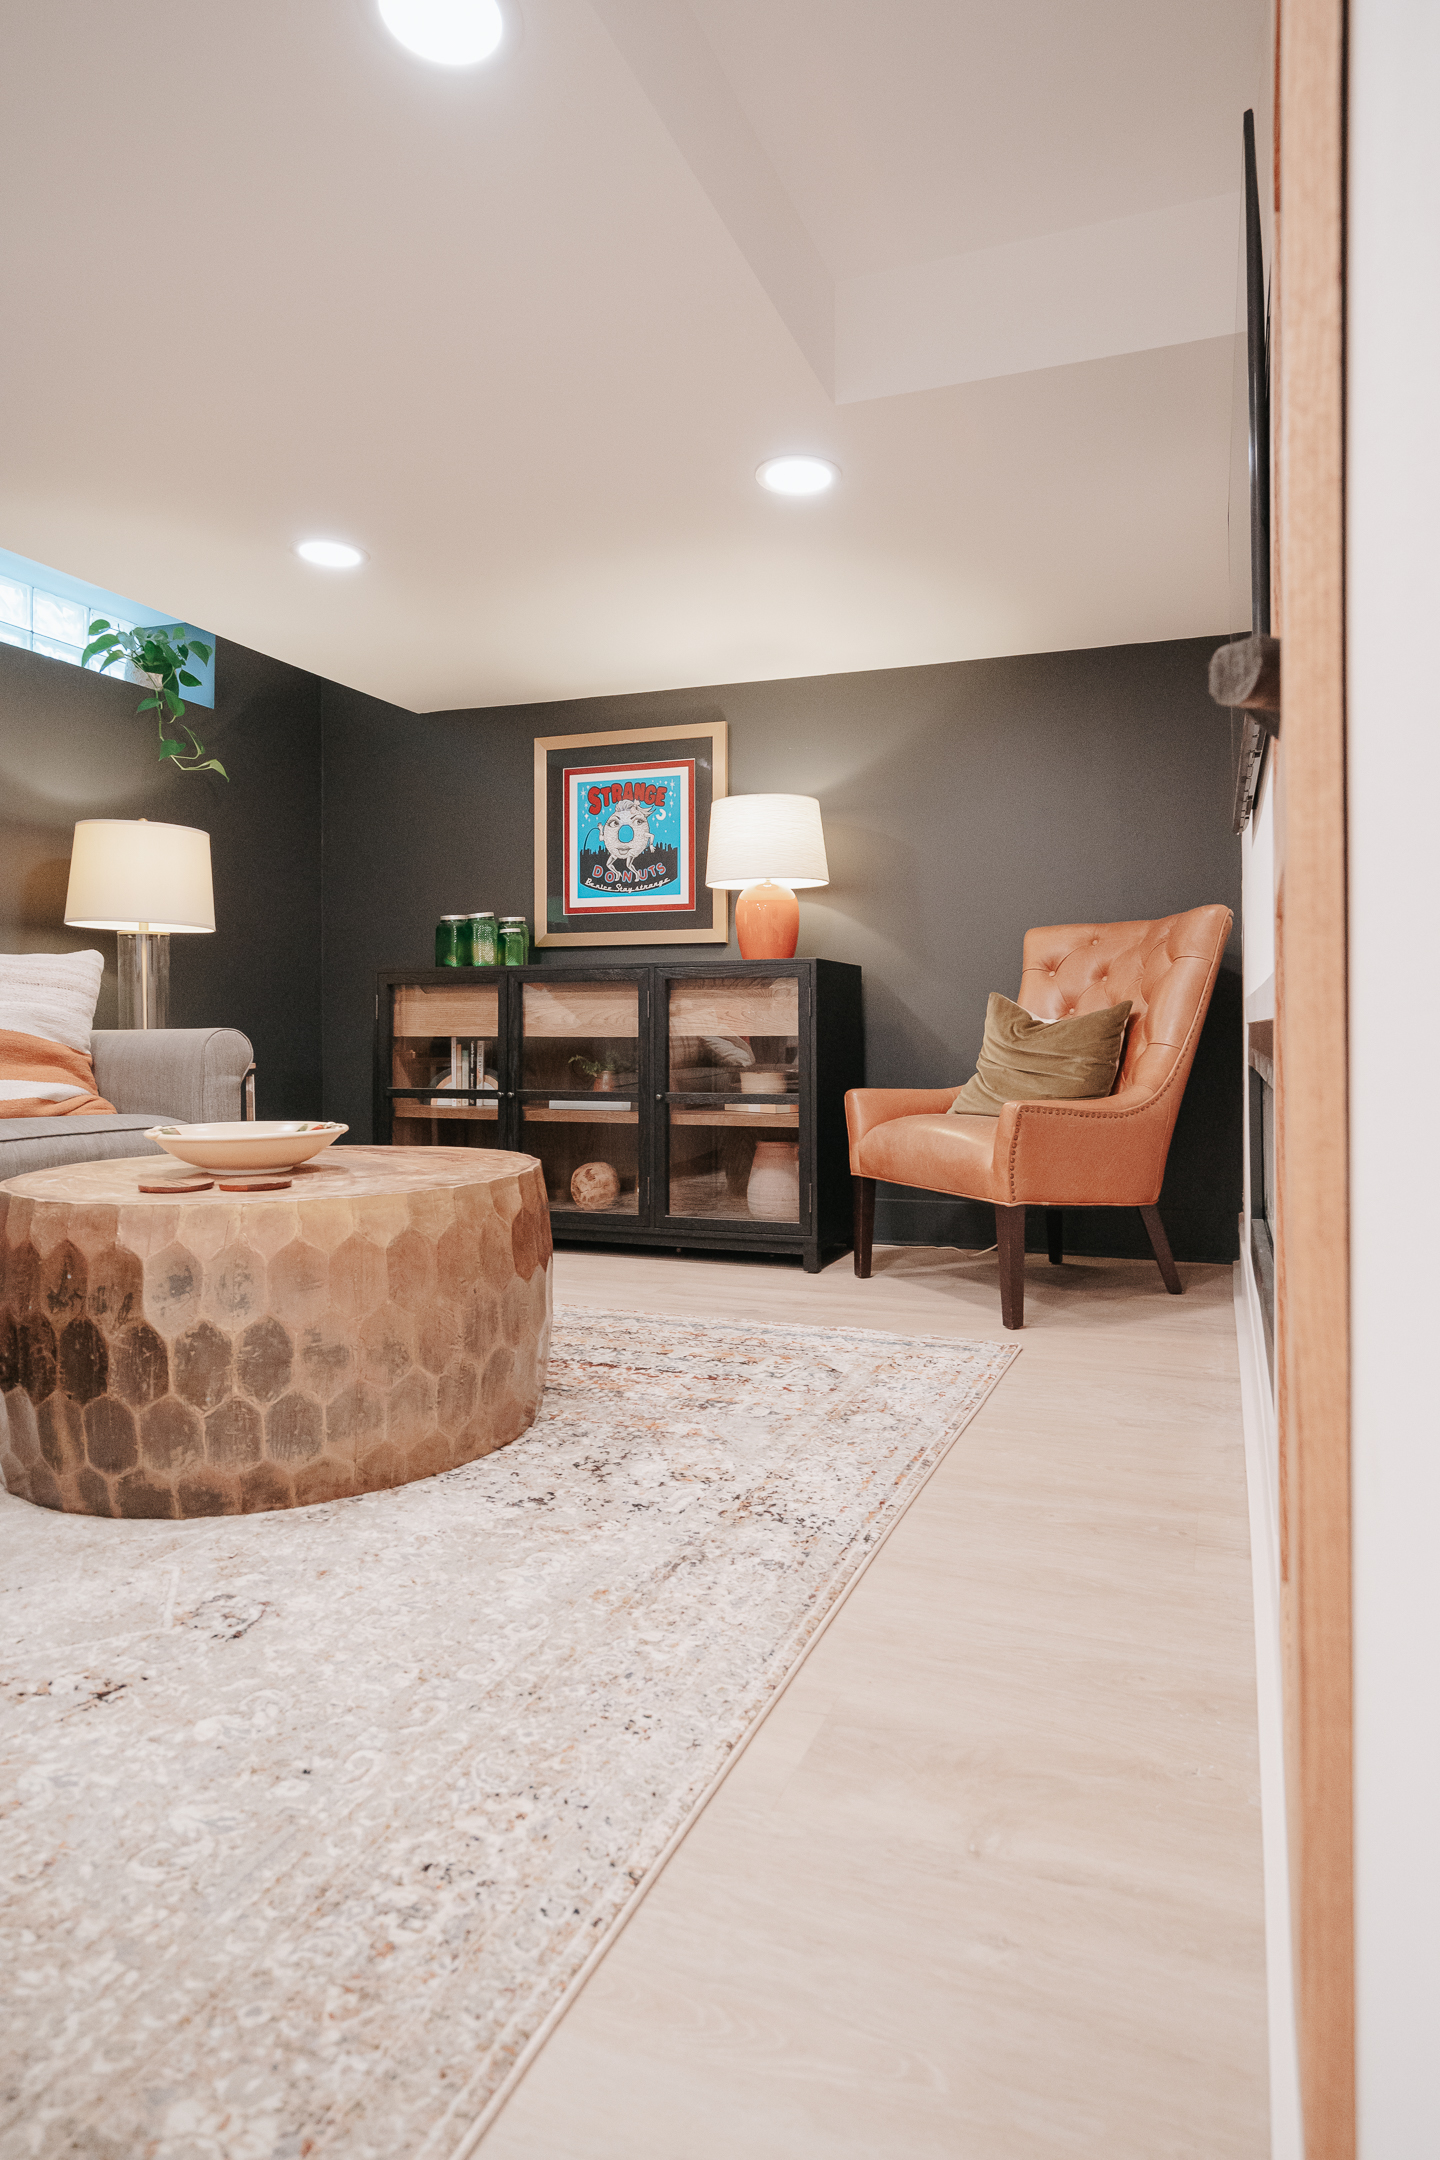
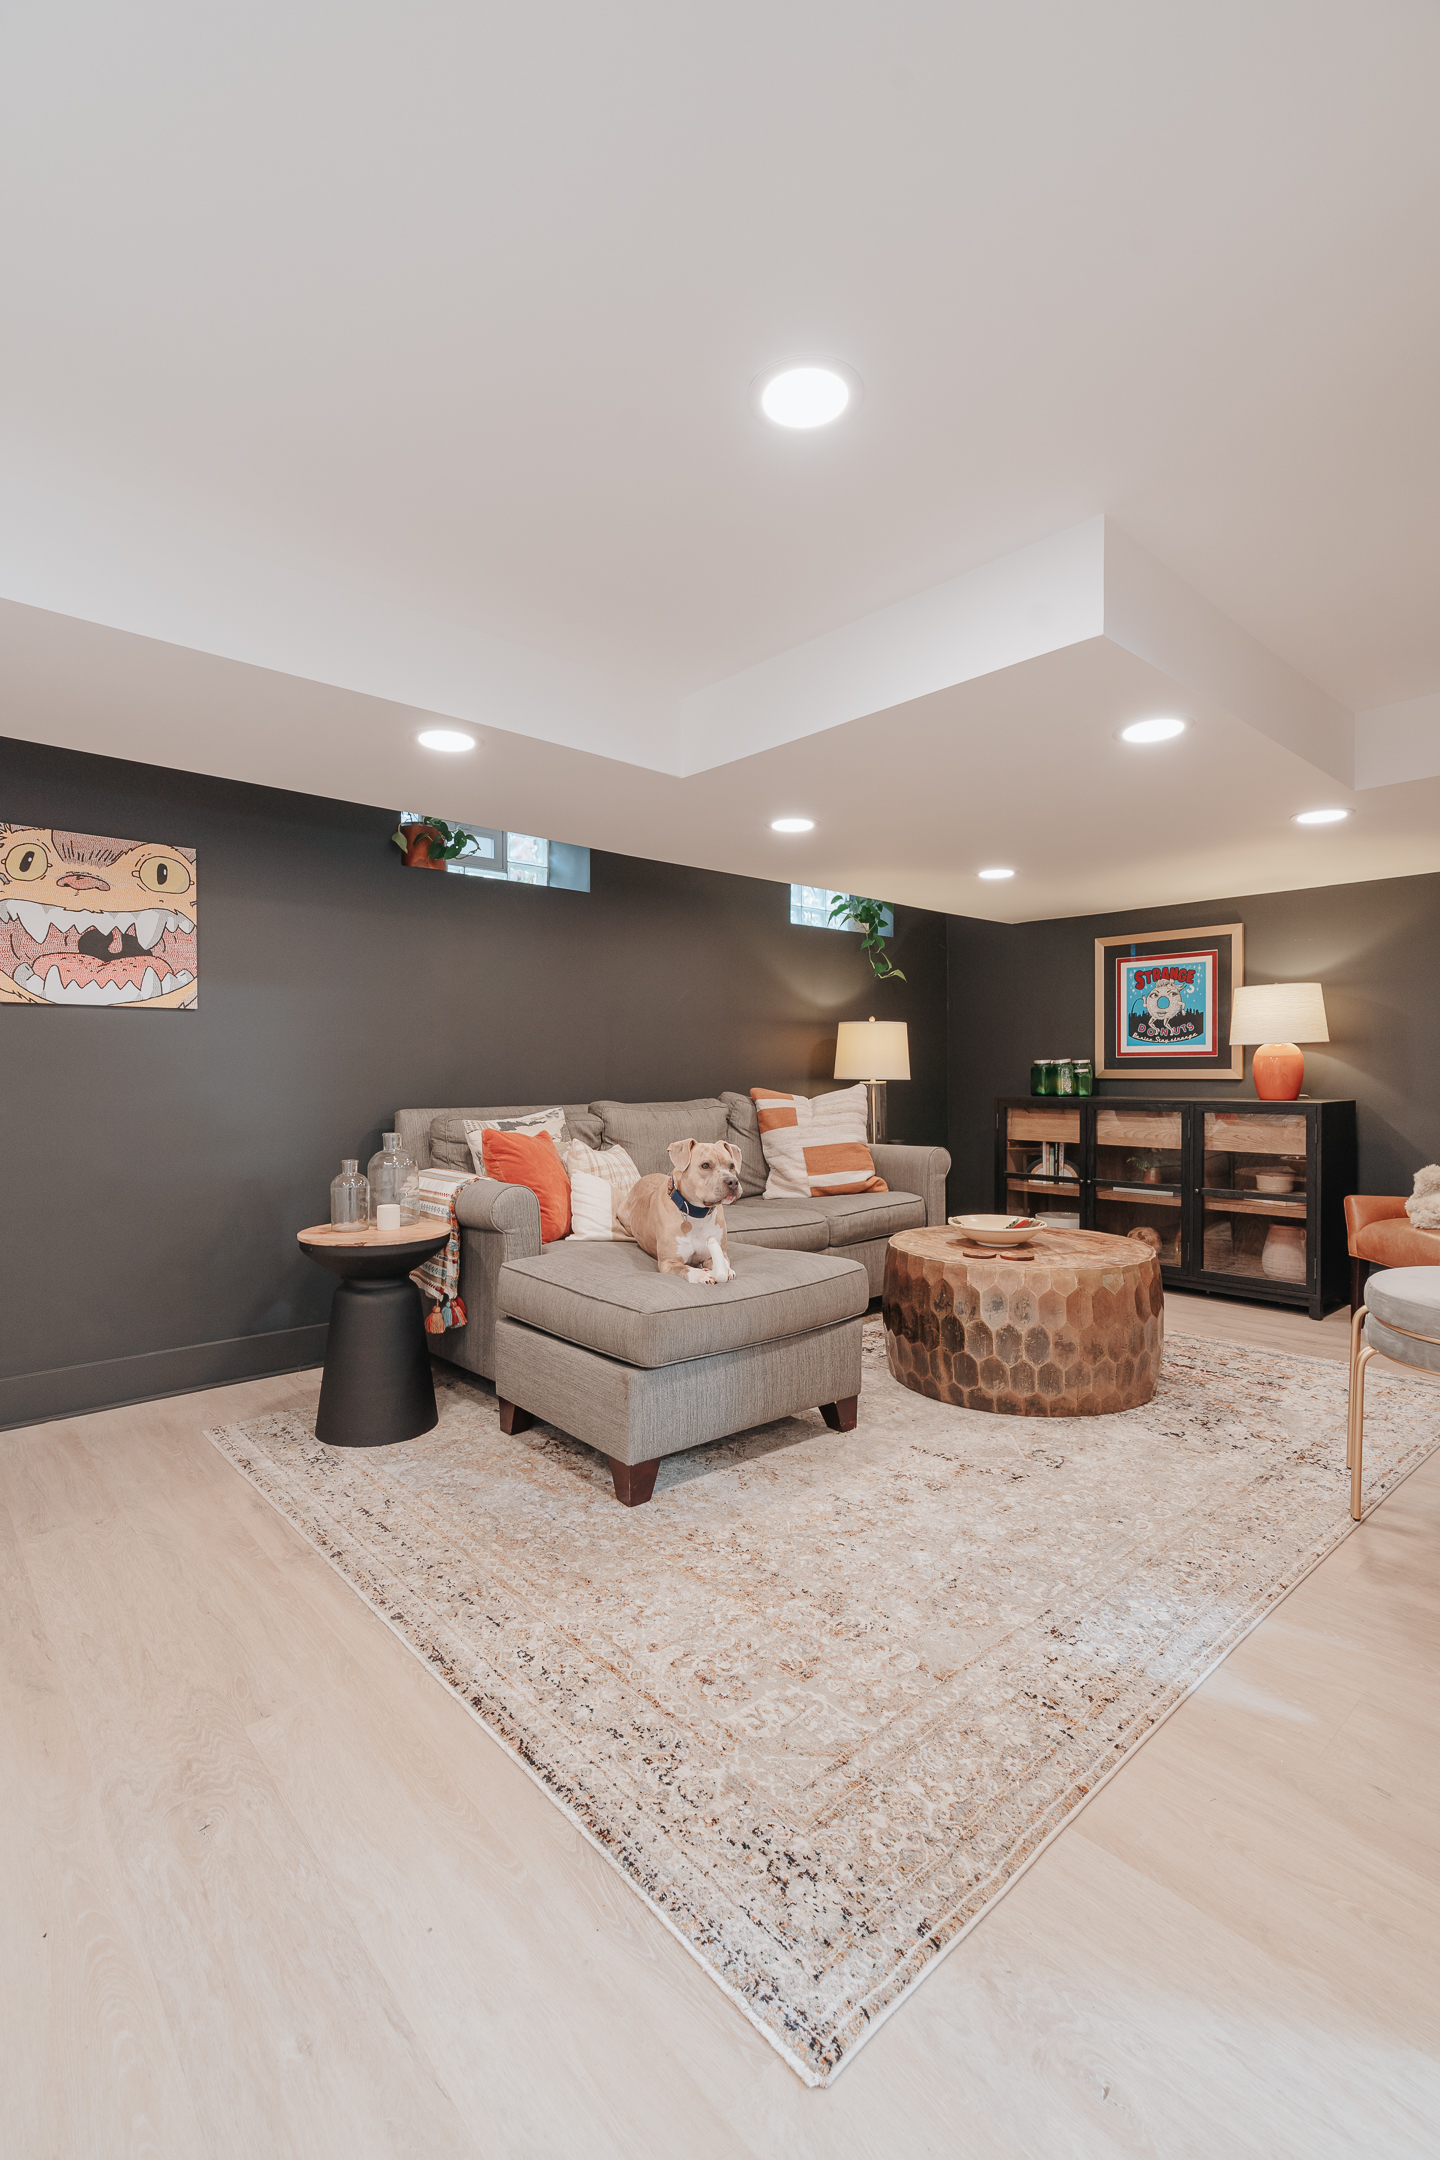
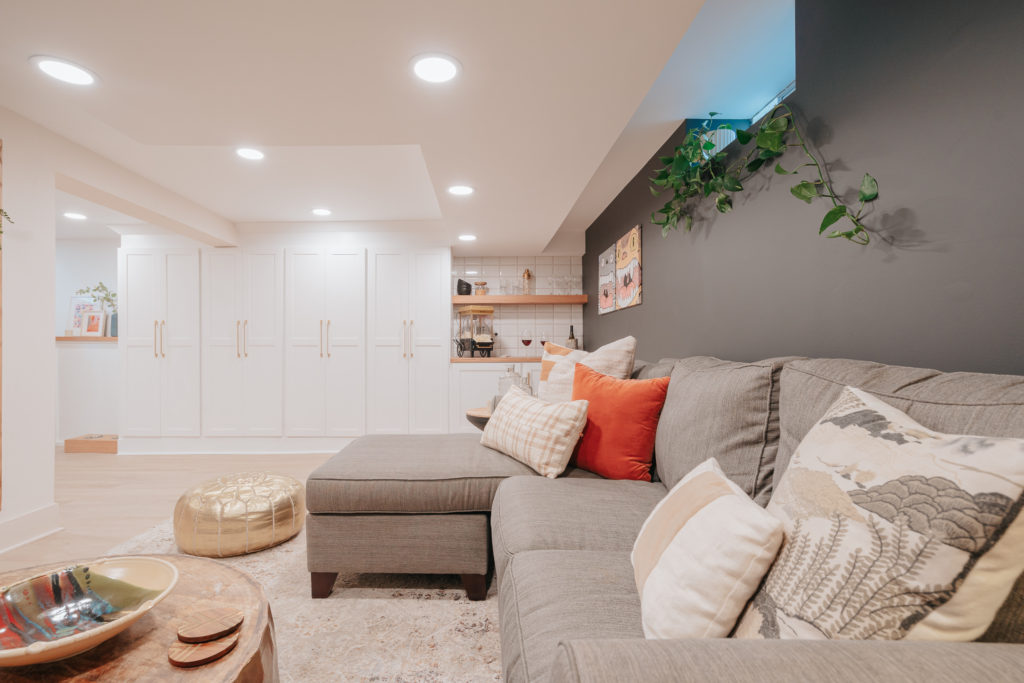
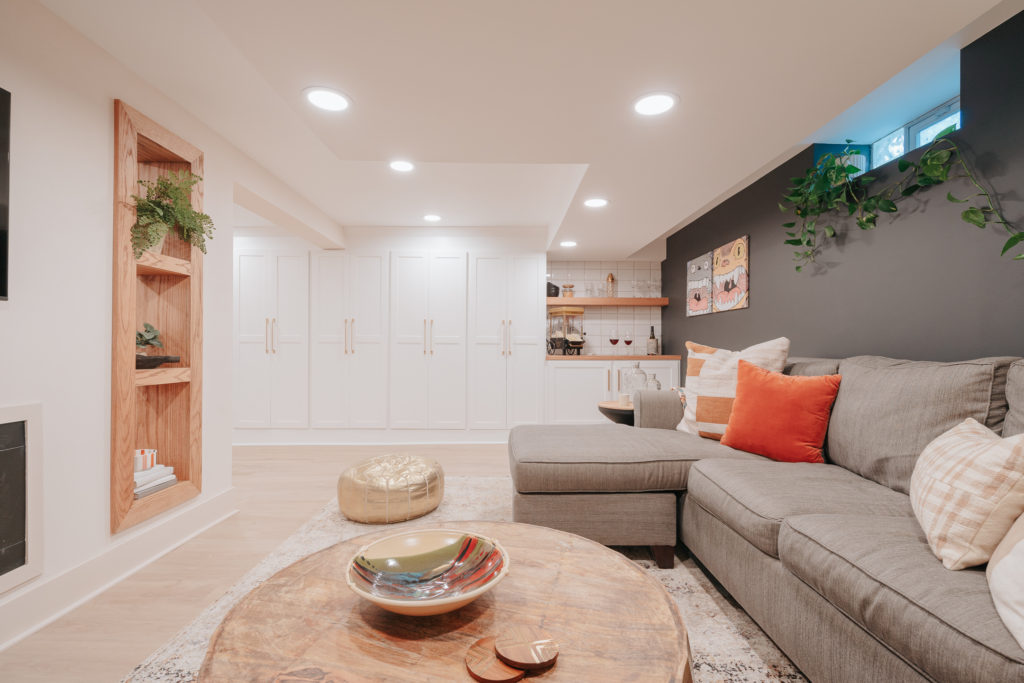
As you first walk down the staircase this is the first space you see. We wanted it to feel warm and welcoming by drawing your eye to the matte black wall, which is Iron Ore by Sherwin Williams. The use of the dark color paint was done to help create an intimate movie watching space and help separate the otherwise open space into two very different rooms.
We added all new flooring throughout the basement. We landed on the Barrel Oak / Henley 6mm Plank that creates a very realistic hardwood flooring look.
In this space we wanted to reuse as many items as we possibly could. Most of the furniture is repurposed from our family room before we remodeled. I still love each piece and wanted to give it a new life down here. The sideboard is new and I am absolutely in love with it’s abundance of storage and design. On top of the sideboard I have a vintage light and green vintage canisters that were my Grandma’s. I have been dying to use these in one of our spaces and just hadn’t found the right home for them yet.
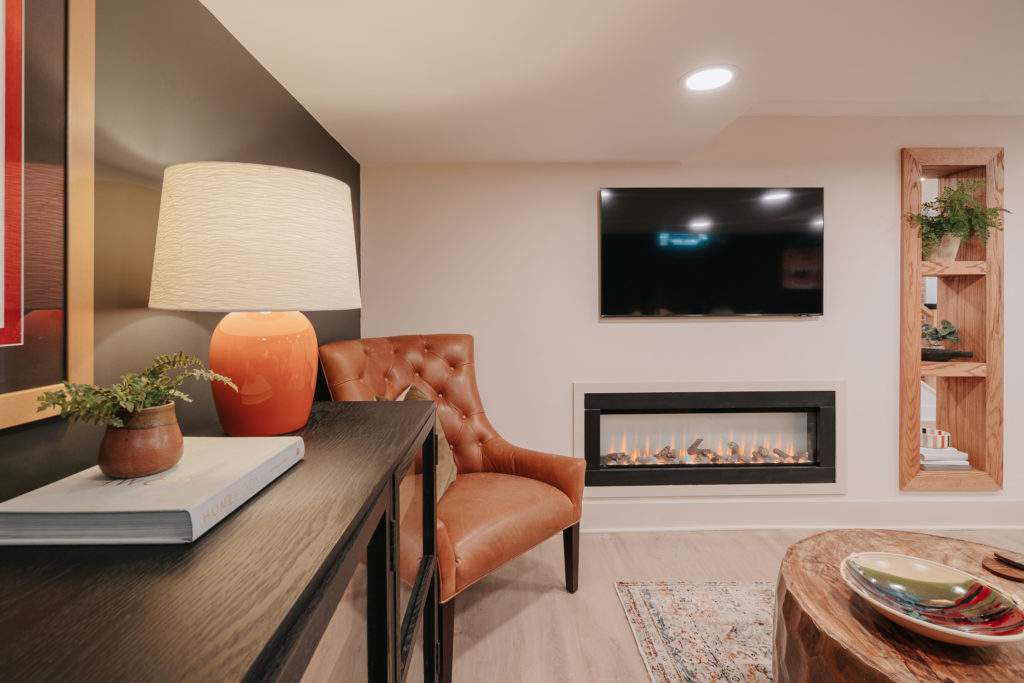
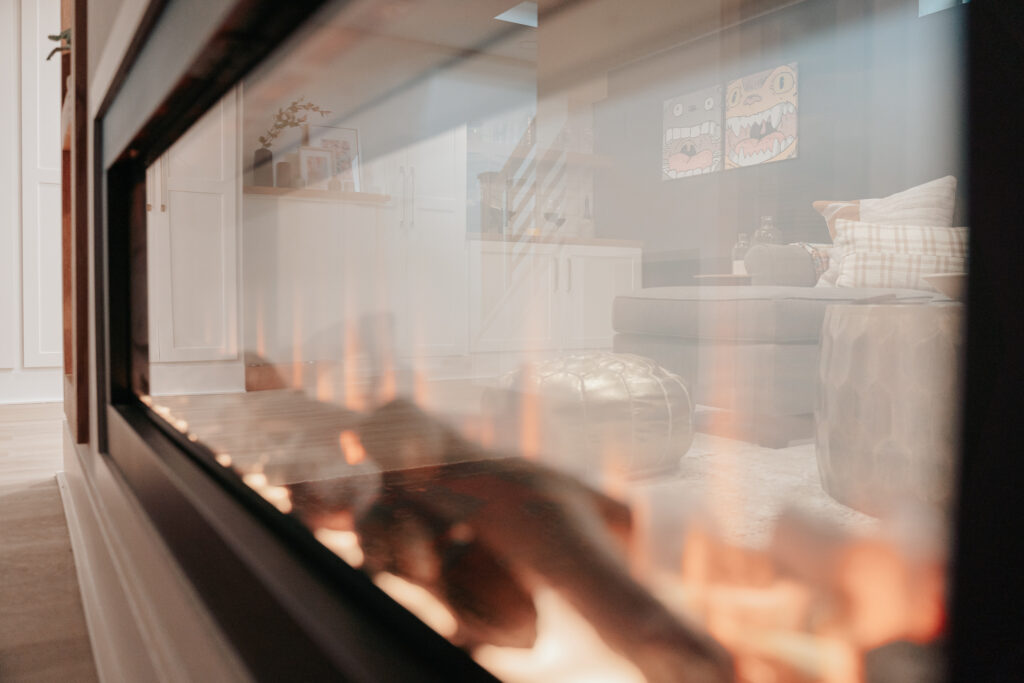
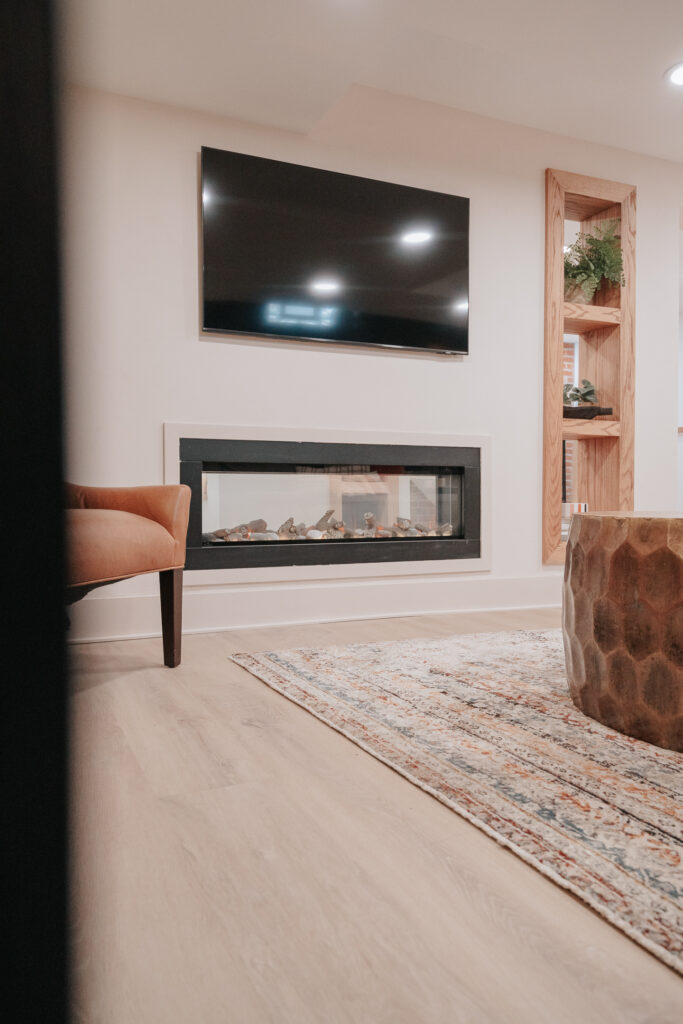
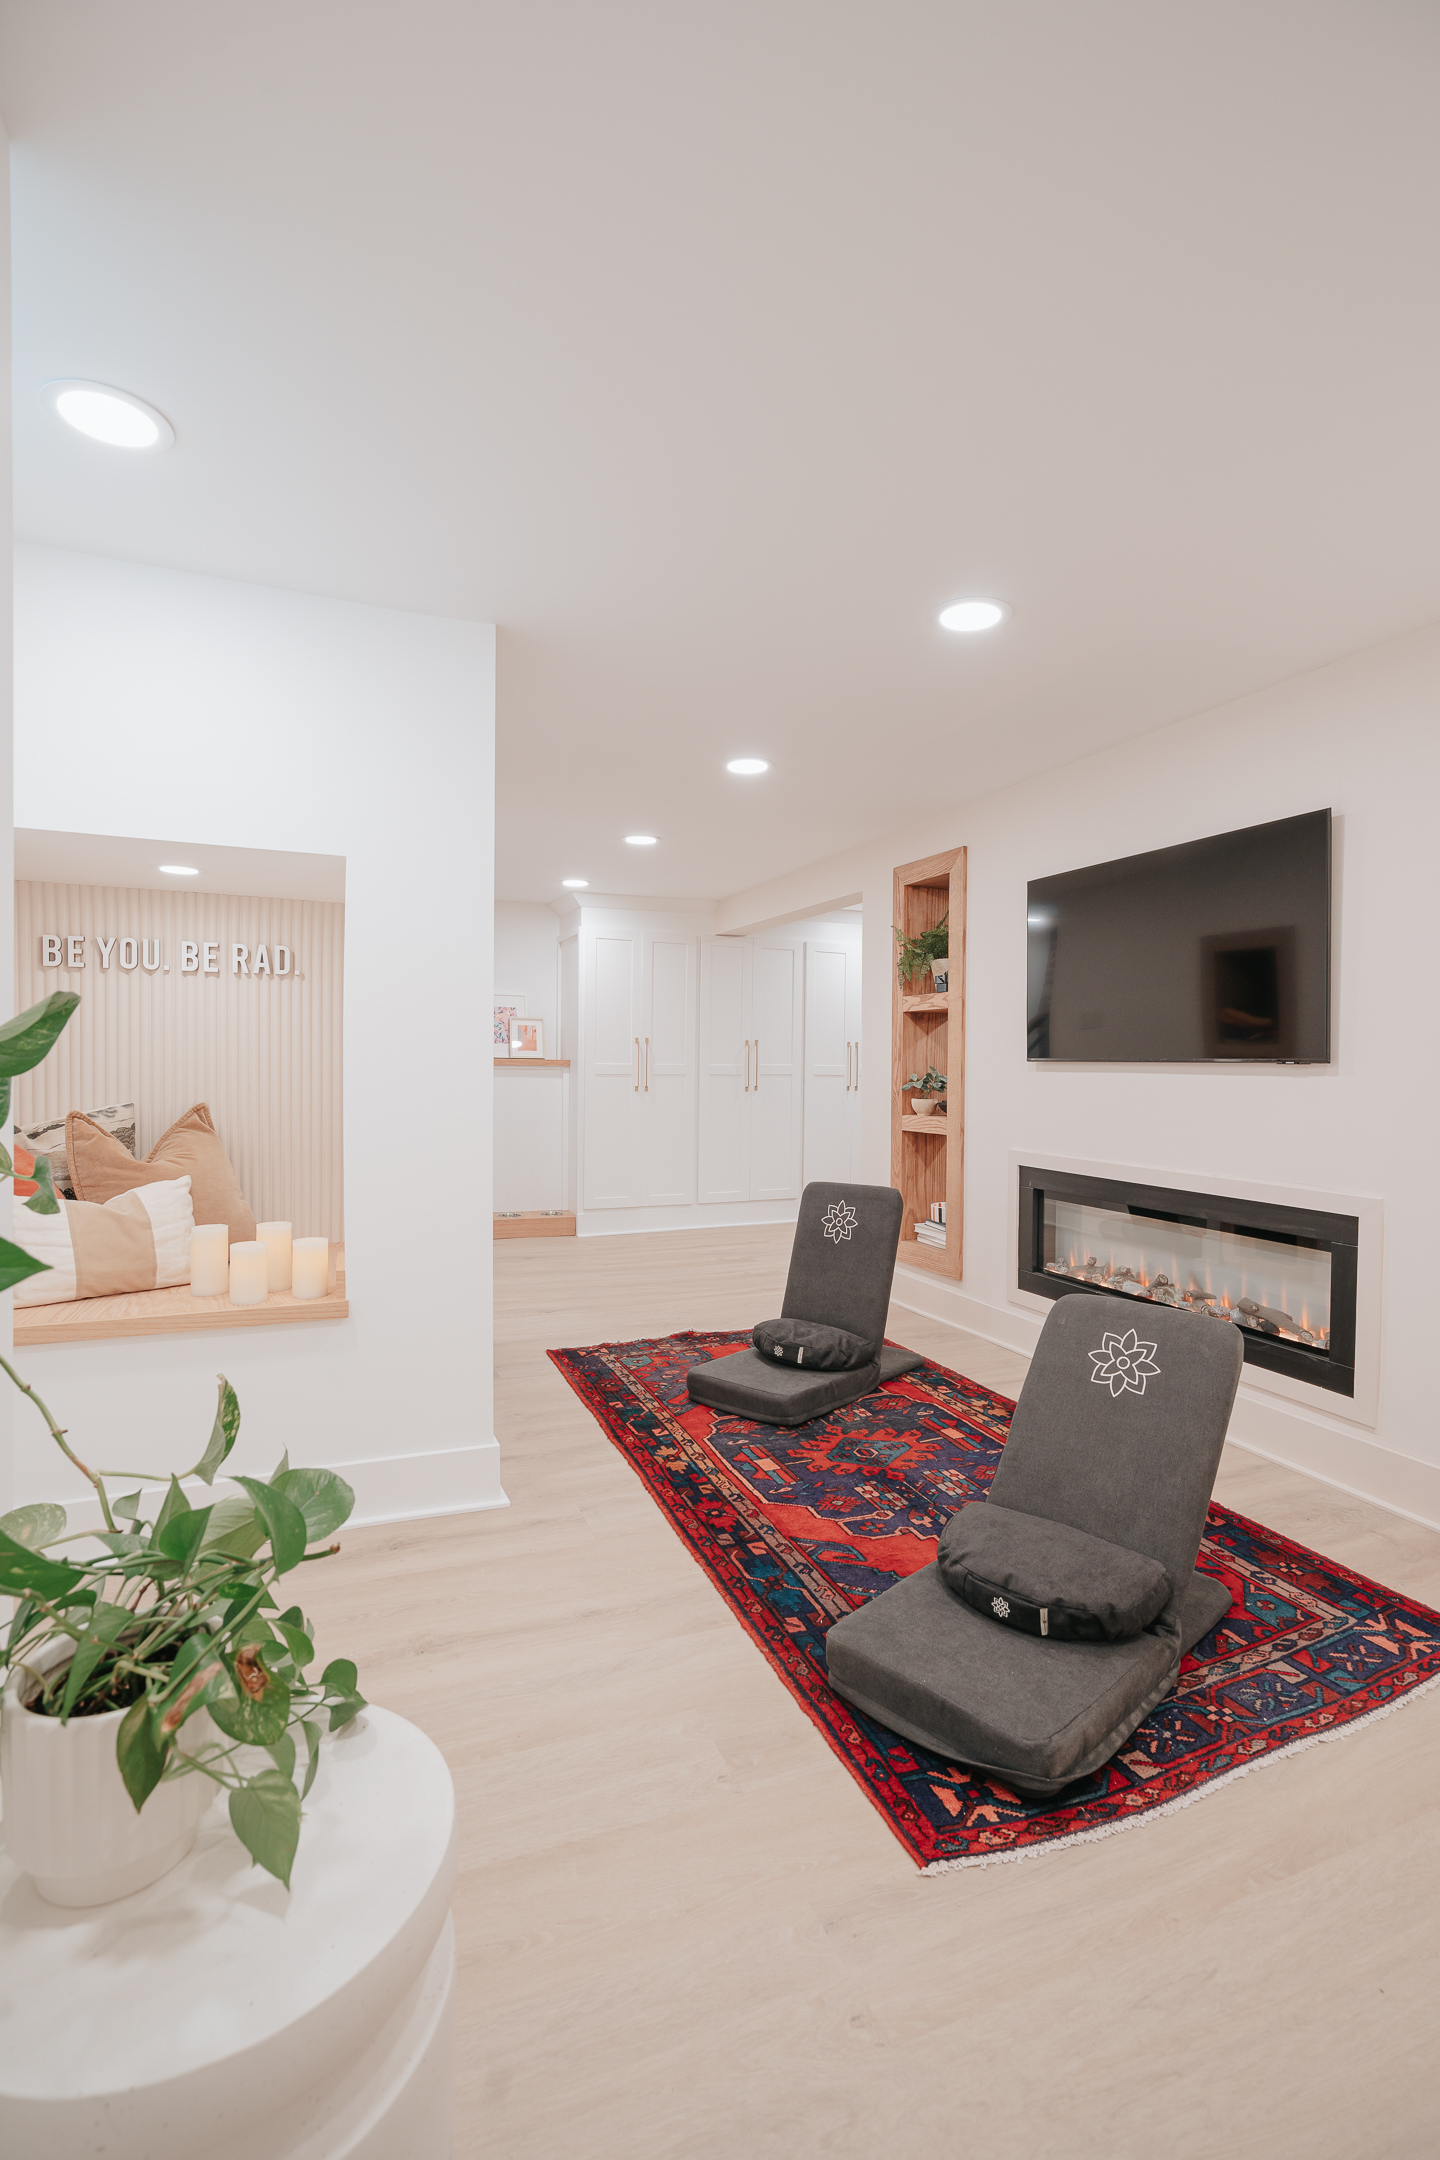
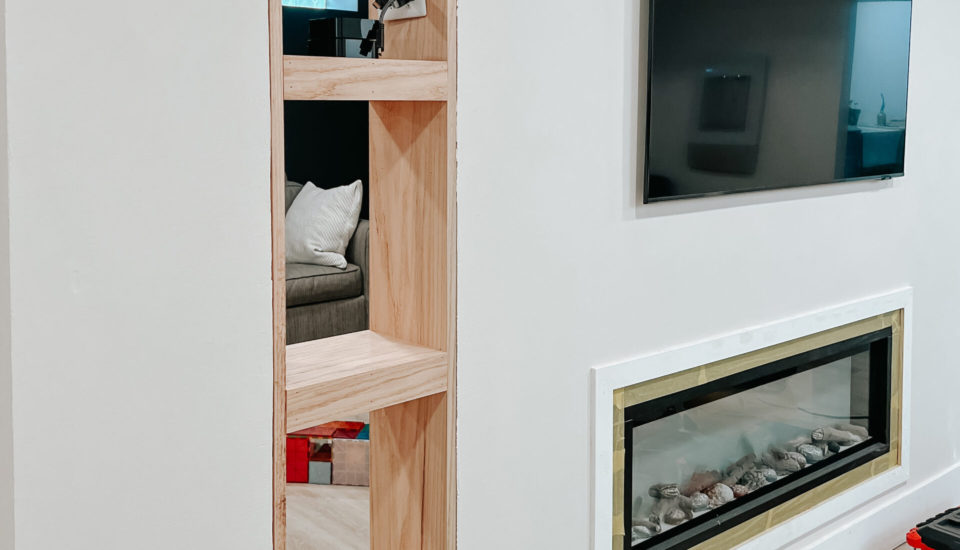
You’ll notice that we separated the two spaces with a large wall. We wanted to hide the support posts but have some free flowing space that connected both areas. And we created that flow by installing a dual sided electric fireplace. Nobody likes seeing their support posts but we all need them. To maximize on the space we went with a double sided fireplace and created a custom shelving unit to house all the television components and provide surface space for decor.
Our kids love that they can make the fireplace change colors and the amount of heat it puts out. The other great thing about it is that you can adjust whether you want the fireplace to see through or not at the push of a button.
The fireplace wall is finished with Wabi lime wash plaster from Color Atelier. I love how you can really play with the amount of texture you want based on how you apply the product. On the family movie area side I wanted to create more movement. While on the meditation yoga side I wanted to have a smoother surface.
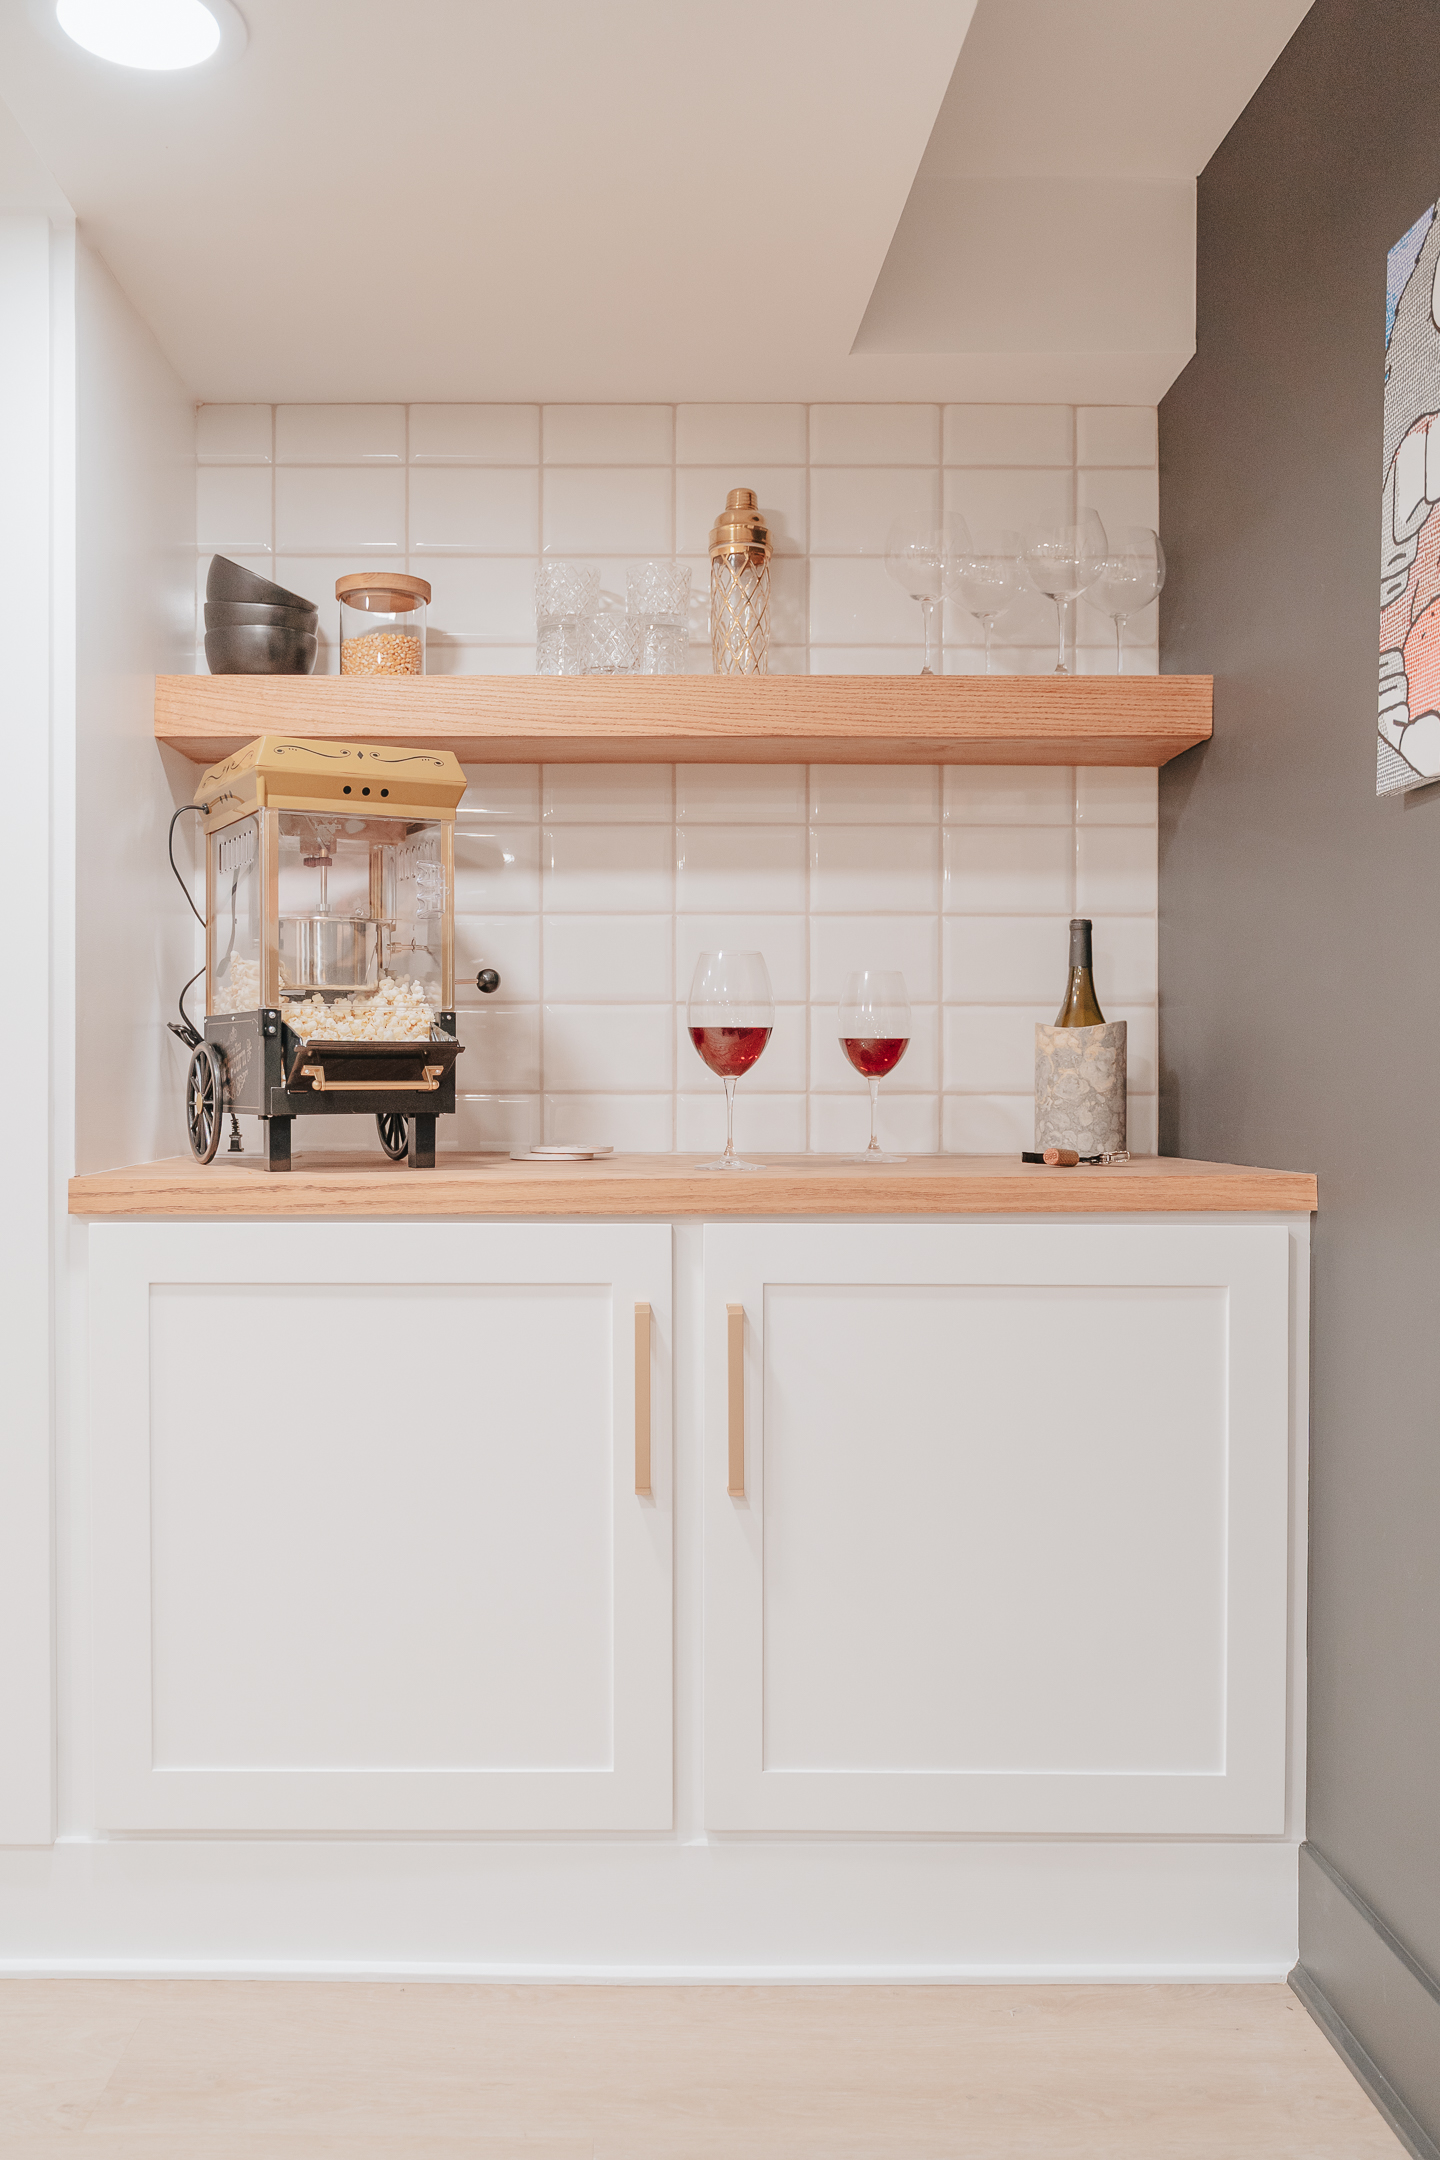
As we began planning all the customization in the basement we realized that we were going to have space for a dry bar. Since our HVAC lines run so low we have lots of fun nooks due to our soffits. This allowed for us to create a more purposeful space within these nooks and our dry bar was formed. Our team custom made both the counters and cabinets.
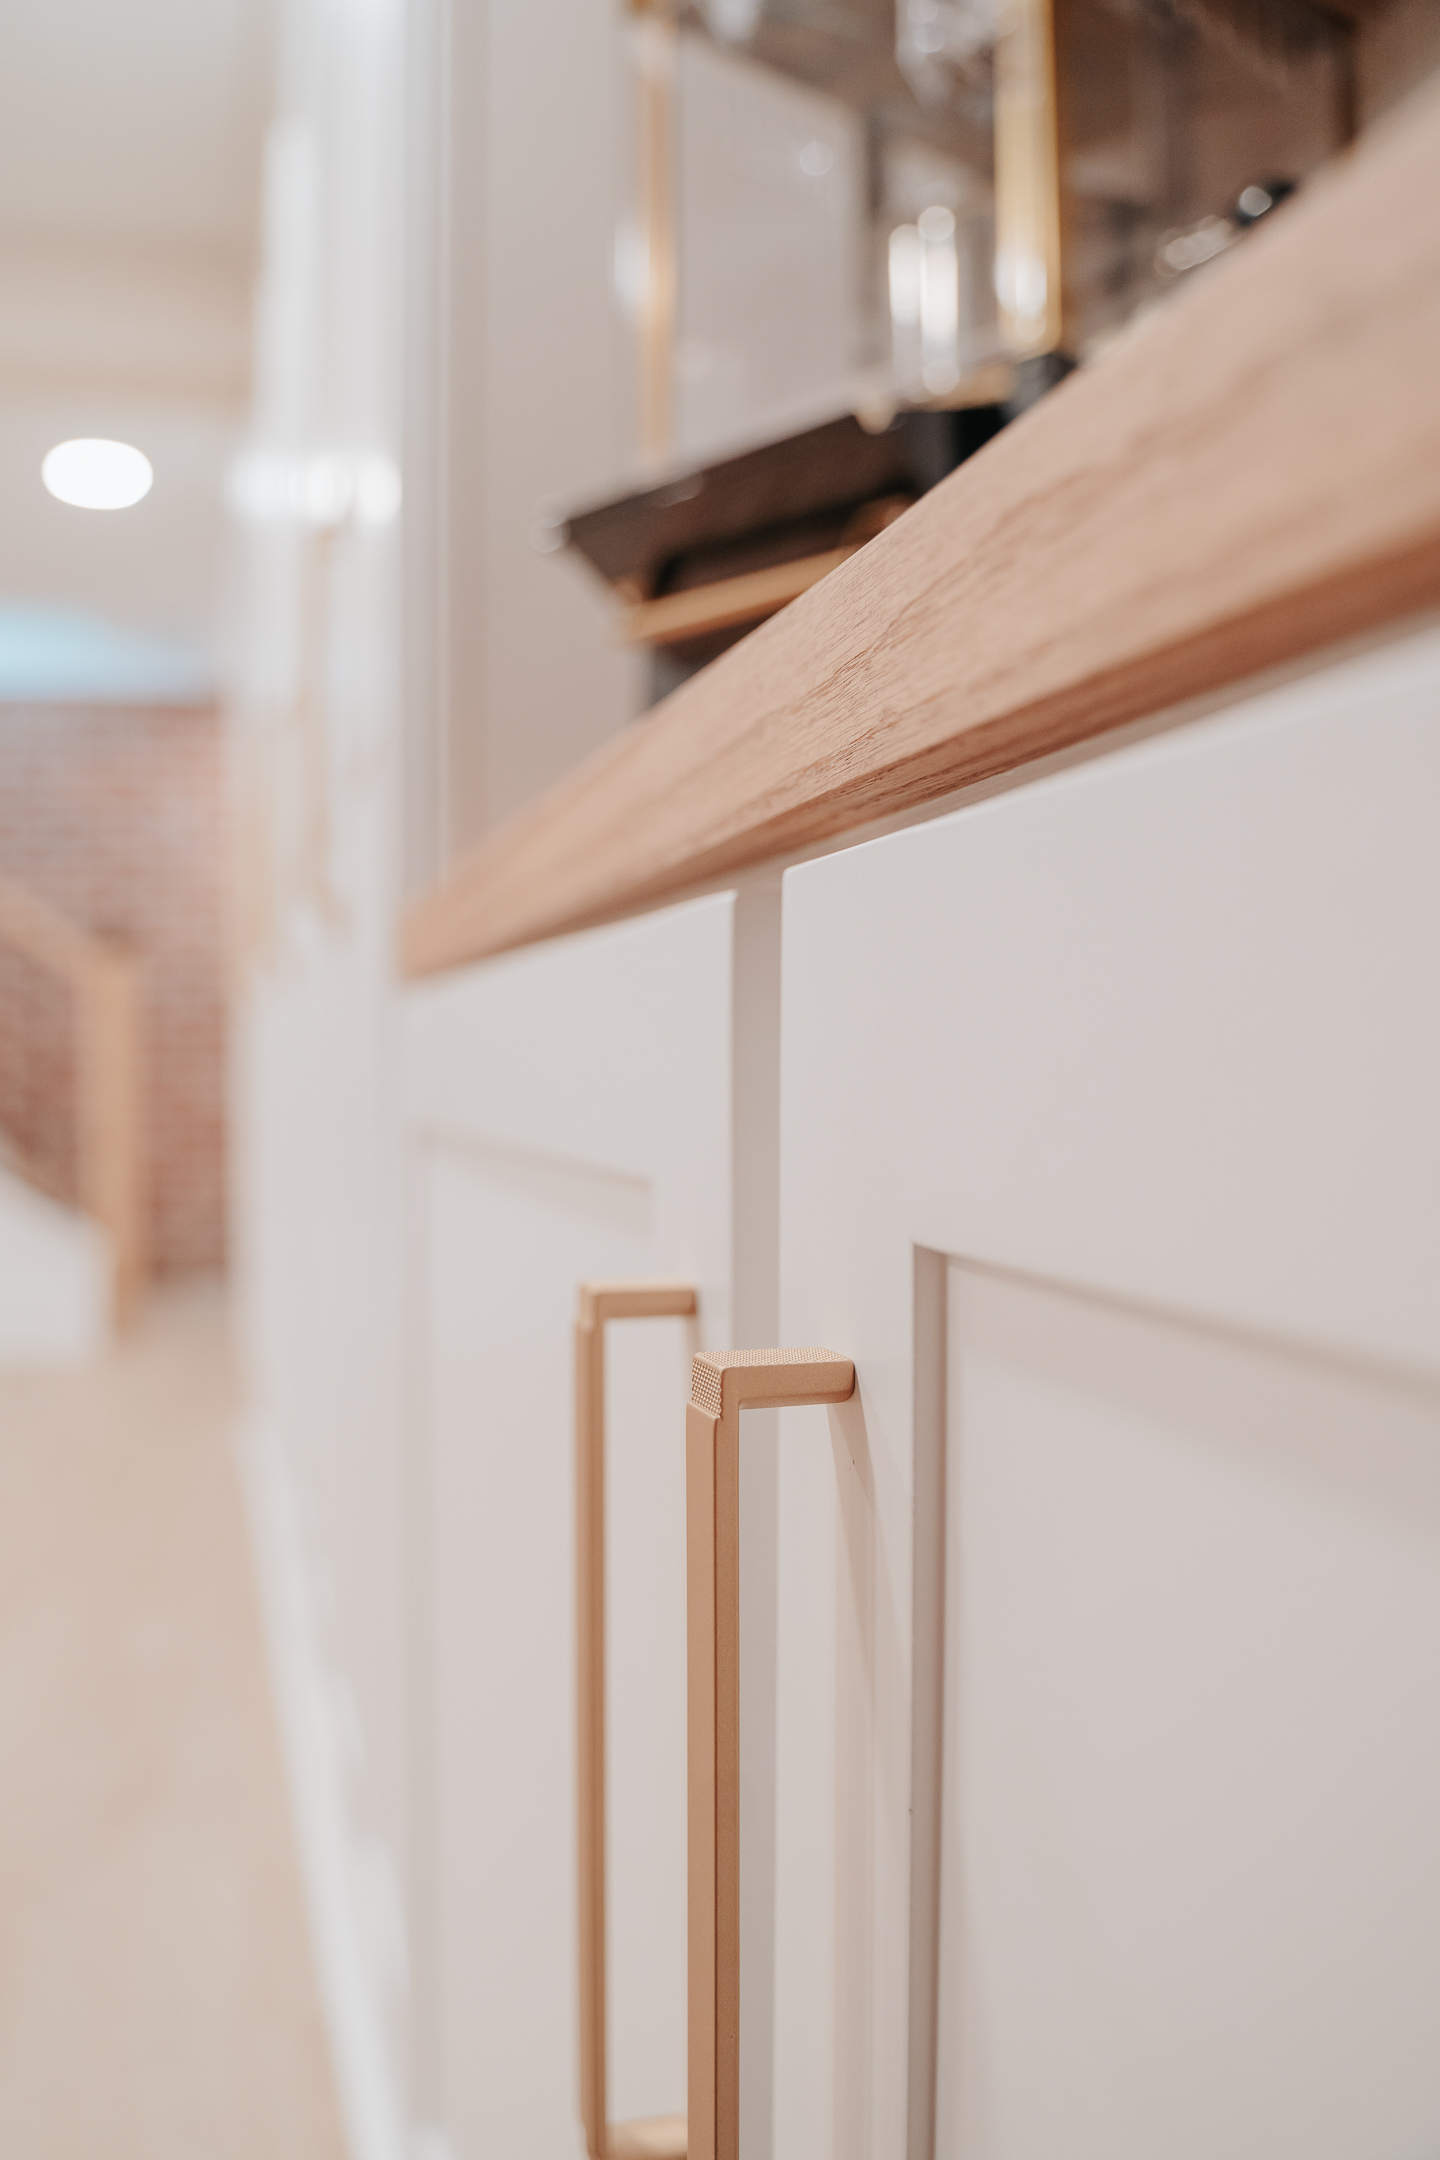
We used the Quardrato wide pulls in the signature satin brass finish from Schaub Company for the hardware. I love the detailing on the sides and the hardware is incredibly light and made in Italy!
From there we installed this incredible tile that we got as a gift from my best friend when we moved into our home six years ago. We then built a custom floating shelf to house glasses and popcorn bowls because who can have a movie area without popcorn!!!
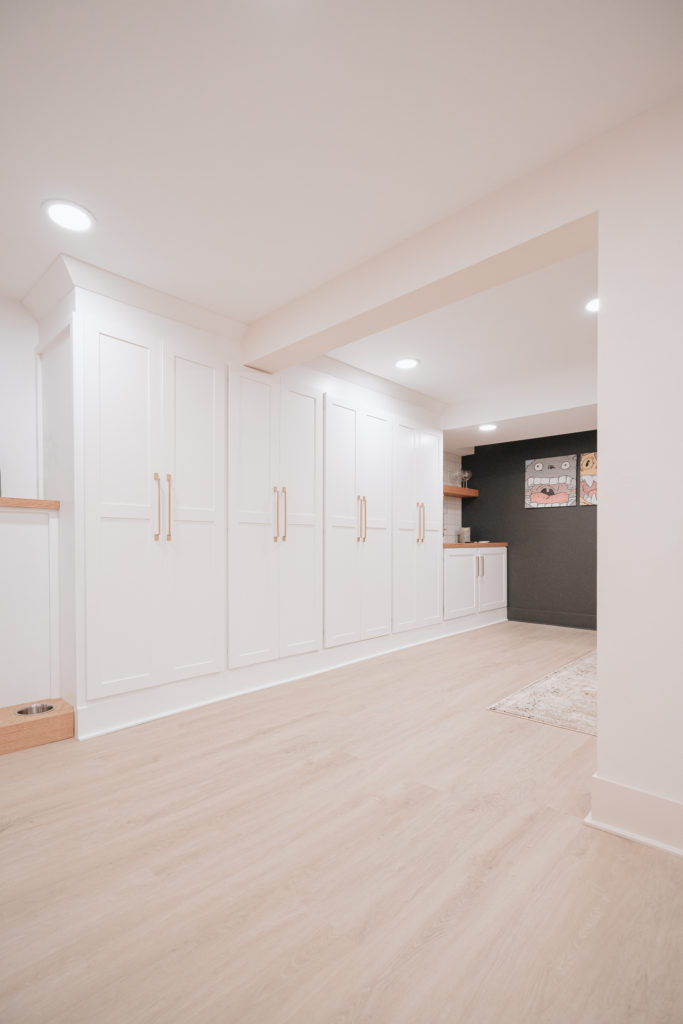
This space needed to be jam packed with storage. The goal here was to create a space for our kids and us to enjoy. That meant we needed a place for them to have easy access to games, toys and of course all the Legos! We’ve found that the large see-through plastic storage bins work best for everyone in our family. So when it came time to build custom storage we used those to guide the build.
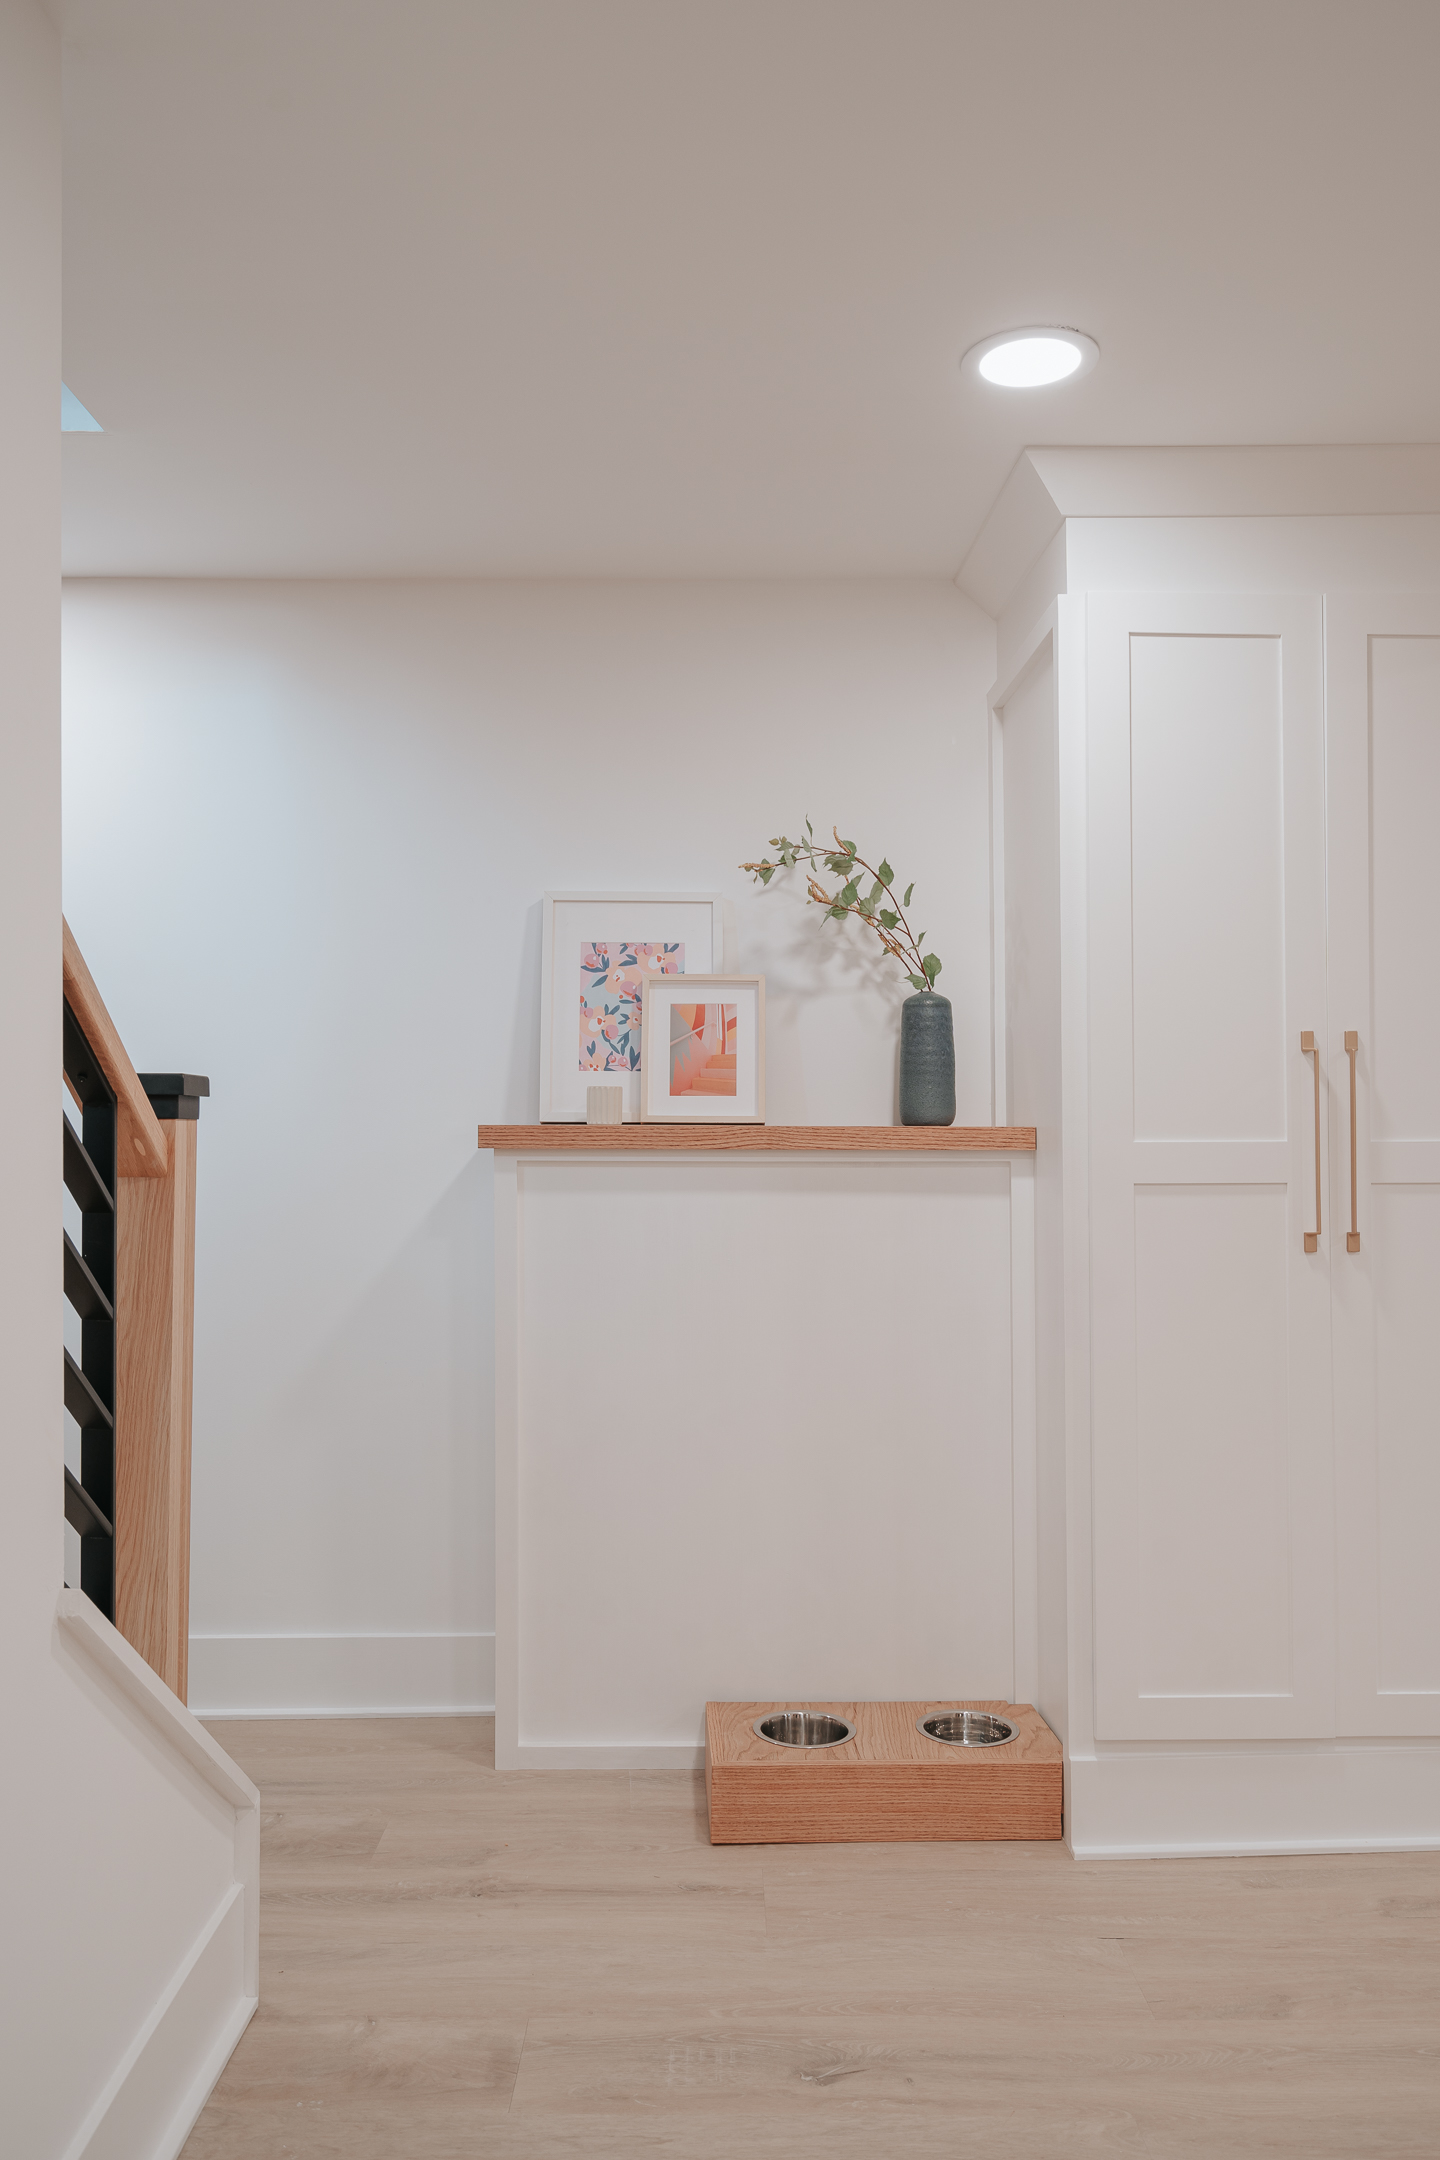
As you enter the basement the front wall is lined with floor to ceiling custom cabinets our team built. Each cabinet can house 4 plastic storage bins, making enough room for 16 bins! Talk about a lot of legos…just kidding, kinda!
I wanted the cabinets to not only serve our family functionally but for them to be designed so they were aesthetically pleasing to the space and not just feel like a wall of storage. To do this we painted them the same colors as the wall, Chantilly Lace by Benjamin Moore.
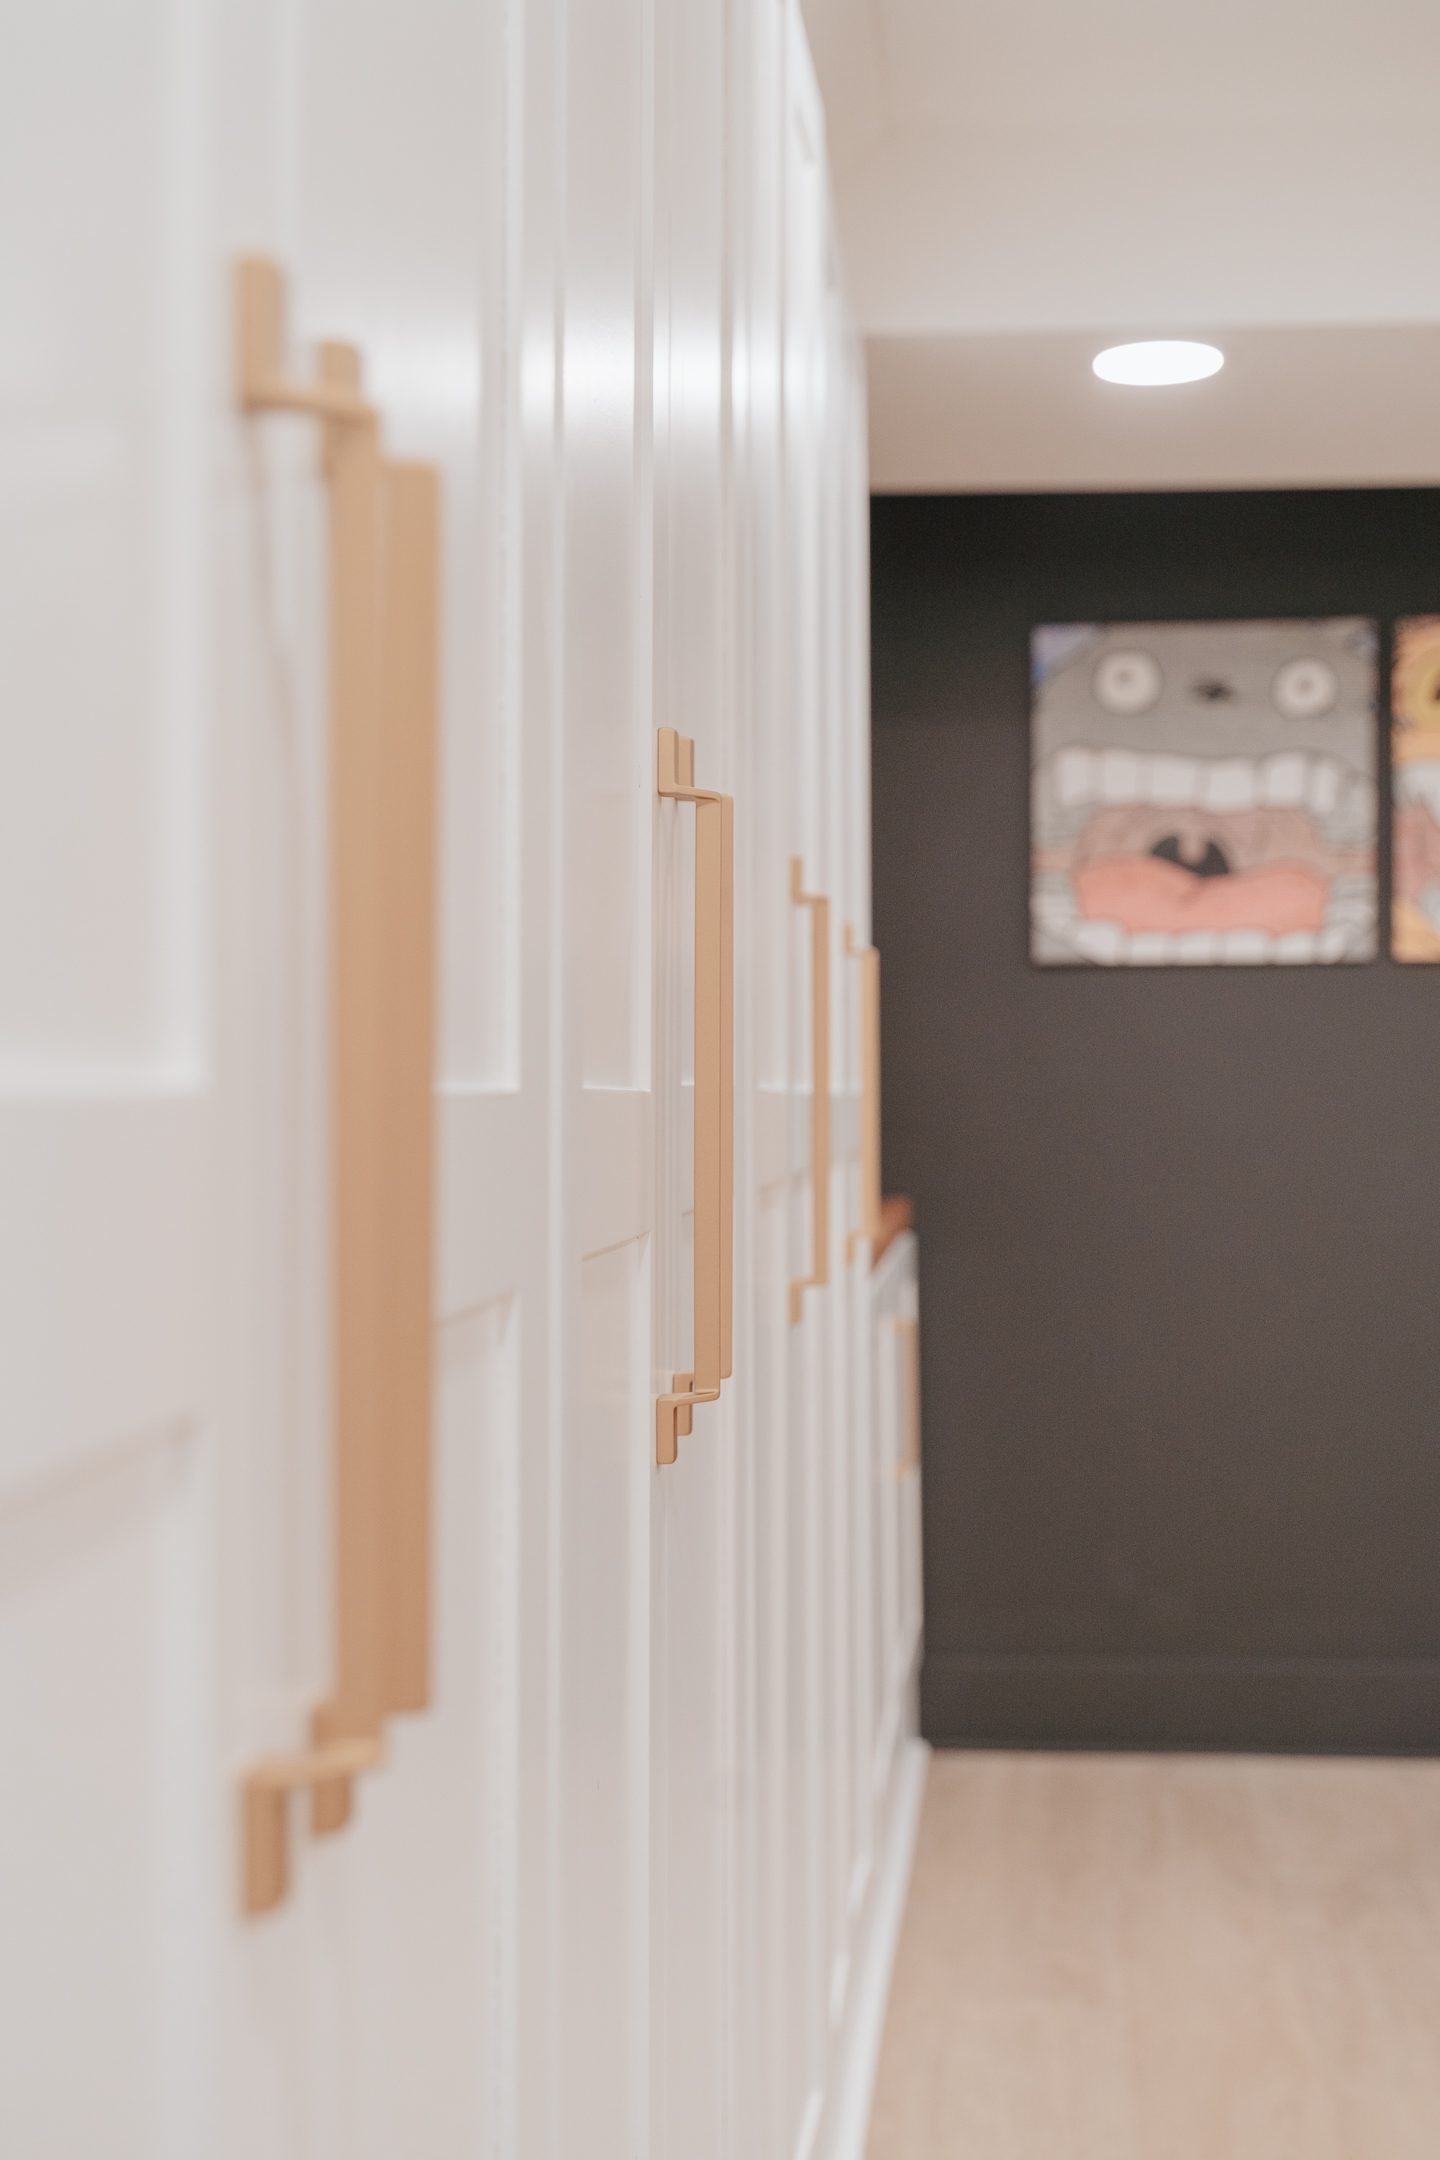
When it came time for hardware selection here I knew I wanted a piece that was simple and elegant yet sturdy enough to handle two little dudes opening and closing. When I came across Schaub’s San Marco pulls in satin brass it was love at first sight!
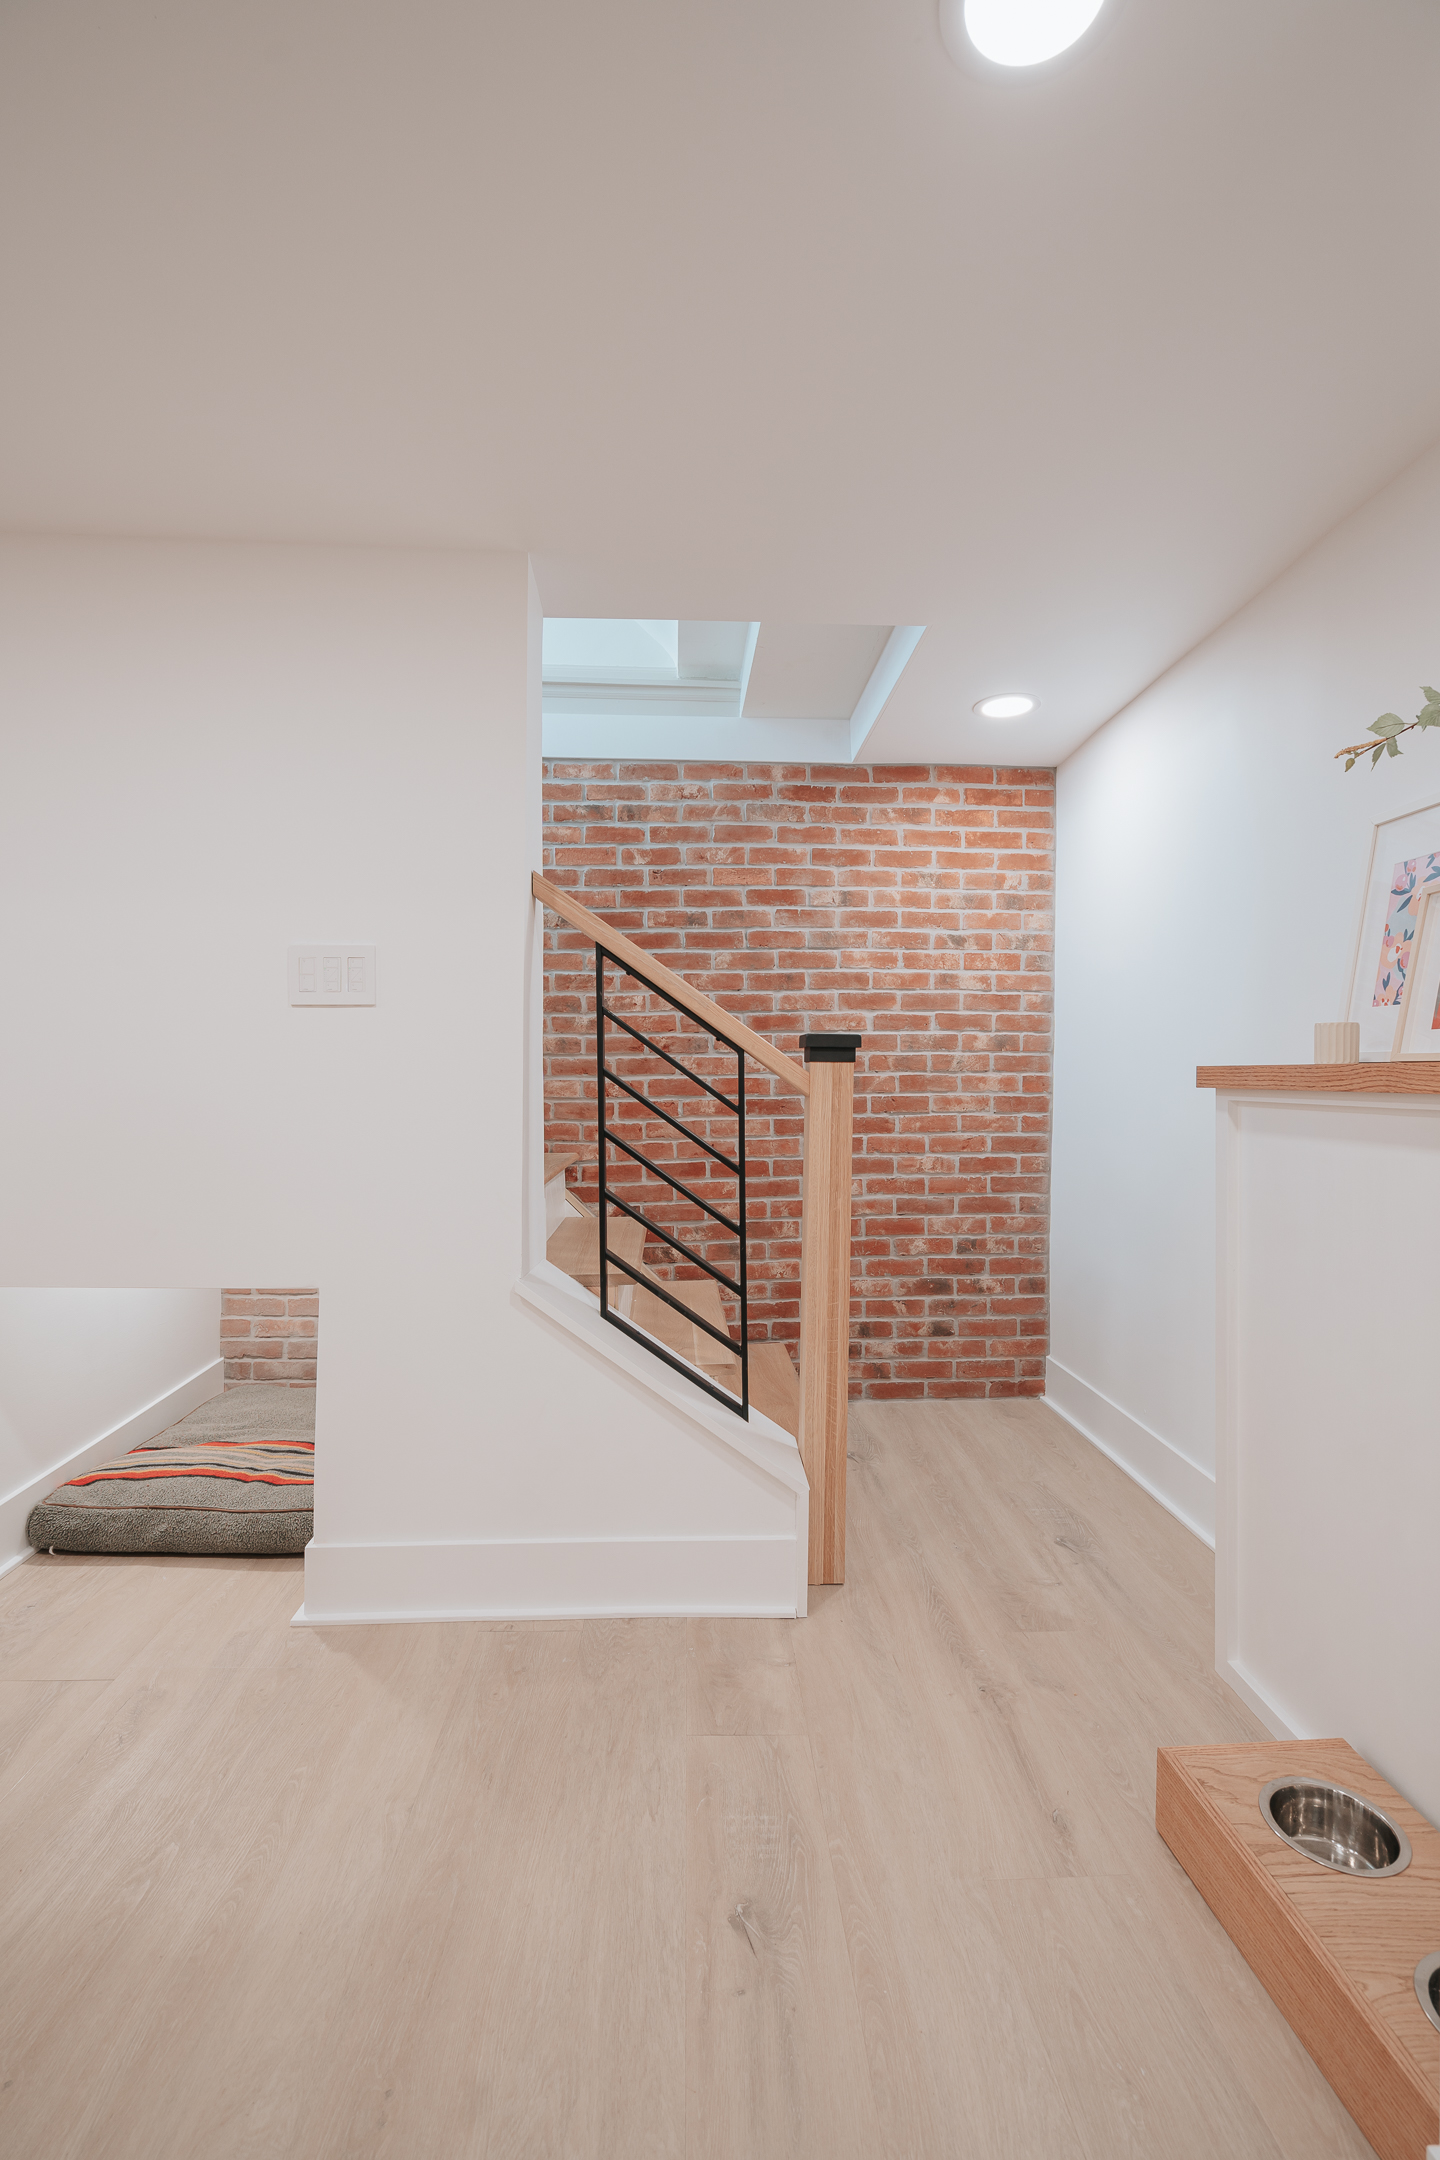
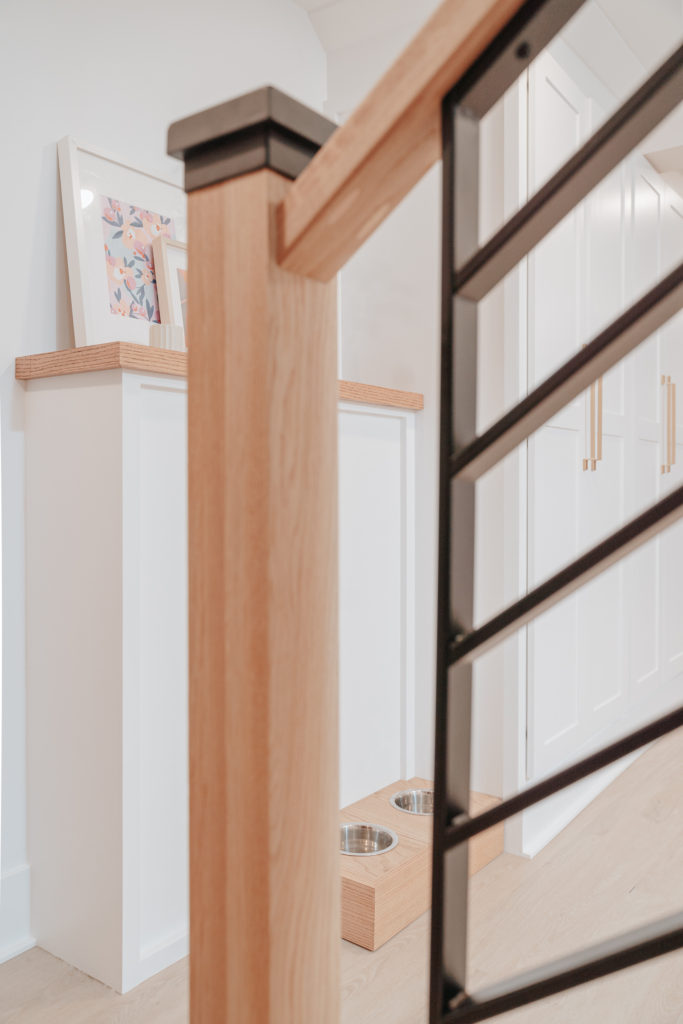
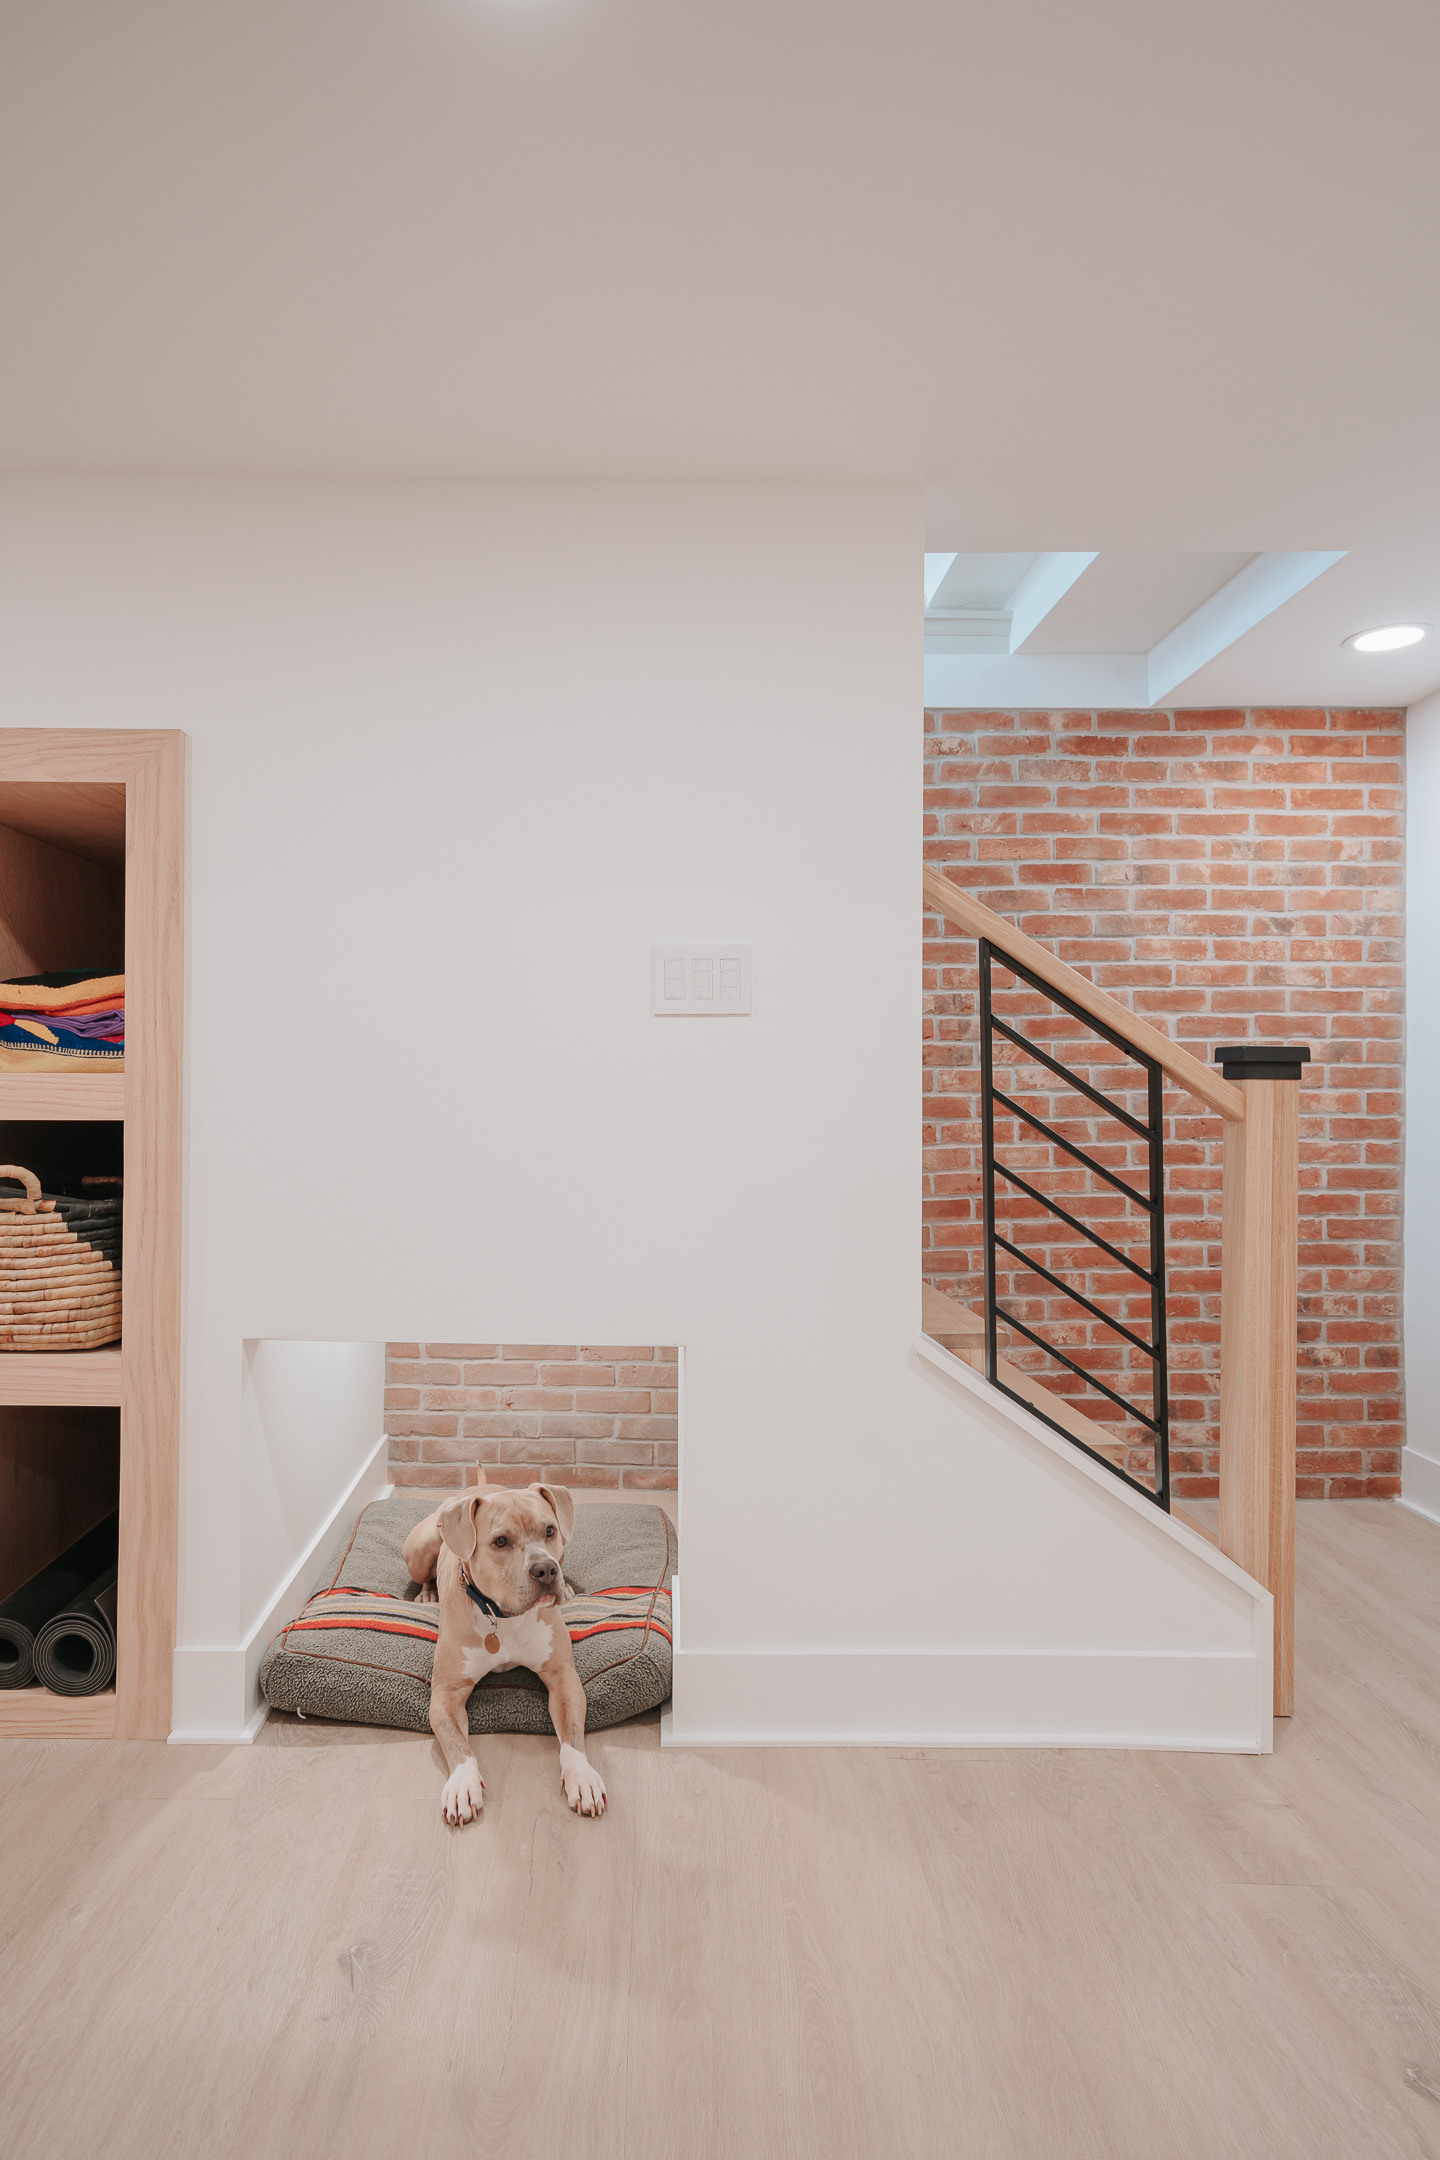
This looks so different from where we started. Not to say the whole space isn’t different but this just makes me extra happy. We rebuilt this staircase during the spring 2020 one room challenge. During that project we had intended to brick the cinderblock wall, but ran out of time! I wanted this space to mimic what we have happening in our dining nook! The goal was to make it feel as if it had always been here, as in a part of the original build. I had debated throughout the entire project if we should paint the brick to keep the same cohesive vibe as upstairs or leave it natural. Once it was installed there was no more questioning what to do. The natural brick immediately brought me back to Chicago and all the incredible memories we have with that city. It was a done deal…natural was the way to go.
We installed a knee wall from LJ Smith that is the same as the knee wall from upstairs.
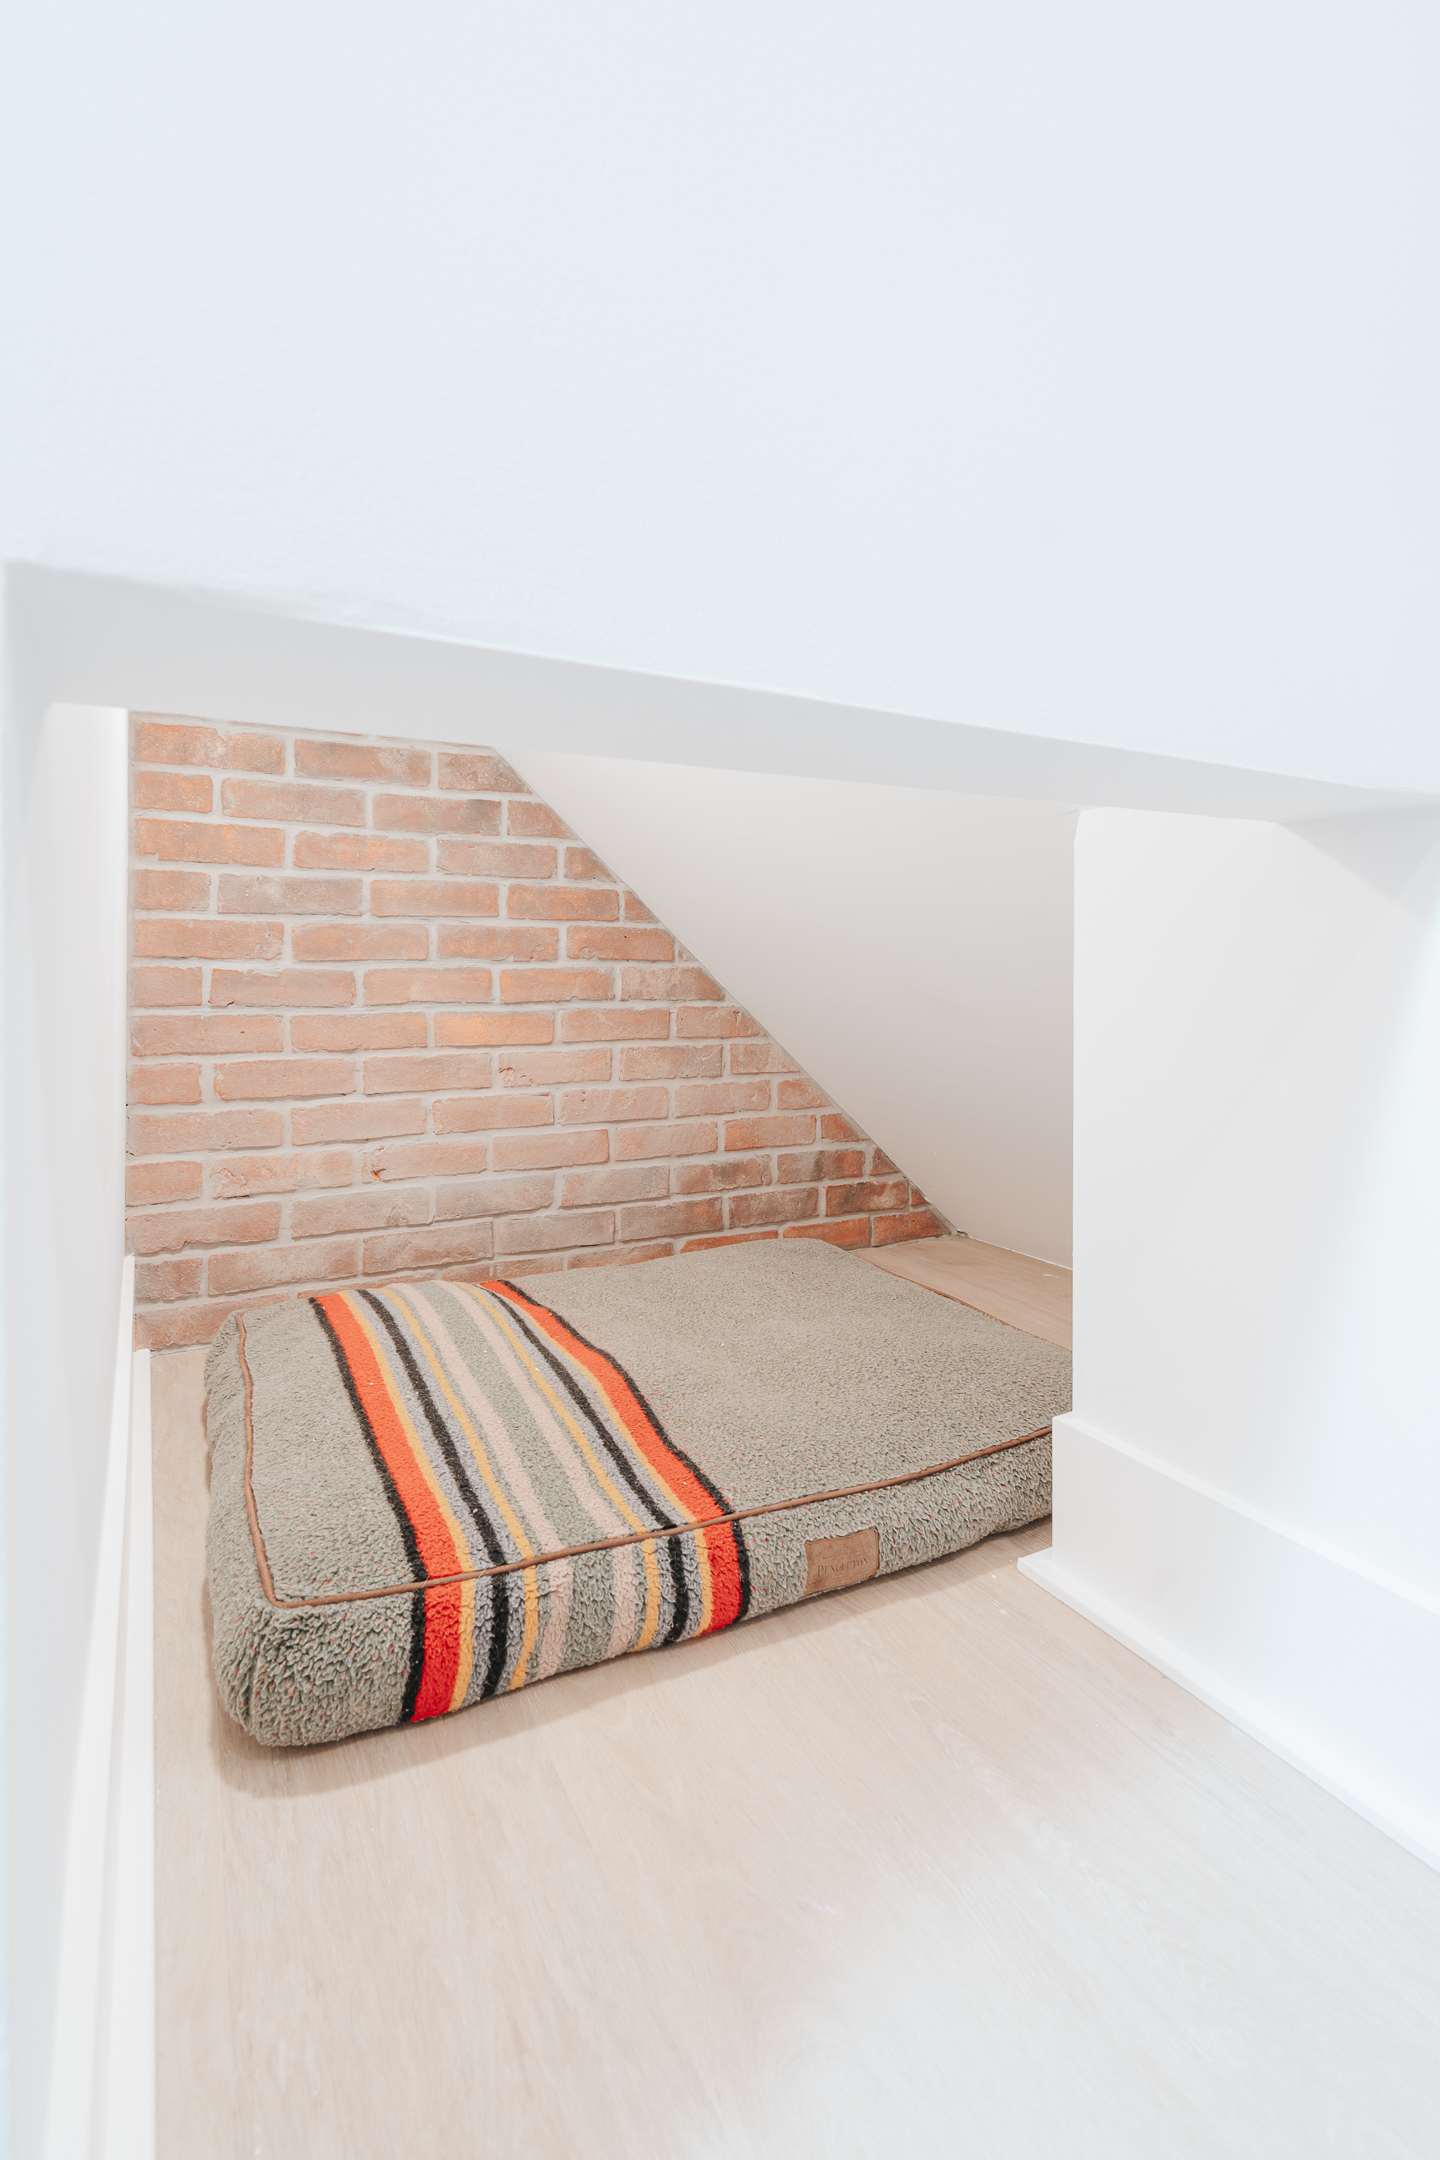
Since we wanted to maximize every inch of space we couldn’t leave what was under the stairs, so we created a custom dog house for Niko. Although I am pretty sure we are going to find the boys in this nook just as much as we find Niko and yes, it’s bricked inside there too!!!
The brick is The Tile Shop’s Firehouse Brick.
Next to the staircase and storage built-ins are custom made dog bowls for Niko, clearly we love this dog. Michael shared how he created them for our kitchen space here! These ones actually cover our main access to the city drain and we needed to have access to that. So when you lift up a bowl you have the access needed! Also directly behind the bowls we have a removable countertop giving access to our water main and shutoffs. So, it houses the mechanics while allowing access and providing yet more additional surface space. Michael thinks of creative ideas for everything!
As we continued to build out our home gym we quickly realized that we were losing floor space. Yoga wasn’t really a possibility in the gym. This side of the basement I wanted to feel extremely calm and relaxing. We went with chantilly lace by Benjamin Moore for the wall and all the trim, except for on the fireplace wall. There we used Wabi lime wash plaster by Color Atelier and Tuscan Winds by Benjamin Moore for the base molding.
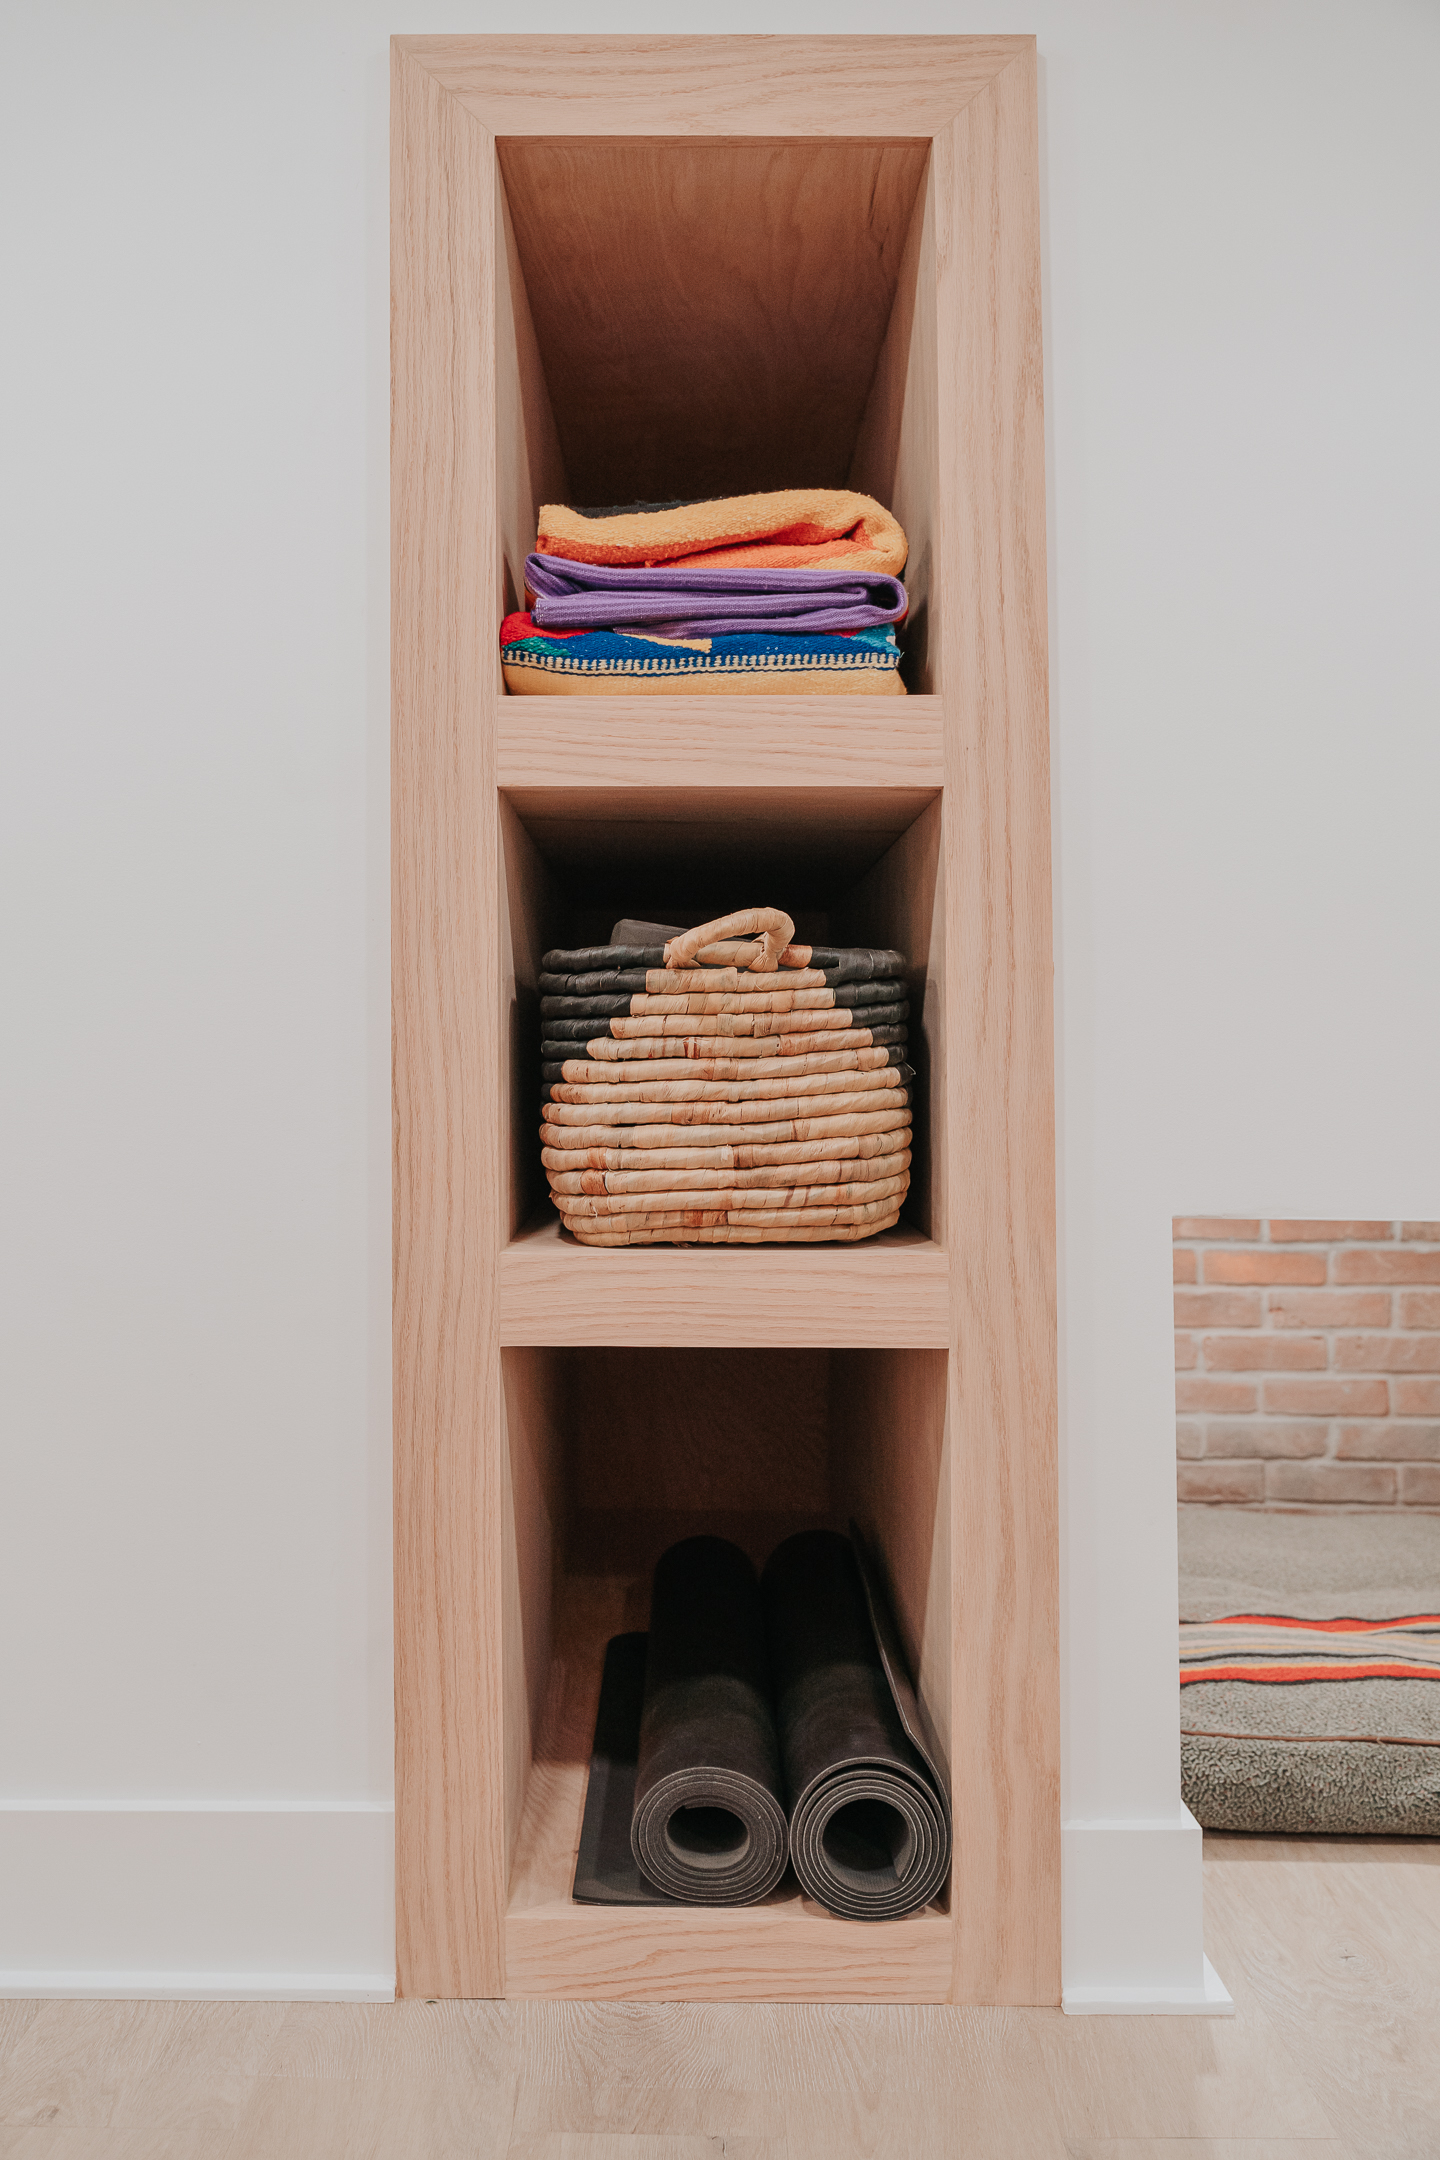
Next to Niko’s home we created an additional storage area for our yoga mats, blankets, blocks and meditation chairs. Everything needs to have a home down here!
Behind the yoga/meditation storage we created a reading nook! Something I have always wanted. Being a lover of books I knew I wanted to make sure we installed the love for reading in our children’s life too. This nook has some really neat elements, a rad accent wall thanks to Novo, dimmable lighting and this incredible custom signage by our friend Lizzy from The House Of Timber. “Be You. Be Rad.” is a quote we consistently say to our boys and words we want them to live by.
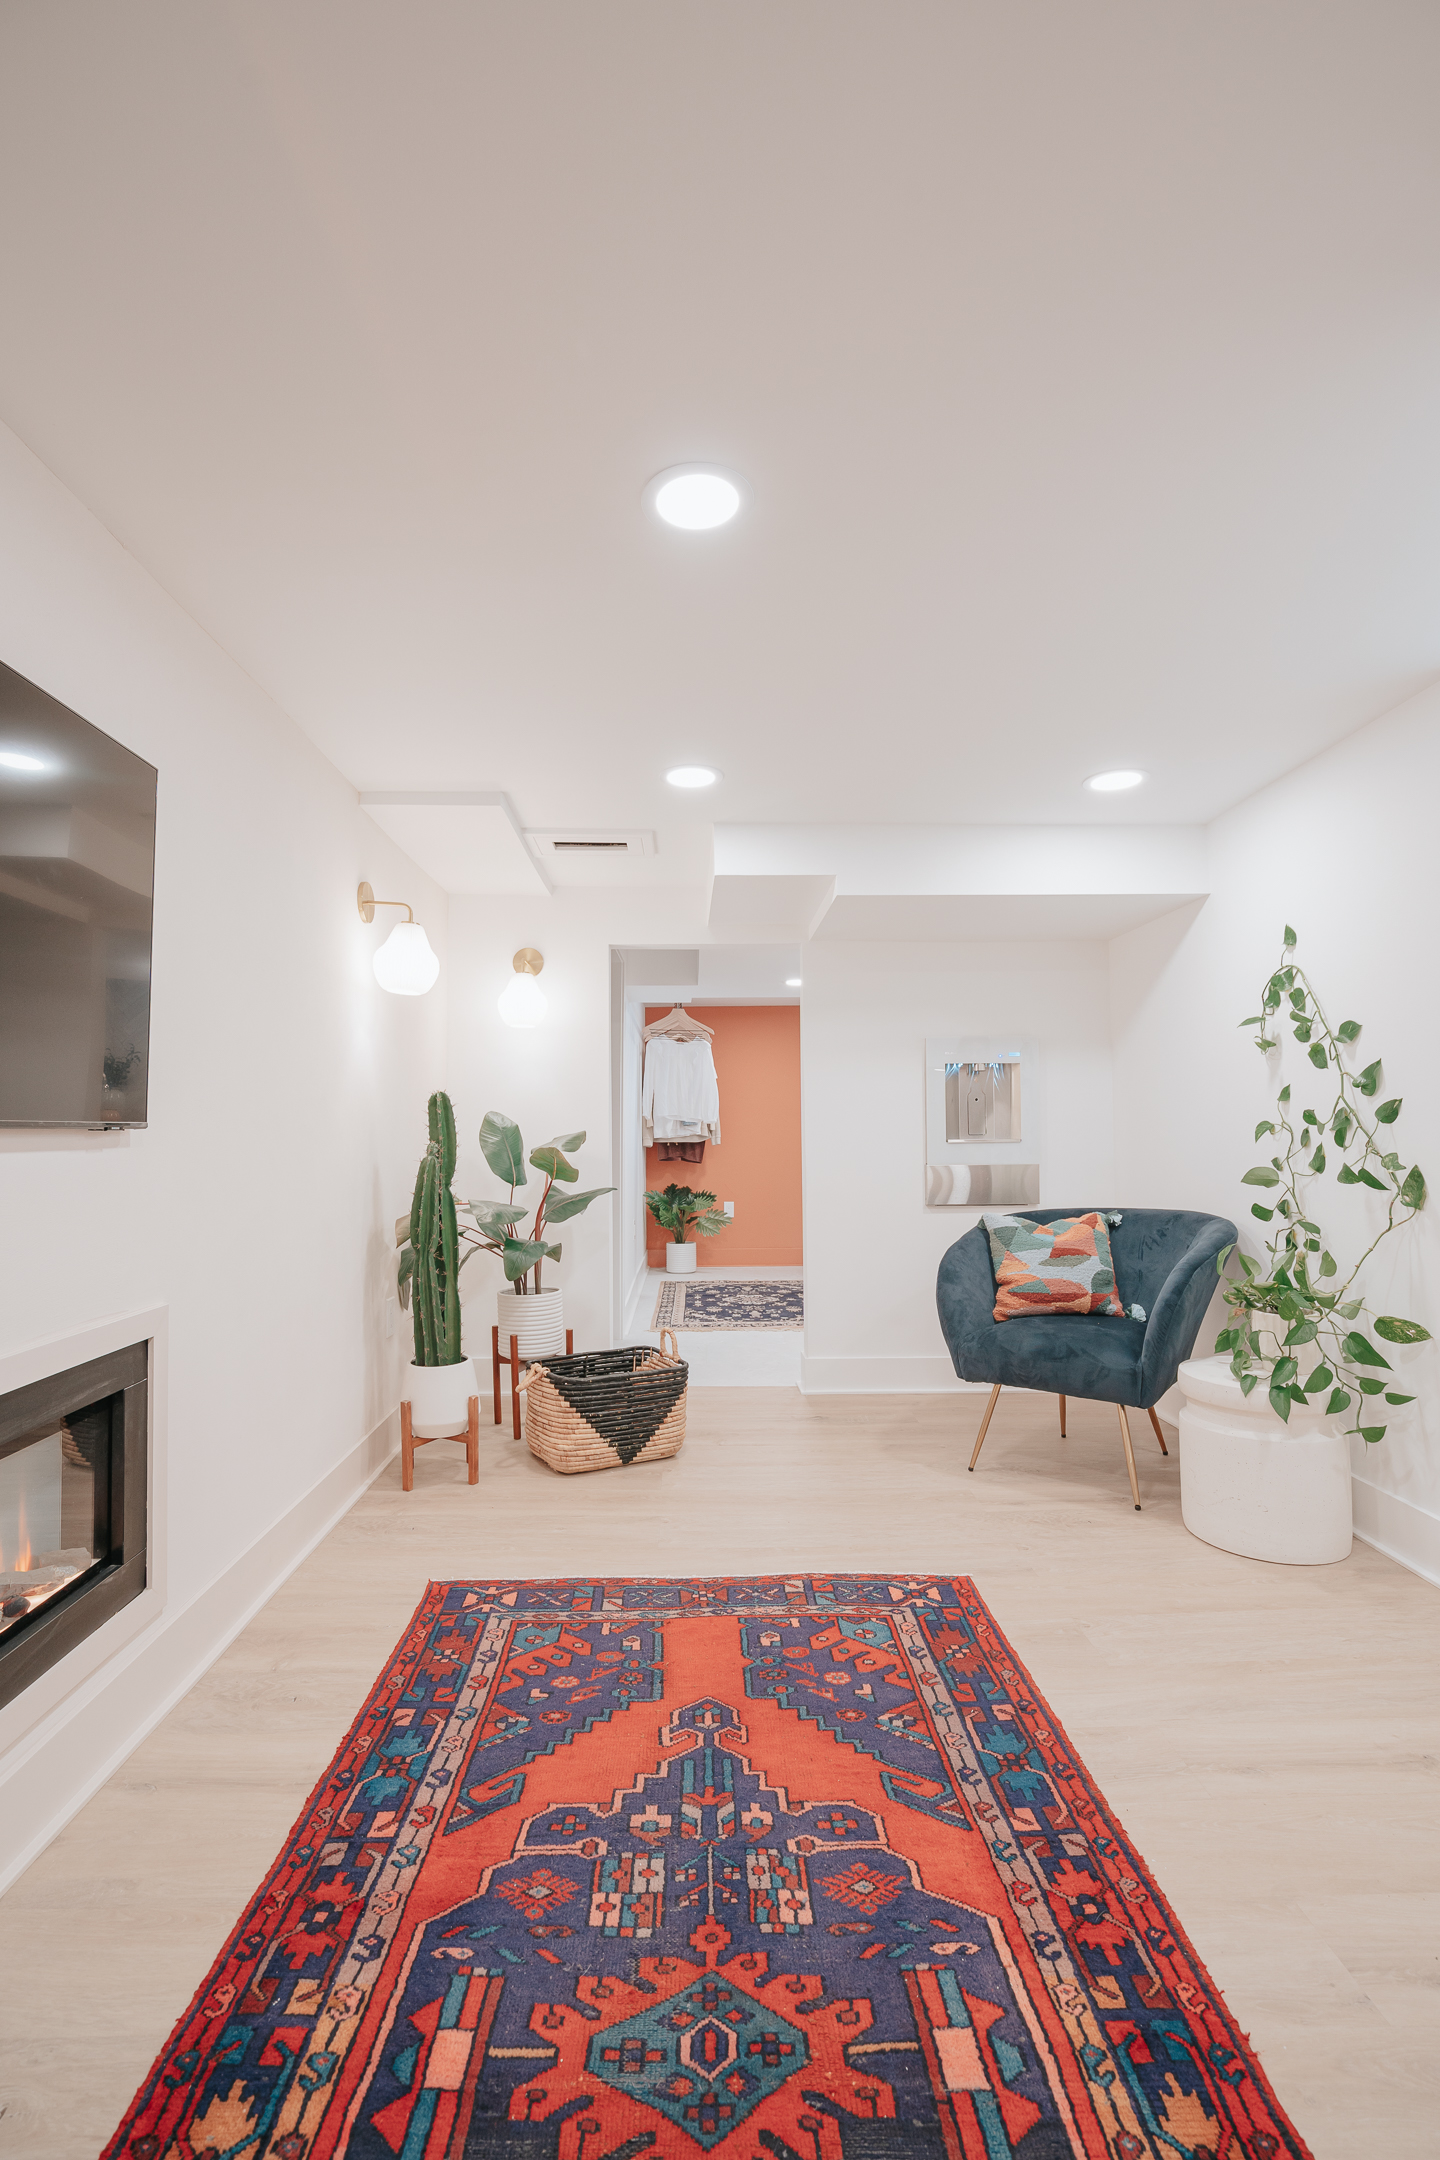
Yep, we’ve got a water station in the meditation area and I am not mad about it! With the amount of water we drink this station is the perfect fit for our family and something Michael has been lusting over for years. We paired this with a living wall and navy velvet textured accent chair by HomePop. My plan is to use our Elkay water station to water all the plants I’ve got growing in the windows!
Now this might just be the biggest transformation yet down here.
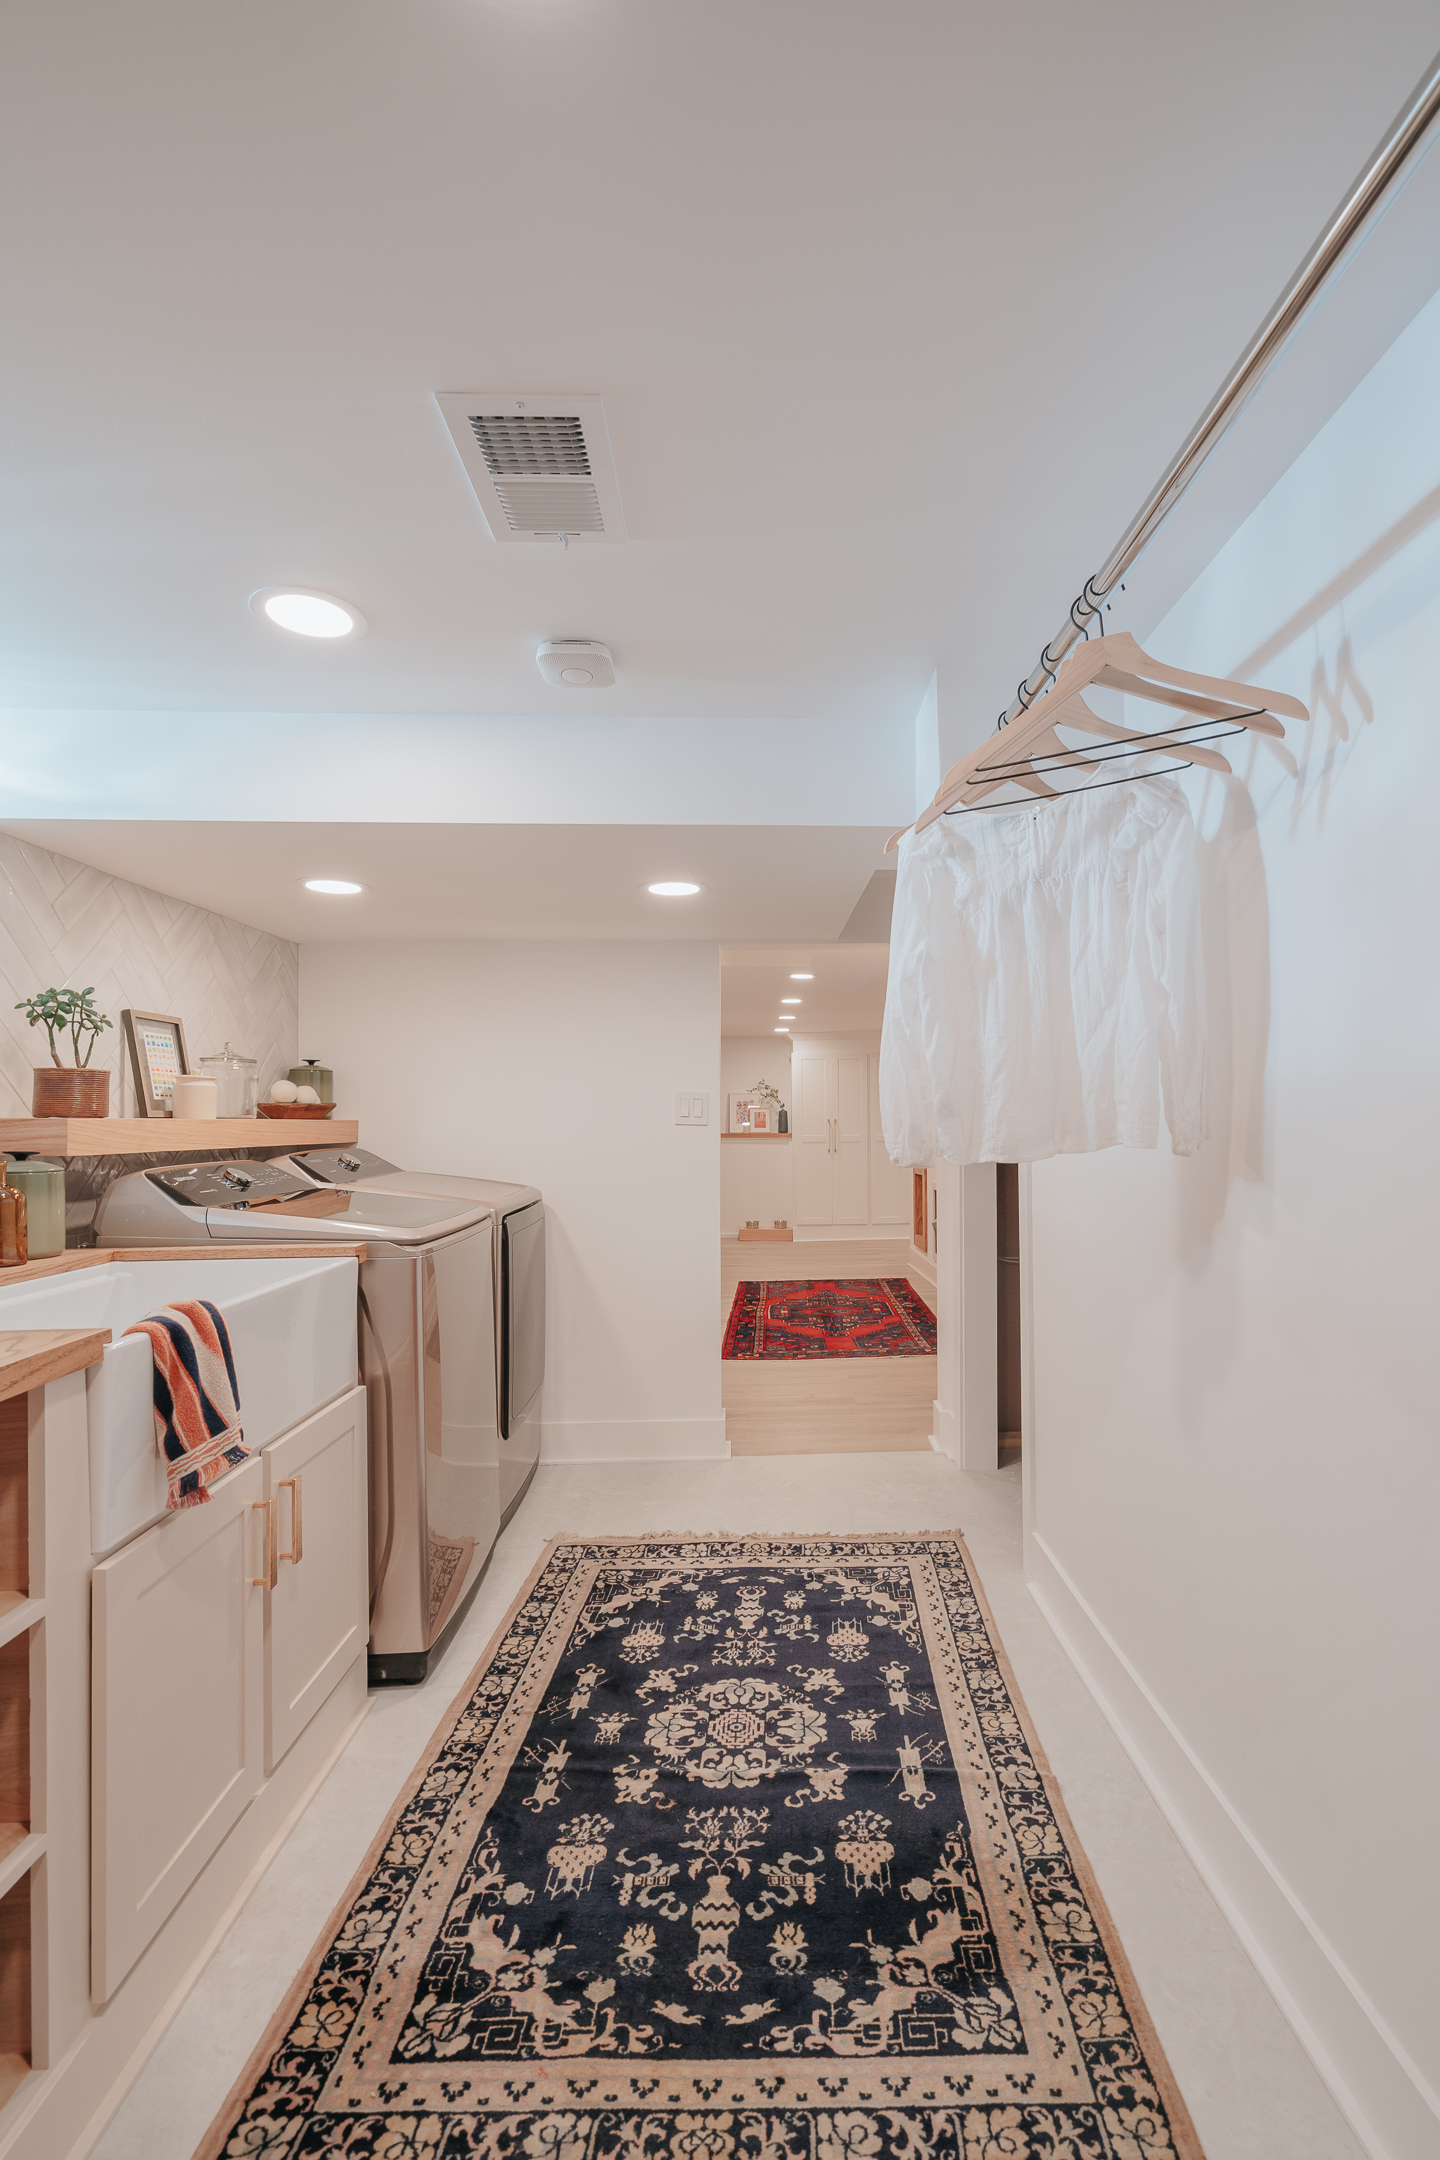
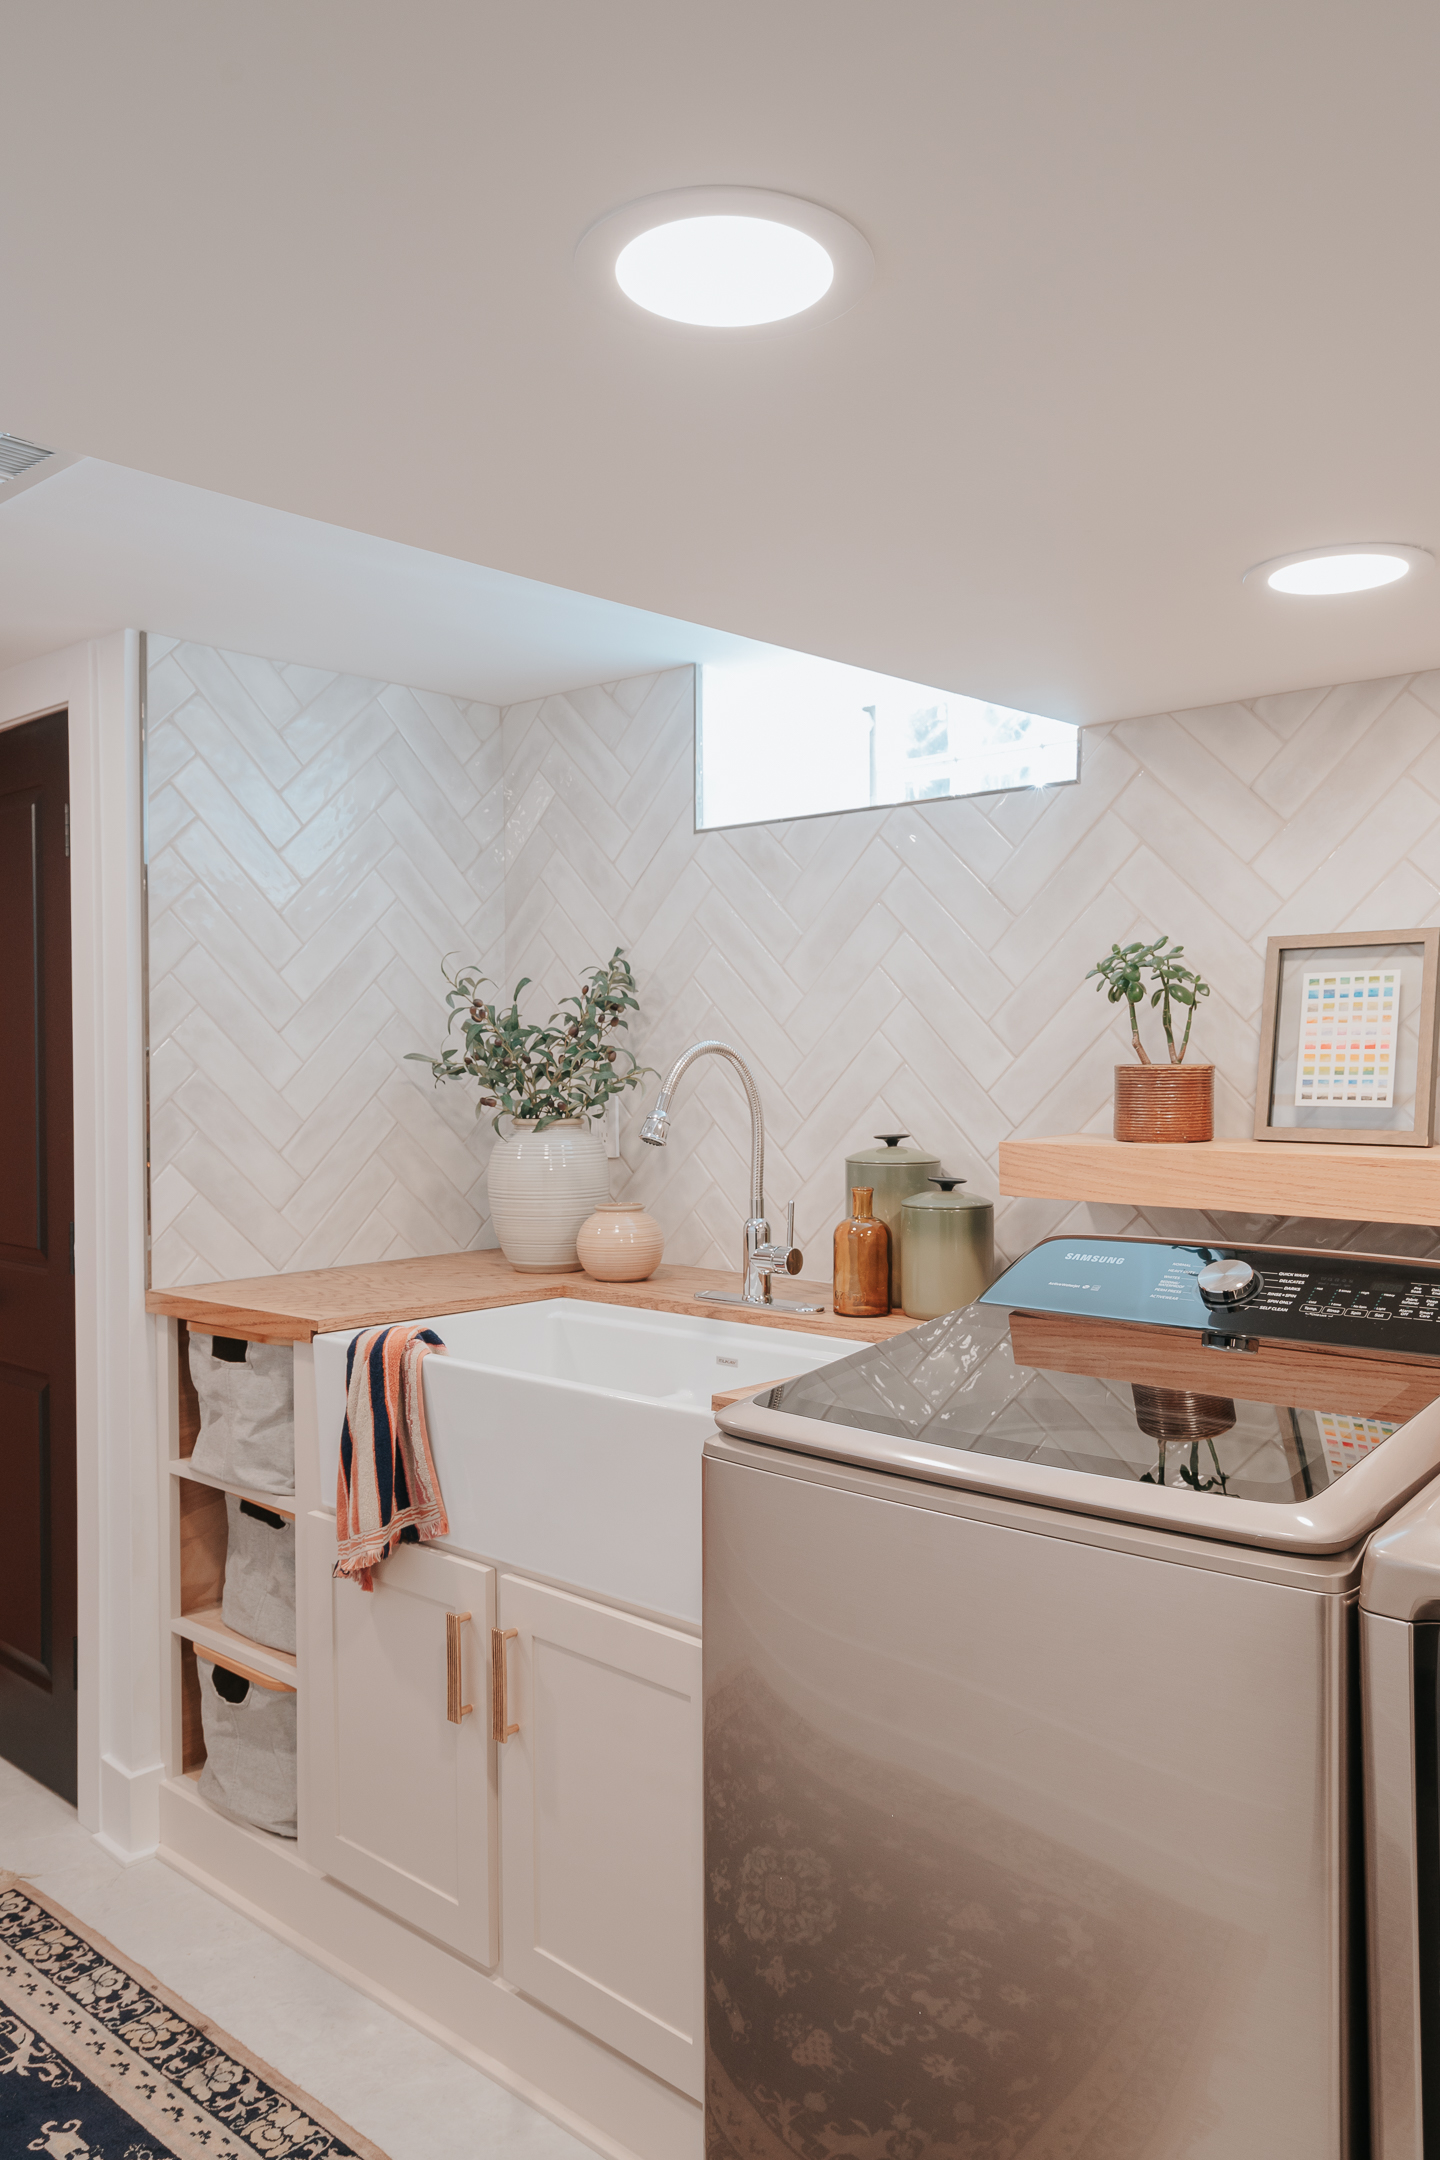
I mean you guys. I can’t even believe this is still the same space. But it is, I promise. Let’s get into what we included here. I wanted to make sure we created a Laundry Room I actually wanted to do laundry in. I know, that’s a weird concept, right. But that was the goal. So first up was to create a space that felt light and airy. Unlike the dungeon feel we had before. We continued Benjamin Moore Chantilly Lace in here as well.
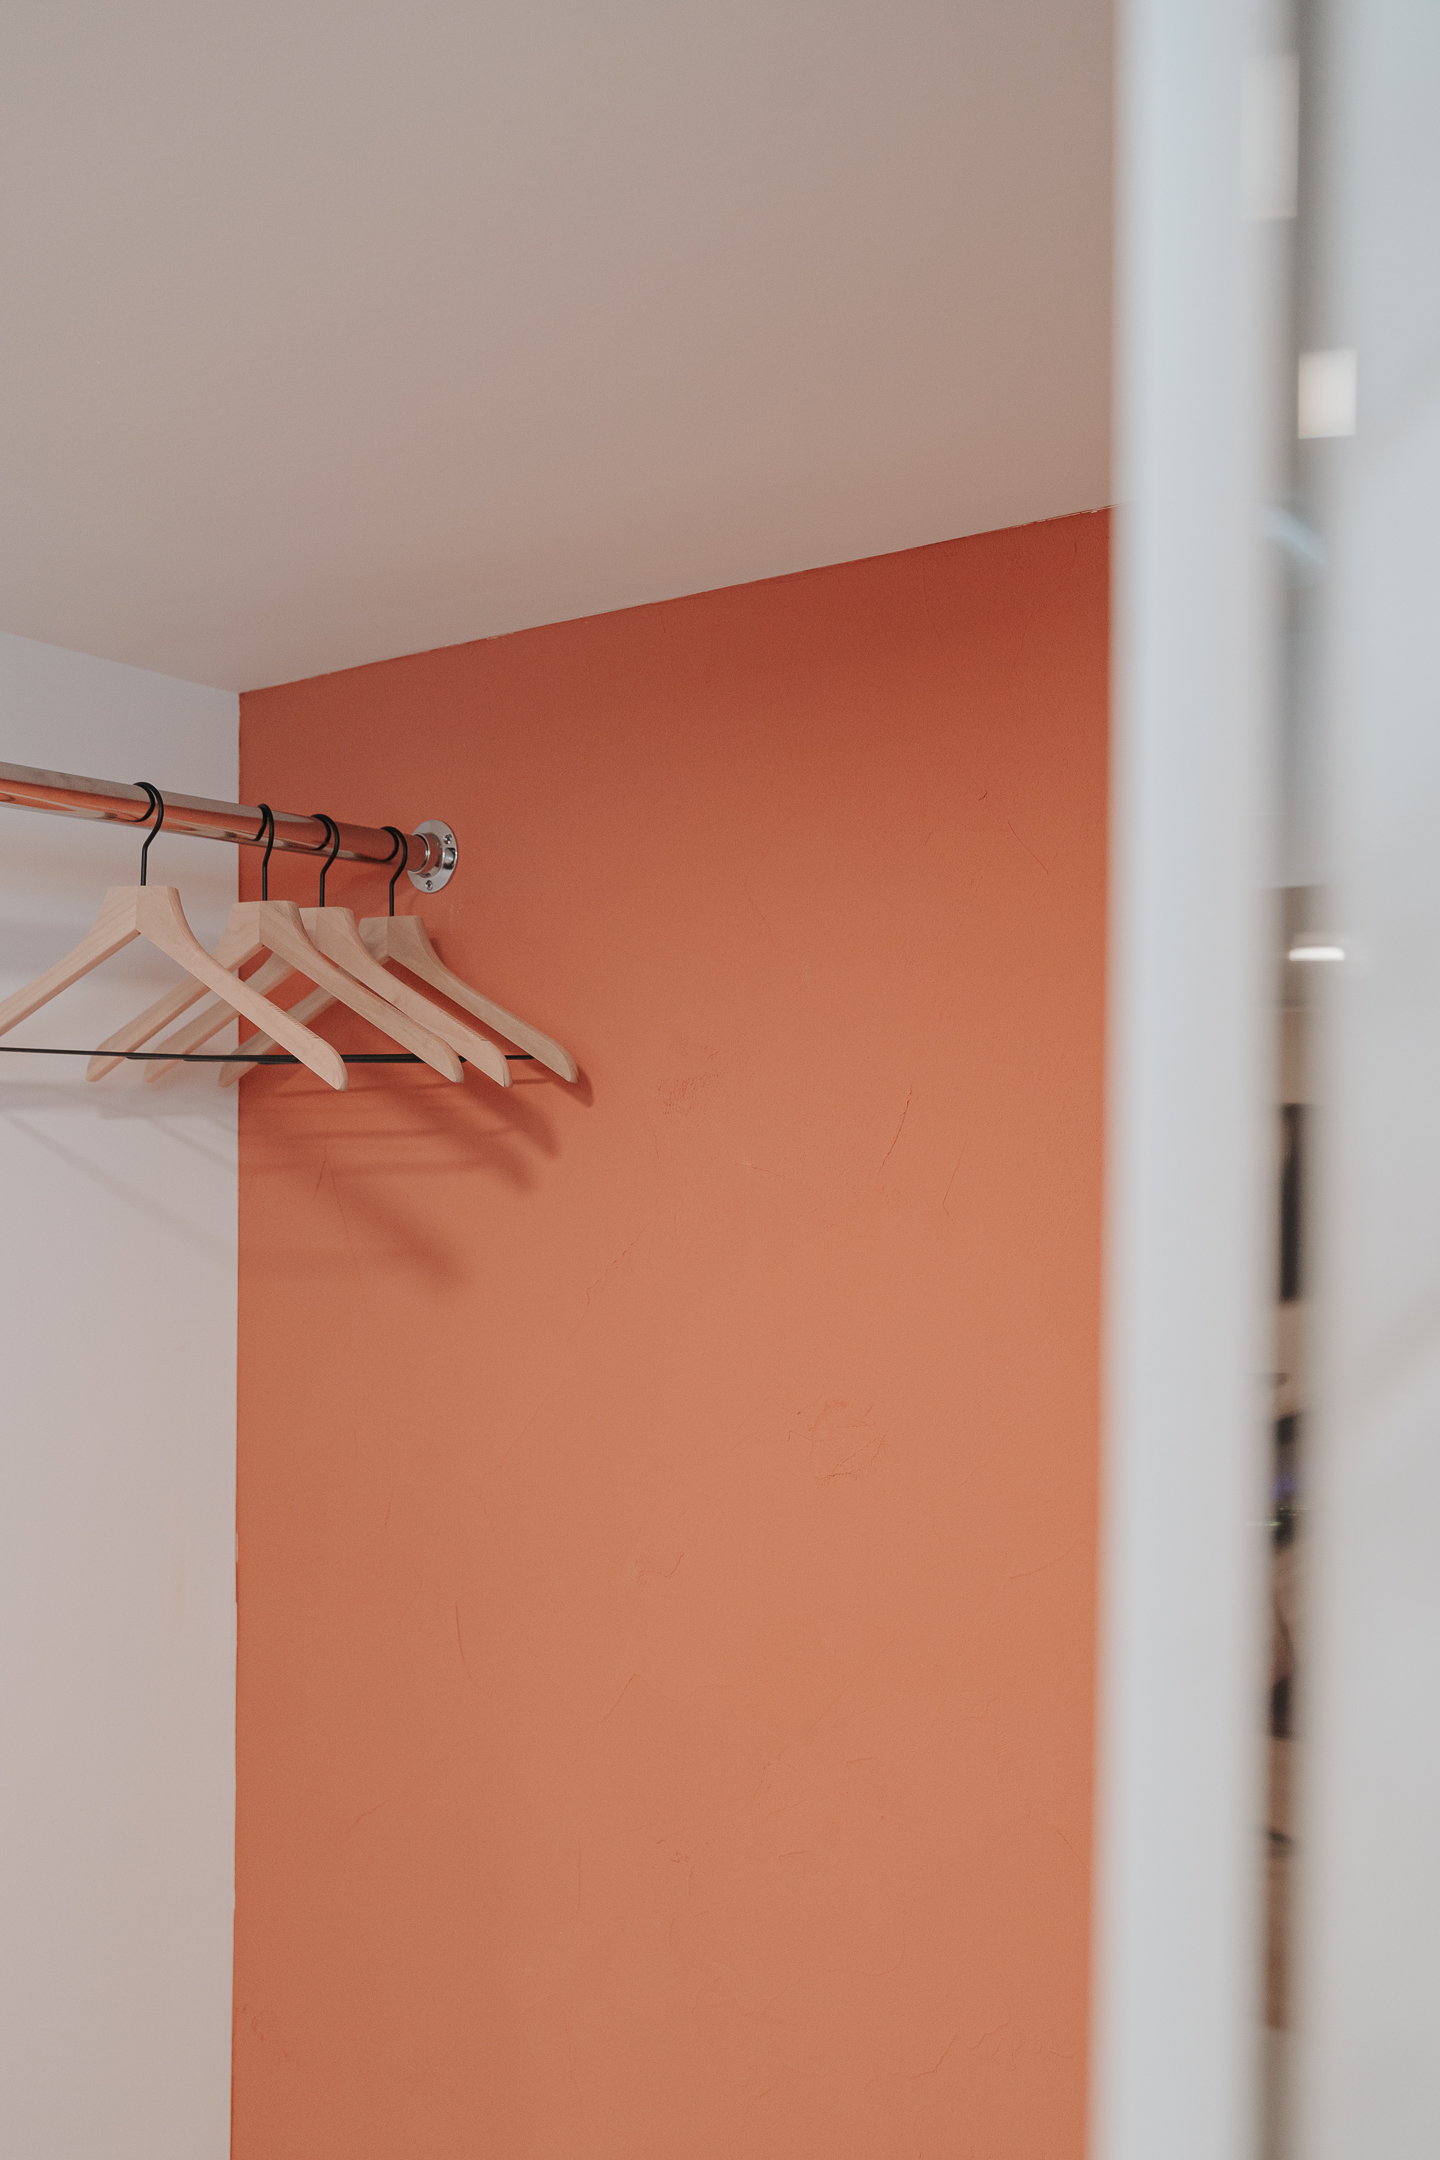
Because you can see the back wall through the meditation + yoga area I wanted to add something that drew your eye back and provided more texture to the overall space. We used Pamplemousse Lime Wash Plaster by Color Atelier. I love how the texture and color helps unit the two spaces yet defines the separation at the same time. We selected the Luna Marble/Willa, which resembles more of a concrete look and represents exactly what I was looking for in our new flooring.
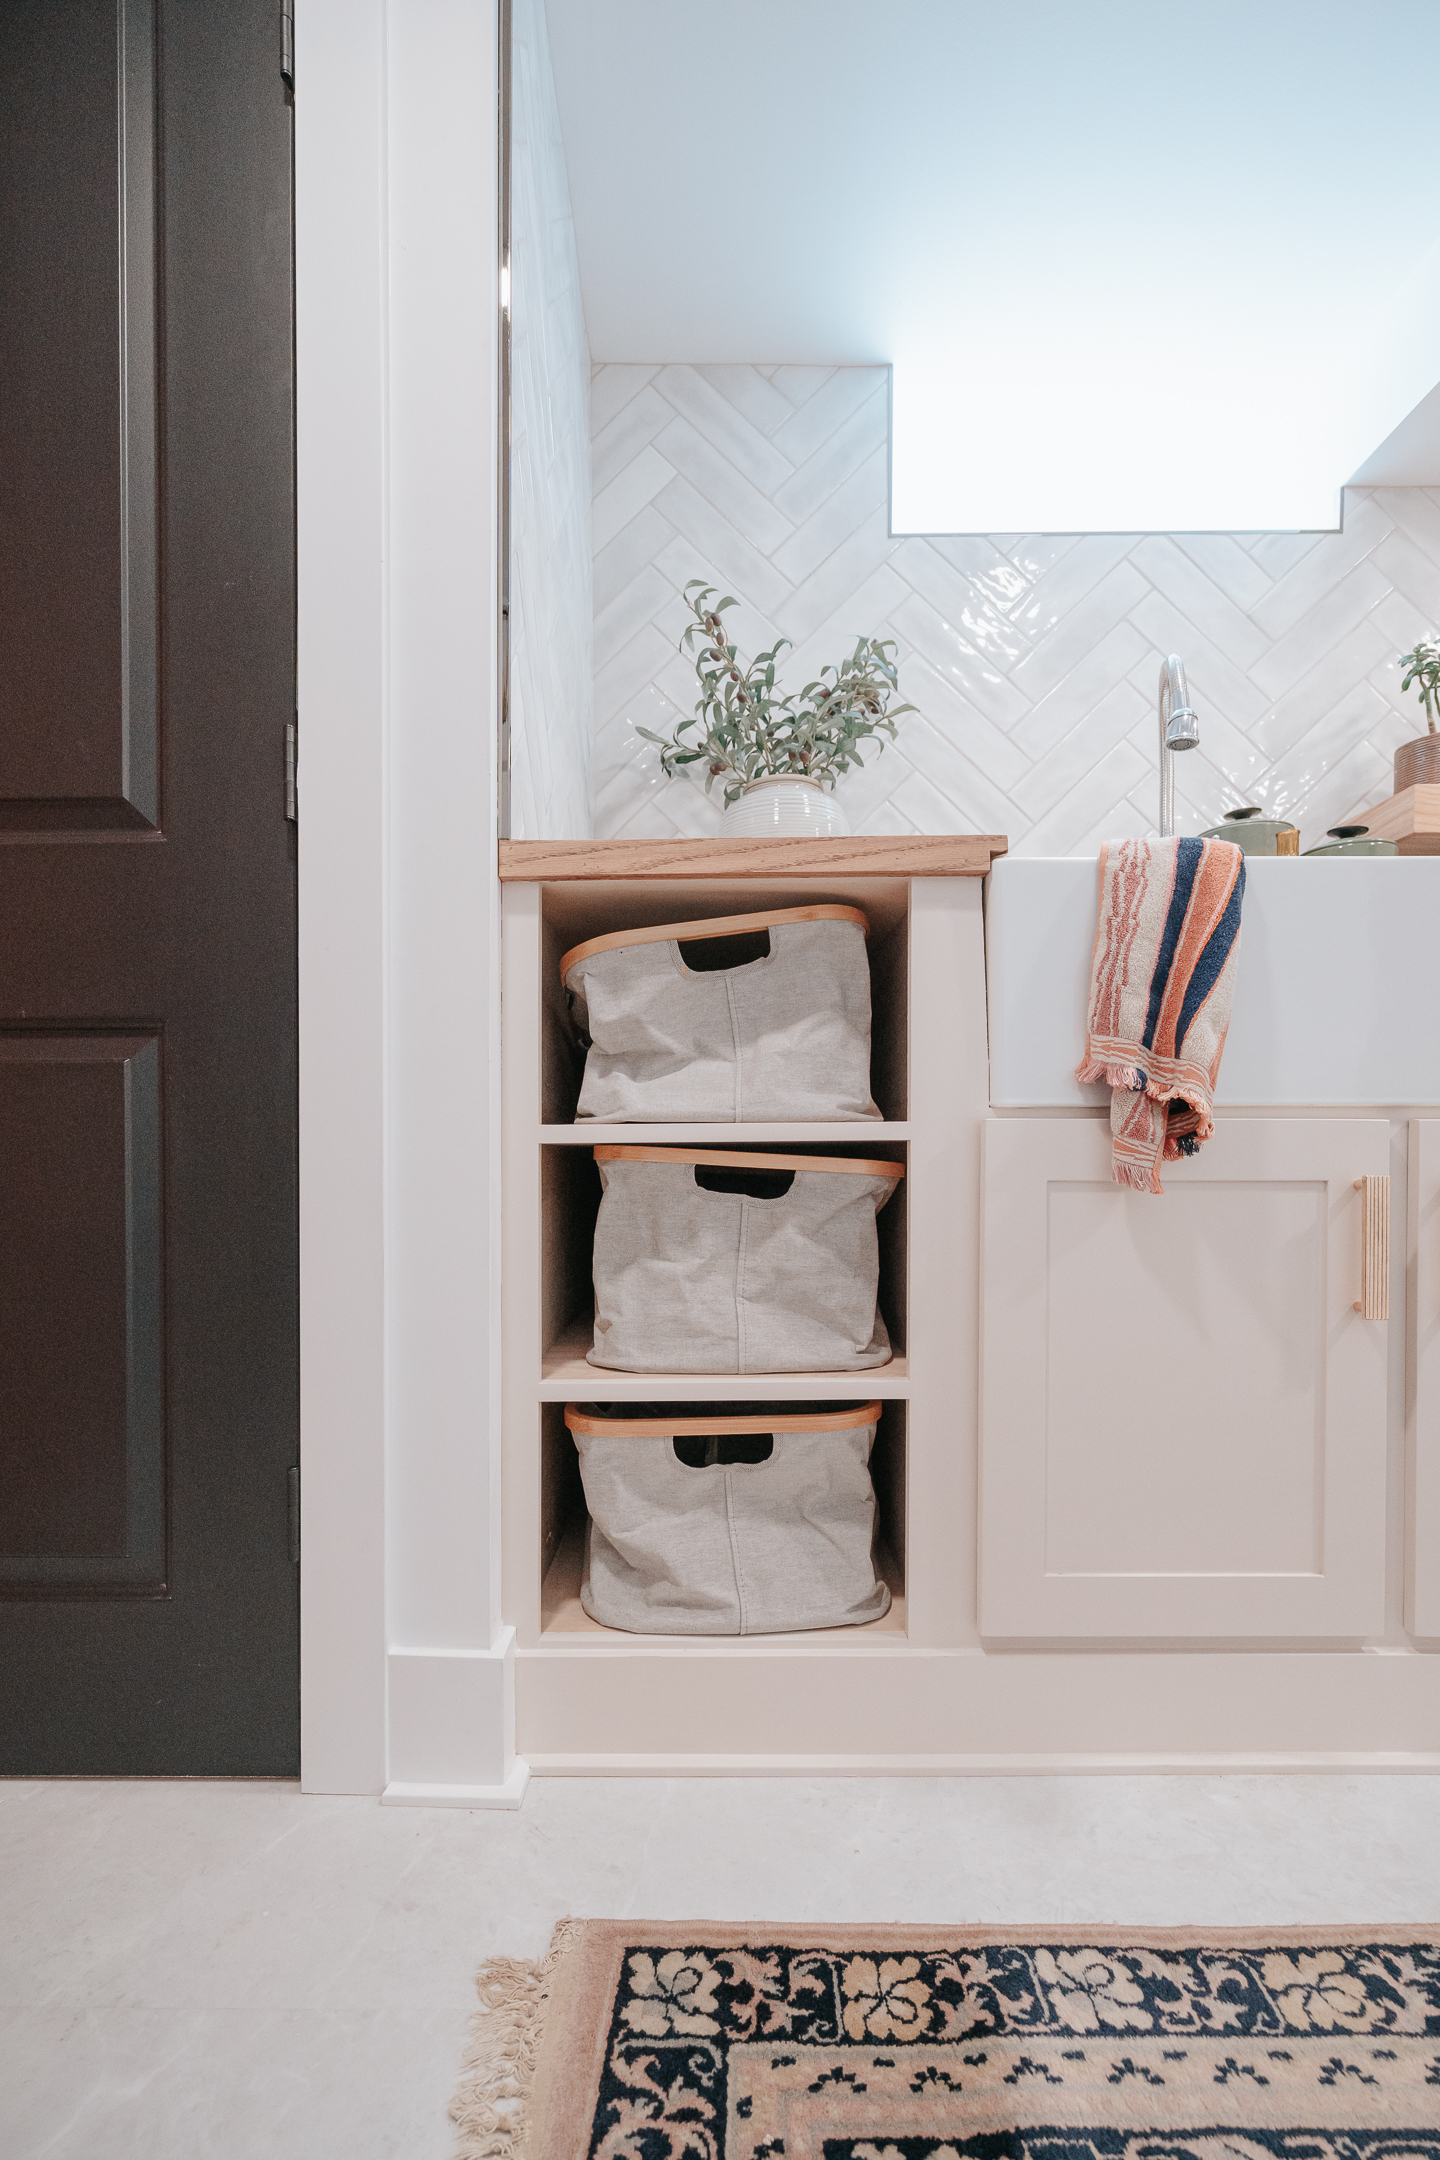
Our team built custom cabinets to fit our laundry baskets for sorting all of our laundry, as well as the base cabinet that houses our sink and storage. We used the 5 inch Stradella Pull in natural bronze from Schaub Company for the hardware on that one. I love this one so much that we also used it in our studio space. I needed to use it again!
Our apron front sink is from Elkay. We pair that with a chrome faucet from Elkay, too. Our backsplash is the same tile we used in the kitchen. We had enough left over that I didn’t want it to go to waste, and in order for it to feel different we laid it in a herringbone pattern. I couldn’t be more happy with how that turned out.
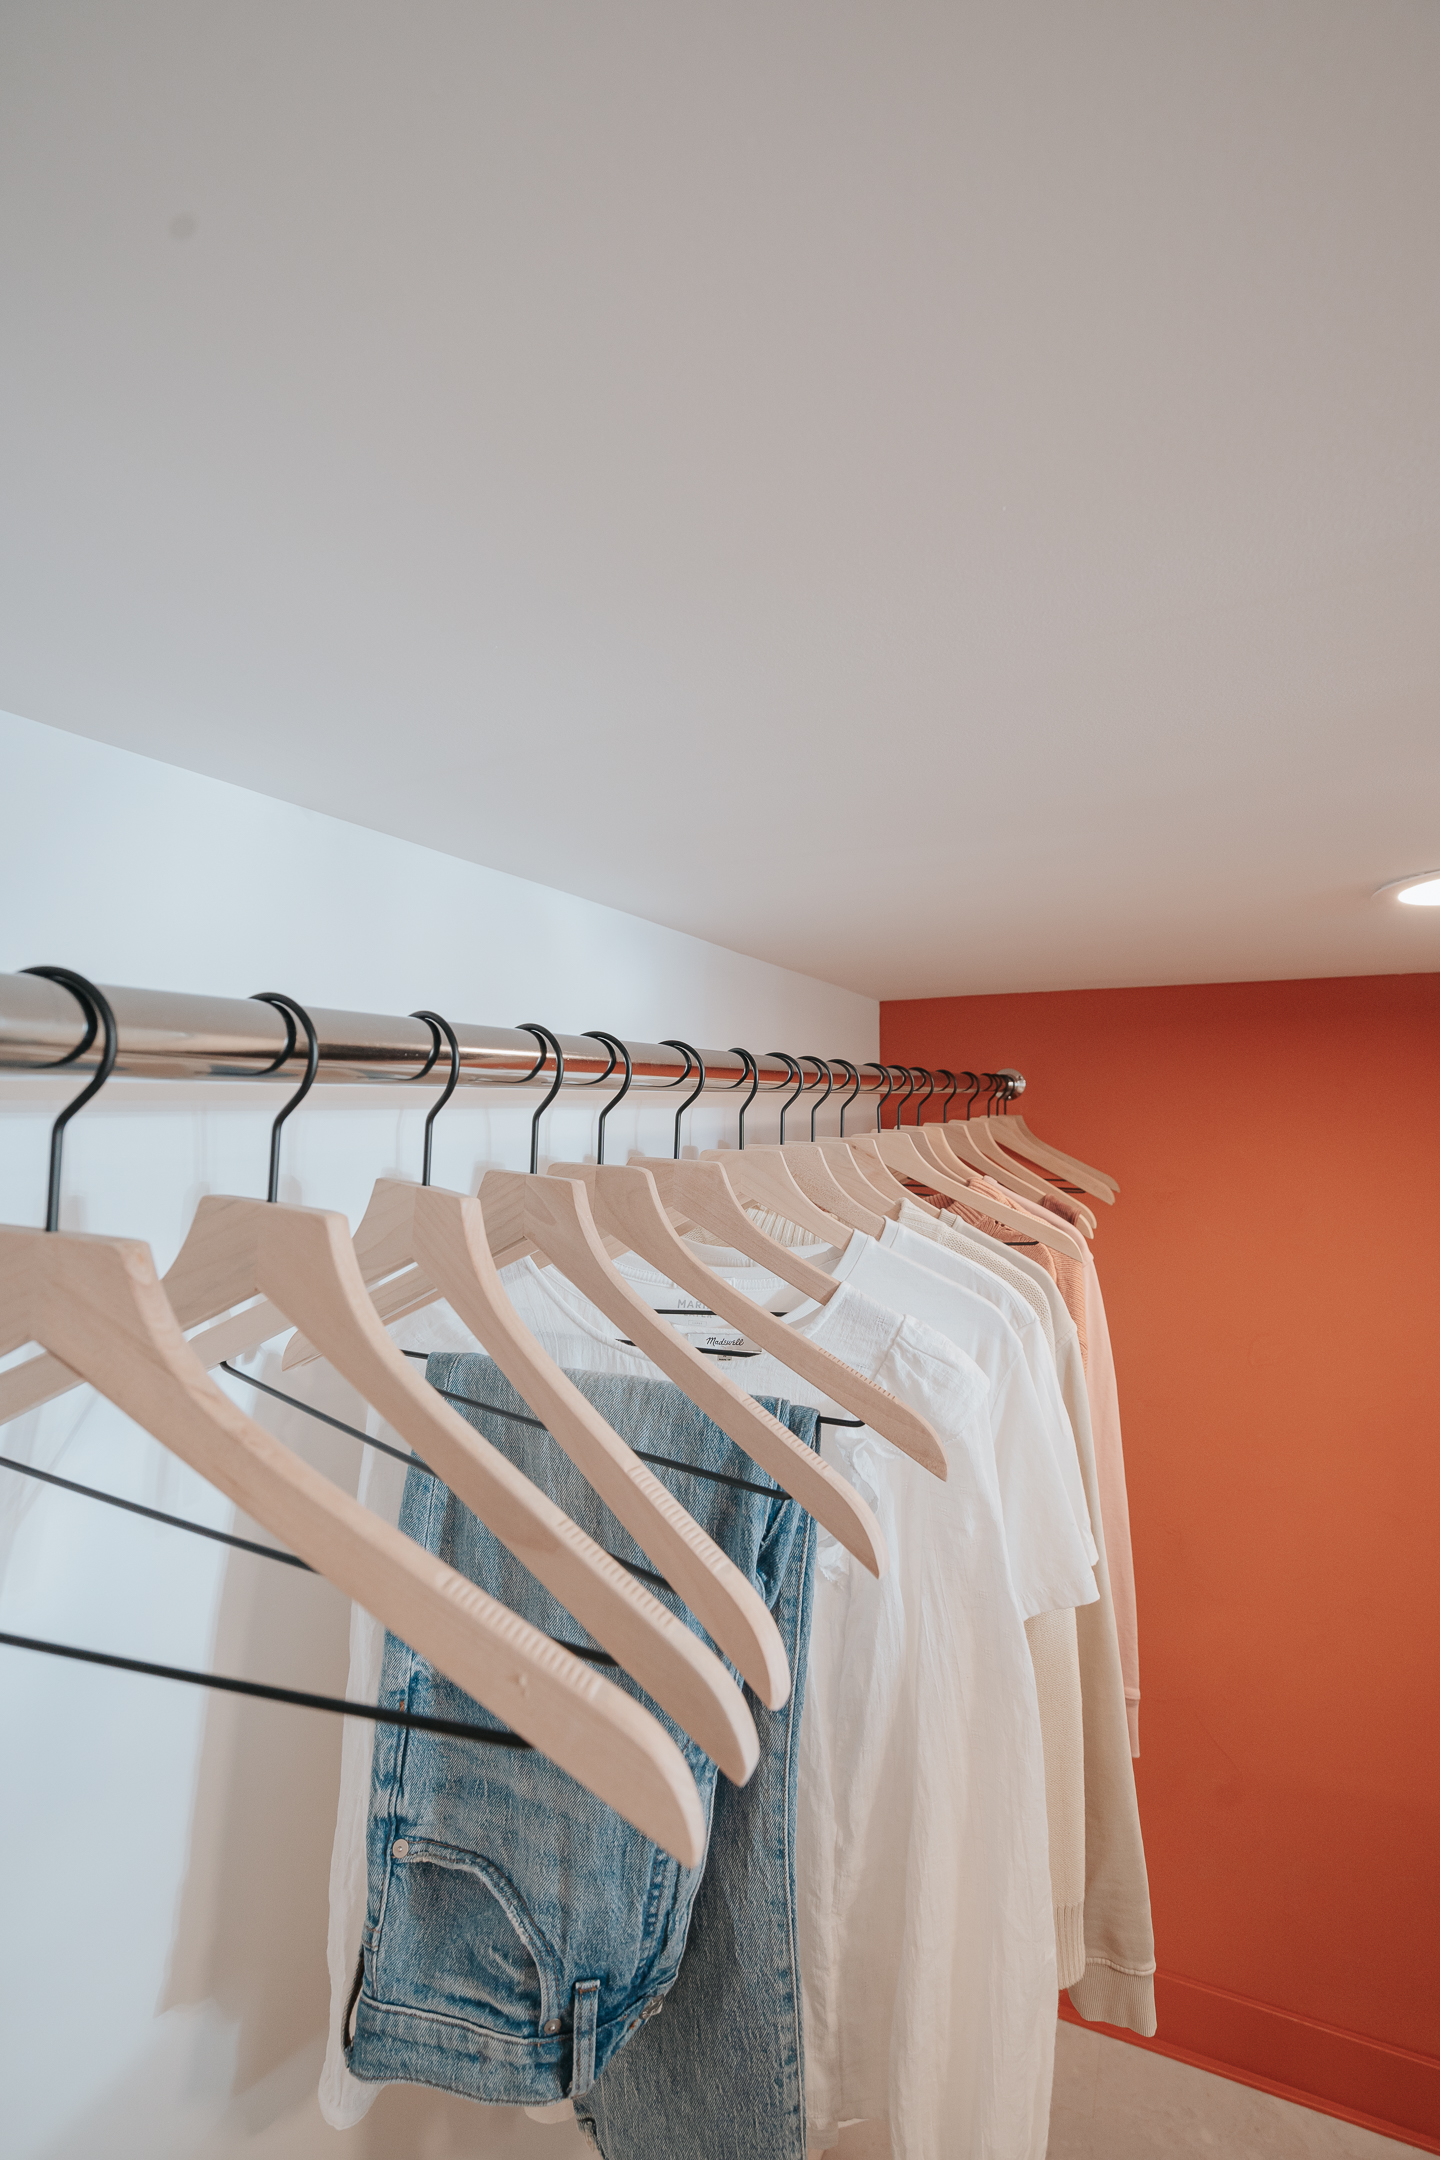
The last part of the laundry room that was a must is a drying rack. One thing I know about us is we don’t dry a lot of things in our dryer. At least not a lot of mine or Michael’s clothes and we needed ample space to dry items! Considering we used to hang clothes on our copper water lines to dry, I’d say our new solution has us covered!
Yet, again we are feeling so grateful for the One Room Challenge to push us to actually complete a space in our own home. This is such a wonderful community and really a lot of fun watching how others are completing their own projects! As always don’t forget to check out all the other Guest ORC posts!
Till next time!
Much Love-
Danielle
Such a big transformation – it looks great and flows so well together 🙂
This looks amazing!
Did you have to dig down at all? I’m curious of the ceiling heights or any adjustments that had to be made with plumbing etc?
We did not dig down at all. There are spaces in the basement that the height is lower due to HVAC however, Michael who is 6’1″ can walk everywhere in the basement.
Clark + Aldine is fully licensed and insured.
© 2024 Clark + Aldine | Interior Design Websites by Formcode | Site Map · Privacy Policy · Terms and Conditions
9 Comments
Danielle! You and Michael knocked this one out of the park! I am in love with that laundry room! And that thin brick wall coming down the stairs is all the heart eyes! Congrats on a stunning reveal! What an honor doing the ORC with you again!
Jennifer!!!
Thank you so much, I truly appreciate that. I love how the ORC brings everyone together.